
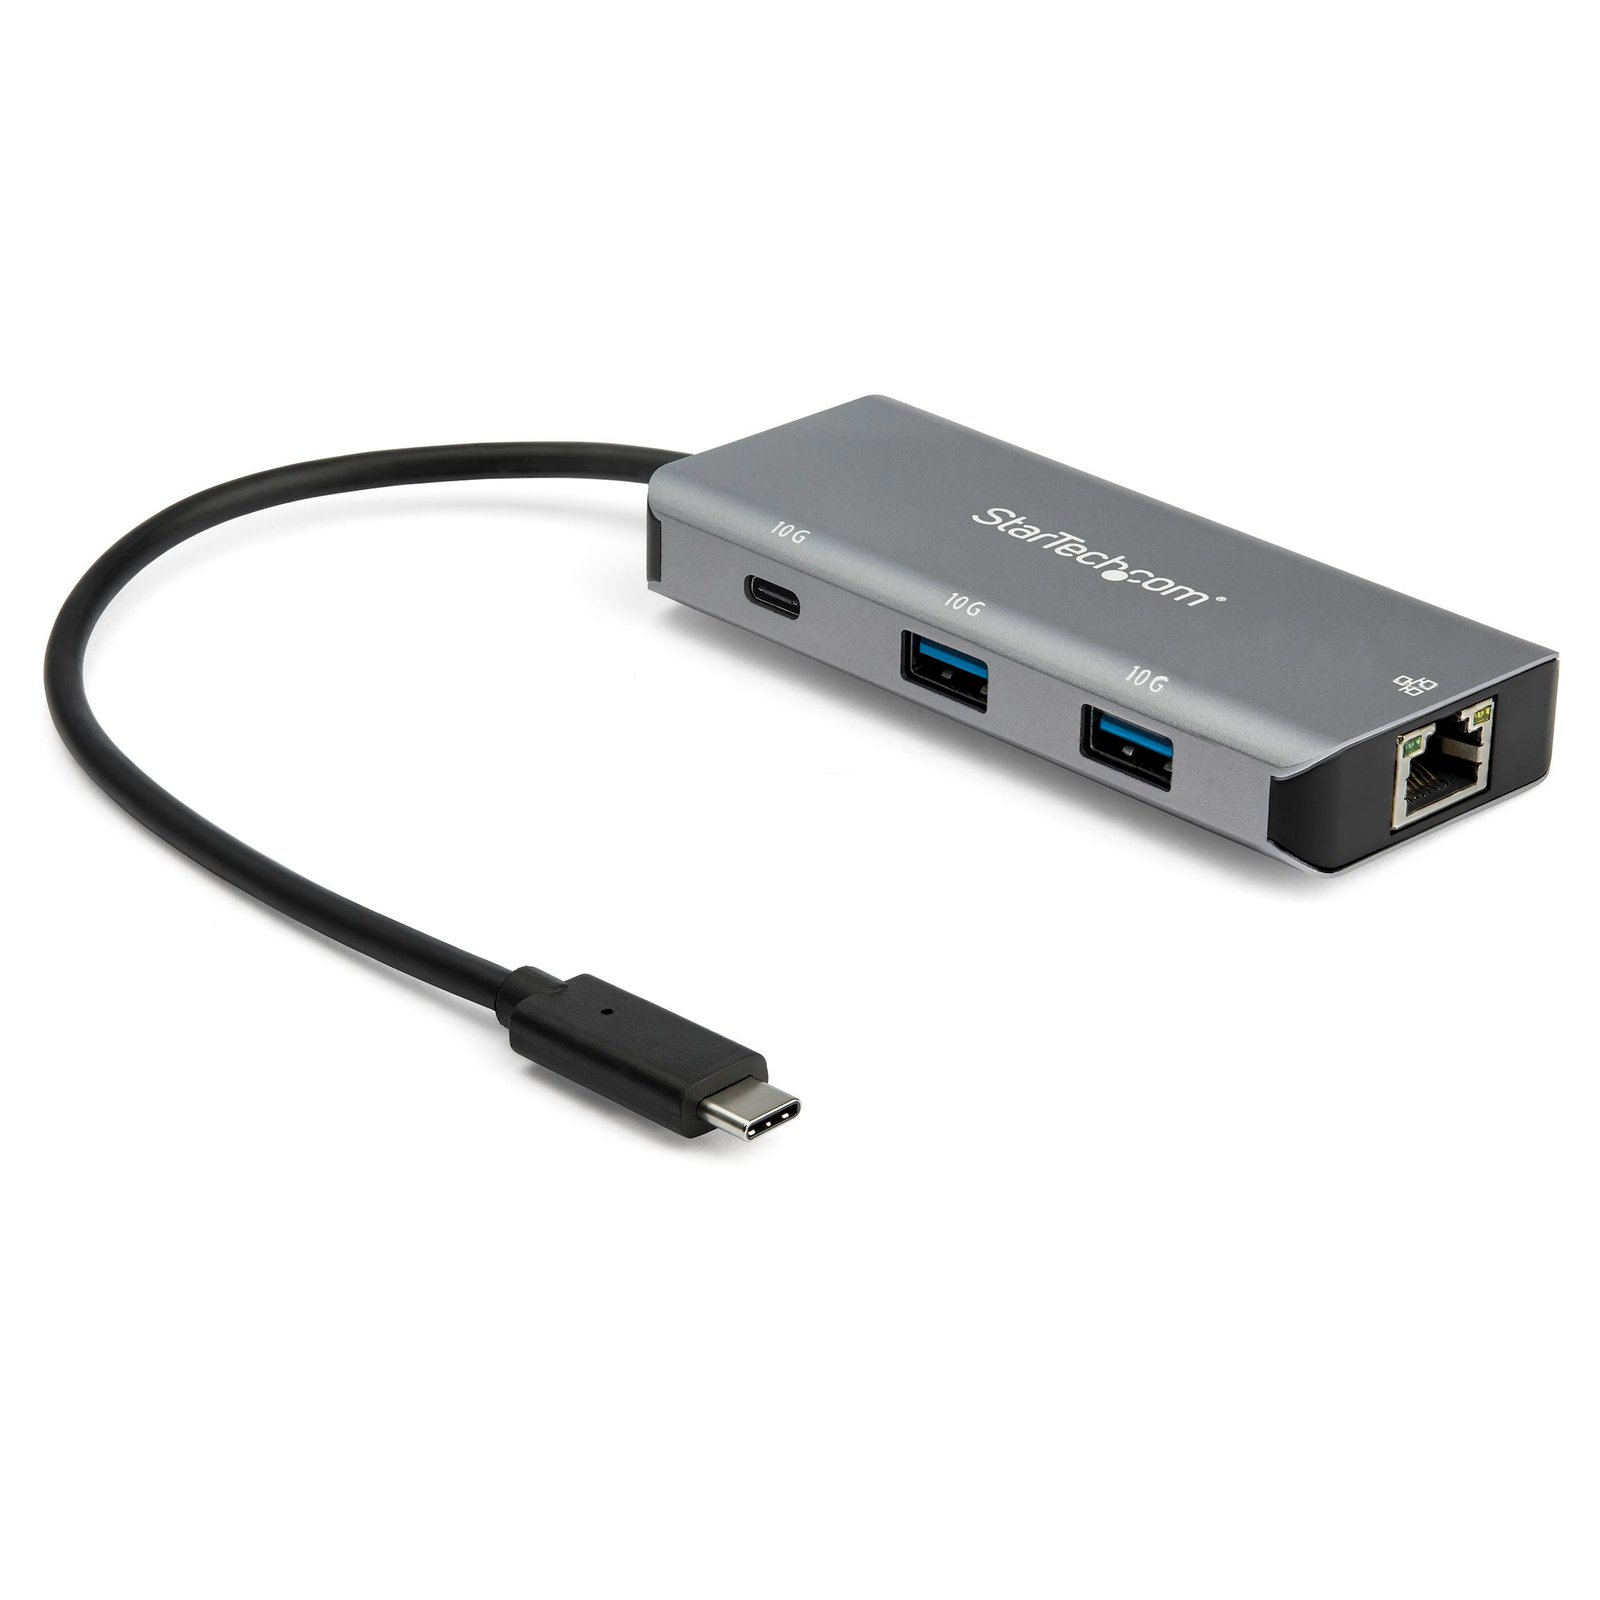
3 Port USB C Hub with Gigabit Ethernet RJ45 GbE Port - 2x USB-A, 1x USB-C - SuperSpeed 10Gbps USB 3.2 Gen 2 Type C Hub Adapter - USB Bus Powered - Aluminum - Works w/TB3 - TAA
$69.69
USB Type-C™ Hub | USB 3.2 Gen 2 (10Gbps) | Gigabit Ethernet | Bus-Powered | Mac & Windows®
Specifications & Compliance
- UPC
- 065030877893
- Brand
- StarTech.com
- Included in Package
- 1 - USB-C Hub
- Shipping (Package) Weight
- 6.4 oz [182 g]
- Weight of Product
- 2.4 oz [69.0 g]
- Product Length
- 4.0 in [10.2 cm]
- Product Width
- 1.8 in [45.0 mm]
- Product Height
- 0.6 in [14.0 mm]
- Package Depth
- 5.7 in [14.6 cm]
- Package Width
- 8.3 in [21.1 cm]
- Package Height
- 1.6 in [41 mm]
- Color
- Black & Space Gray
- Cable Length
- 9.8 in [25 cm]
- Warranty
- 2 Years
- Connector 1
- USB-C (10Gbps, 4.5W)
- Connector 1 (Quantity)
- 1
- Package Quantity
- 1
- Connector 2 (Quantity)
- 1
- Operating Temperature
- 0 to 50℃
- Storage Temperature
- -20 to 70℃
- Humidity
- 0% to 95% (non-condensing) at 25℃
- Material
- Aluminum and Plastic
- Maximum Data Transfer Rate
- 10 Gbps (USB 3.2 Gen 2)
- Industry Standards
- USB 3.2 Gen 2 - Backwards compatible with USB 3.0, 2.0, and 1.1</BR> IEEE 802.3</br> IEEE 802.3u</br> IEEE 802.3ab
- Power Source
- Bus Powered
- Chipset ID
- Realtek - RTS5423 <br> Realtek - RTL8153
- Power Delivery
- No PD Pass-Through
- Input Voltage
- 5V DC
- Output Voltage
- 5 DC
- Connector 3
- USB-A (10Gbps, 4.5W)
- Connector 3 (Quantity)
- 2
- Number of Ports
- 3
- Interface
- USB 3.2 Gen 2
- Bus Type
- USB 3.2 Gen 2 10Gbps
- Type and Rate
- USB 10Gbps
- Compatible Networks
- 10/100/1000 Mbps
- Connector 4
- RJ-45
- Connector 4 (Quantity)
- 1
- UASP Support
- Yes
- Auto MDIX
- Yes
- Full Duplex Support
- Yes
- Wake-On-LAN (WOL)
- Yes
- Form Factor
- Compact
- USB-C Host Connection
- Yes
- USB-C Device Port(s)
- Yes
- USB Pass-Through
- Yes
- Total Available Power Output
- Up to 15W </br> <i>Total available power is dependent of the source</i>
Questions & Answers
I am having issues with my new network interface card (NIC) and my on-board NIC is still enabled. What do I do in Windows?
Sometimes an on-board network interface card (NIC) conflicts with a new NIC. In these cases it is best to disable the on-board NIC. The best way to disable your on-board NIC is to go into your BIOS and disable it there if possible. To do this, consult your motherboard manual. You can also disable any NIC in Windows. Here is how you do this: First click Start , or, in Windows 10 and 8, hold down the Windows key and press X . Then click Control Panel . Windows 10 Click Network and Internet . Click Network and Sharing Center . On the left, click Change adapter settings . Right-click the NIC that you would like to disable and select Disable . Windows 8 Click Network and Sharing Center . On the left, click Change adapter settings . Right-click the NIC that you would like to disable and select Disable . Windows 7 Click Network and Internet . Click Network and Sharing Center . On the left, click Change adapter settings . Right-click the NIC that you would like to disable and select Disable . Windows Vista Click Network and Sharing Center . On the left, click Manage network connections . Right-click the NIC that you would like to disable and select Disable . Windows XP Click Network Connections . Right-click the NIC that you would like to disable and select Disable .
Why do I have speed or connectivity issues?
If you are experiencing speed or connectivity issues, it is best to set a specific speed at half or full duplex in your settings. You can set your network adapter to perform at a certain speed, but the device that the adapter is connected to (whether it is a router, switch, or computer) must also be able to perform at the same speed. Note : You must log in as the local administrator before you continue. To open Device Manager: Press Windows key + R . Type devmgmt.msc . Click OK . Open the Networking adapters section. Right-click the network adapter that you want to change and select Properties . Click the Advanced tab. Scroll down to Speed & Duplex . By default, it is set to Auto-Negotiate . Select any of the speeds that you see in the list. Click OK and restart your computer.
Can I use my network card for a Preboot Execution Environment (PXE)?
StarTech.com does not support a Preboot Execution Environment (PXE) as this requires third-party software. However, our devices can be used as long as the following conditions are met: The BIOS must support PXE. The BIOS must see the card. The environment must have drivers for the chipset used in the card. If using a USB networking card, the environment must have support for USB devices as well.
Related products
-
4 Port USB C Hub - USB Type-C to 1x USB-C/3x USB-A - Commercial Metal USB 3.0 Hub - SuperSpeed USB 3.2 Gen 1 (5Gbps) - Self Powered - BC1.2 Fast Charge - Mountable/Rugged
$55.34 Add to cart -
4-Port USB-C Hub - USB-C to 1x USB-C and 3x USB-A - USB 3.0 Hub - Includes Power Adapter
$66.99 Add to cart -

3-Port USB-C Hub with Gigabit Ethernet - USB-C to 3x USB-A - USB 3.0 (5Gbps) - Includes Power Adapter - TAA
$78.91 Add to cart -

USB to USB-C Adapter with Power Delivery - USB-C to USB-A and USB-C - USB 3.0
$32.99 Add to cart