
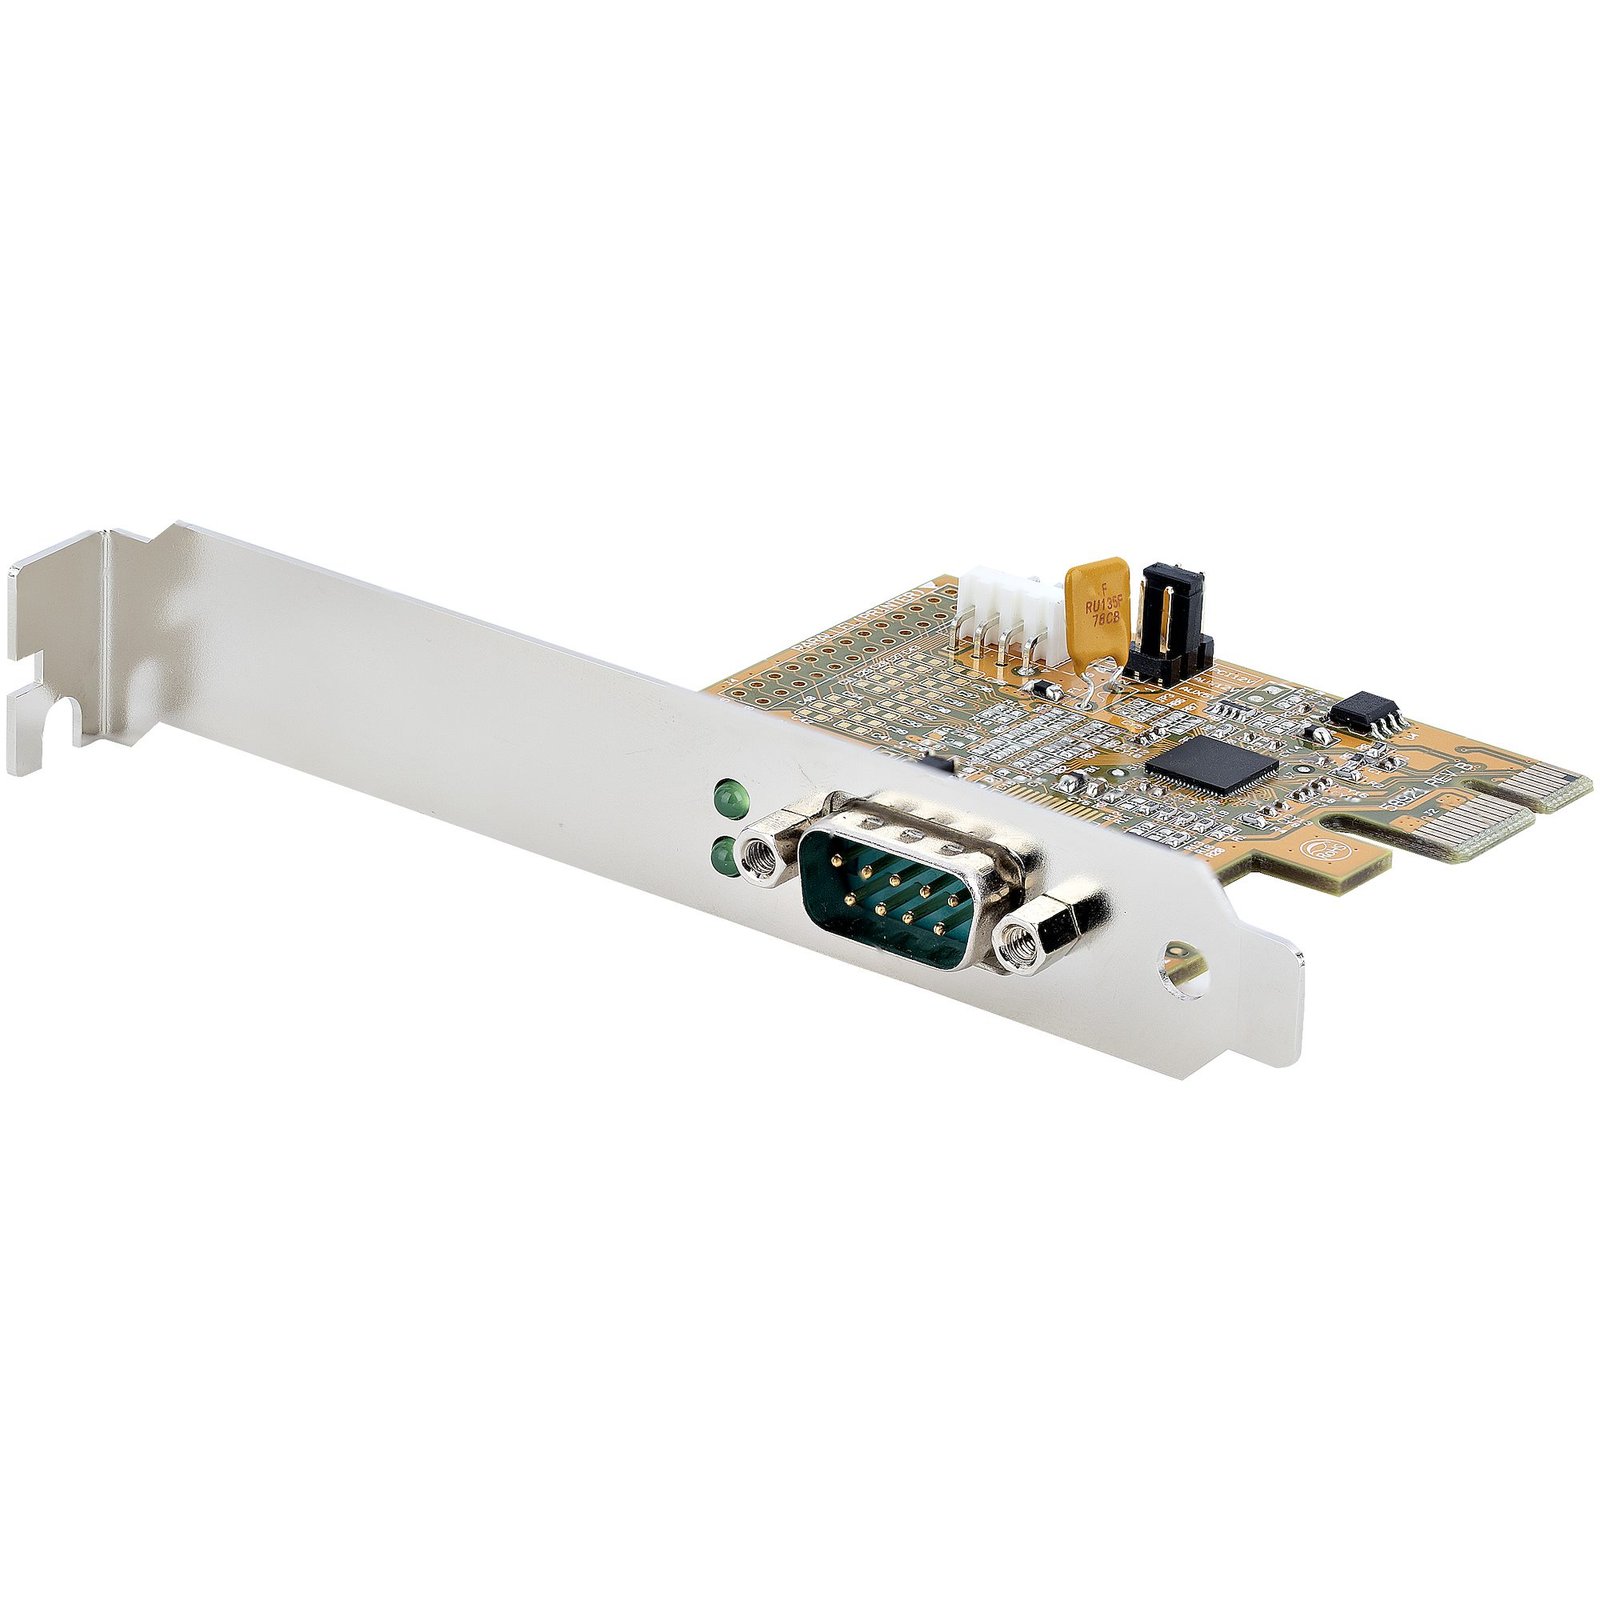
1-Port PCI Express Serial Card, PCIe to RS232 (DB9) Serial Interface Card, PC Serial Card, 16C1050 UART, Standard/Low Profile Brackets, COM Retention, Windows/Linux - TAA
$63.54
Baud Rate 921.6 Kbps per Port | 256-byte FIFO | PCIe 2.0 x1
Specifications & Compliance
- UPC
- 065030894777
- Brand
- StarTech.com
- Included in Package
- 1 - PCIe Serial Card, 1 - Low-Profile Bracket, 1 - Quick-Start Guide
- Shipping (Package) Weight
- 4.5 oz [128 g]
- Weight of Product
- 1.5 oz [42.0 g]
- Product Length
- 2.9 in [73.0 mm]
- Product Width
- 0.7 in [18.0 mm]
- Product Height
- 4.7 in [12.0 cm]
- Package Depth
- 5.7 in [14.5 cm]
- Package Width
- 8.3 in [21.2 cm]
- Package Height
- 1.6 in [41 mm]
- Color
- Yellow
- Warranty
- 2 Years
- Connector 1
- PCI Express x1
- Connector 1 (Quantity)
- 1
- Package Quantity
- 1
- Connector 2
- DB-9 Serial
- Connector 2 (Quantity)
- 1
- Operating Temperature
- 0°C to 55°C (32°F to 131°F)
- Storage Temperature
- -40°C to 75°C (-40°F to 167°F)
- Humidity
- 5 ~ 95% RH
- Material
- Steel
- Industry Standards
- PCI Express Version 2.0 x1
- Chipset ID
- ASIX - AX99100A, ASIX - ZT3243LFEY
- LED Indicators
- 2 - Green = Activity<br> Off = No Activity
- Number of Ports
- 1
- Interface
- Serial
- Bus Type
- PCI Express
- System and Cable Requirements
- Computer with an available PCI Express x1 or greater slot
- Card Type
- Standard Profile (LP bracket incl.)
- Port Style
- Integrated on Card
- Serial Protocol
- RS-232
- Max Baud Rate
- 921.6 Kbps
- FIFO
- 256 Bytes
- Wake-On-LAN (WOL)
- Yes
- Data Bits
- 5, 6, 7, 8, 9
- Flow Control
- Hardware and Software
- Parity
- Even, Odd, None, Space, and Mark
Questions & Answers
How do I install my network card in Windows Vista, Windows 7, Windows 8, Windows 10, or Windows 11? (.exe method)
To install a network card driver in Windows, download the latest driver package from StarTech.com, extract the files, run Setup.exe as an administrator, and restart the computer if prompted. Explanation: Before installing the network card driver, ensure that Windows is fully updated with the latest service packs, security updates, and feature updates available for your operating system. To install the driver: Download the latest driver package from the StarTech.com Drivers & Downloads page. Locate the downloaded ZIP file and extract its contents. Open the folder that matches your version of Windows, if applicable. Right-click Setup.exe and select Run as administrator . Follow the on-screen instructions to complete the installation. Restart the computer if prompted. After Windows restarts, the operating system will complete the driver installation and the network card should be ready to use. Note: If the Run as administrator option is unavailable, ensure that you are launching Setup.exe from the extracted folder and not directly from within the ZIP file.
Is there an alternative method to install my network card driver in Windows Vista, Windows 7, Windows 8, Windows 10, or Windows 11?
Yes. If the standard Setup.exe installation method does not work, you can manually install the network card driver through Device Manager by selecting the driver files directly. Explanation: Before installing the network card driver, ensure that Windows is fully updated with the latest service packs, security updates, and feature updates available for your operating system. To manually install the driver: Download the latest driver package from the StarTech.com Drivers & Downloads page. Extract the contents of the downloaded ZIP file. Open Device Manager by pressing Windows Key + R, typing devmgmt.msc, and pressing Enter. Locate the network adapter with a driver issue, typically identified by a yellow exclamation mark (!) or question mark (?). Right-click the device and select Update Driver. Select Browse my computer for drivers. Select Let me pick from a list of available drivers on my computer. If prompted, select Show All Devices and click Next. Click Have Disk. Browse to the extracted driver folder and locate the appropriate Manual Drivers directory for your operating system and system type (32-bit or 64-bit). Select the driver information file (.INF) and click Open. Click OK, then Next to begin the installation. Follow the on-screen prompts to complete the driver installation. After installation is complete, the network card should appear normally in Device Manager and be ready for use. Note: The device name displayed in Device Manager may vary depending on the network controller used by the product.
Serial communication is not working. Is the problem caused by the adapter or my serial software application?
Older applications that use serial communication often use legacy hardware addresses that do not work with PCI, PCIe, or USB to Serial products. We recommend contacting the software provider/support team to check if this is the case.
Everything is hooked up but nothing is working. What should I do?
When you troubleshoot issues with a serial device, there are some quick tests that you can complete to rule out potential problems. You can test to make sure that the following components are working correctly and are not the source of the issue: Serial cables Serial ports Serial devices To test your setup components, try the following: Use the serial cable, serial port, and serial device in another setup to see if the problem is with the components or the setup. Use a different serial cable, serial port, and serial device in your setup to see if the problem persists. Ideally, you should test a component that you know works in another setup. When you test your cables, it is recommended that you do the following: Test each cable individually. Use short cables when you are testing. When you test the serial ports and serial device, it is recommended that you do the following: Press the Windows key + R , type devmgmt.msc , and press Enter to open Device Manager . Check to see if your device is listed under Ports (COM & LPT) . Make sure that the COM port number is the correct number for the serial device and that the software being used to connect the computer to the serial device uses the correct COM port number. If the device is listed with an error, follow the instructions on the website to reinstall the drivers. Note: Some serial devices work only if the COM port number is between a certain range. For example, COM1 to COM4. Perform a serial loopback test. See this FAQ on how to perform a RS-232 serial loopback test: http://www.startech.com/faq/serial_loopback_test_rs232_windows
How can I make sure my serial port is working in Windows?
To check whether or not an RS-232 serial port is working, perform an RS-232 loopback test by doing the following: If your serial port is not female, convert it by taking a female/female cable or gender changer and plugging it into the serial port. Take a metal paperclip or wire and cross pins 2 and 3. If you look closely at the female end, the pins should be numbered. Open a telnet session on the COM port number of the device that you are testing. To find out the COM port number, refer to the following FAQ: https://www.startech.com/faq/com-port-listing-windows . Note: To open a telnet session on the COM port, you need a telnet client like PuTTY or Hyper Terminal. Windows XP comes with Hyper Terminal. When the session is open, anything you type into it you should see. The loopback test fails when you cannot see what you are typing. If the loopback test fails, make sure that the serial cable or gender changer that you are using works and that the adapter is in the correct port. You can check multiple ports at the same time by opening multiple sessions, putting the loopback adapter on one port, and trying to type into each session. When you can see what you are typing, you know that the COM port is working and you can see which port number the physical serial port is. Close the window for the port that you just tested to speed up the testing of the remaining serial ports. For products related to this article, click here .
Everything is hooked up but nothing is working. What should I do?
When you troubleshoot issues with a SATA cable, there are some quick tests that you can complete to rule out potential problems. You can test to make sure that the following components are working correctly and are not the source of the issue: Hard disk drive Hard drive controller (for example, motherboard) SATA cable To test your setup components, try the following: Use the hard disk drive, hard drive controller, and SATA cable in another setup to see if the problem is with the components or the setup. Use a different hard disk drive, hard drive controller, and SATA cable in your setup to see if the problem persists. Ideally, you should test a component that you know works in another setup. When you test the hard disk drive, hard drive controller, and SATA cable, it is recommended that you do the following: Make sure that the hard drive is spinning without the SATA cable attached. The power cable should make the drive spin if it is a mechanical drive and not a solid state drive. If your operating system is not detecting the hard disk drive, make sure that the drive is formatted with a partition (for example, NTFS or FAT32). If you are using a computer running a version of Windows, a drive letter must also be assigned to the hard disk drive. For more information about how to initialize a drive, refer to the following FAQ: https://www.startech.com/en-us/support/faqs/technical?topic=harddrives#initialize-hard-drives .
How do I check to ensure the COM port is listed properly in Windows?
To ensure your serial device is installed properly, complete the following: Open the Device Manager by pressing the Windows Key + R . Type “devmgmt.msc” and press Enter . Expand the Ports (COM & LPT) section. You should see a COM number in brackets to the right of each port, and there should not be any exclamation points or question marks next to the entries in the list.
How to Change COM Port Number on Windows
Some serial devices require a specific COM port number to function. In these cases, consult the manual of your serial device to determine the correct number to use. To change the COM port number of a serial device in Device Manager, complete the following: Open the Device Manager by pressing the Windows Key + R . Type “devmgmt.msc” and press Enter . Expand the Ports (COM & LPT) section. Right-click the COM port and select Properties . Click the Port Settings tab and click Advanced . Change the COM port number to an available COM port number. Note : Multiple serial ports cannot share the same COM port number. Restart your computer. Note : Even if you change the COM port number back to the original number, you still need to restart your computer.
Related products
-

10 Pack 2 Port PCI Serial Adapter Cards
$99.99 Add to cart -

1ft (30cm) USB to Serial Adapter Cable, COM Retention, Interchangeable Nuts/Screws, USB-A to DB9 RS232, FTDI IC, ESD Protection, Windows/macOS/Linux
$38.94 Add to cart -

3ft (1m) USB to Serial Cable with COM Port Retention, DB9 Male RS232 to USB Converter, USB to Serial Adapter for PLC/Printer/Scanner, Prolific Chipset, Windows/Mac - TAA
$39.96 Add to cart -

1S1P 54mm ExpressCard Serial Parallel Combo Card with 16550 UART
$51.99 Add to cart