
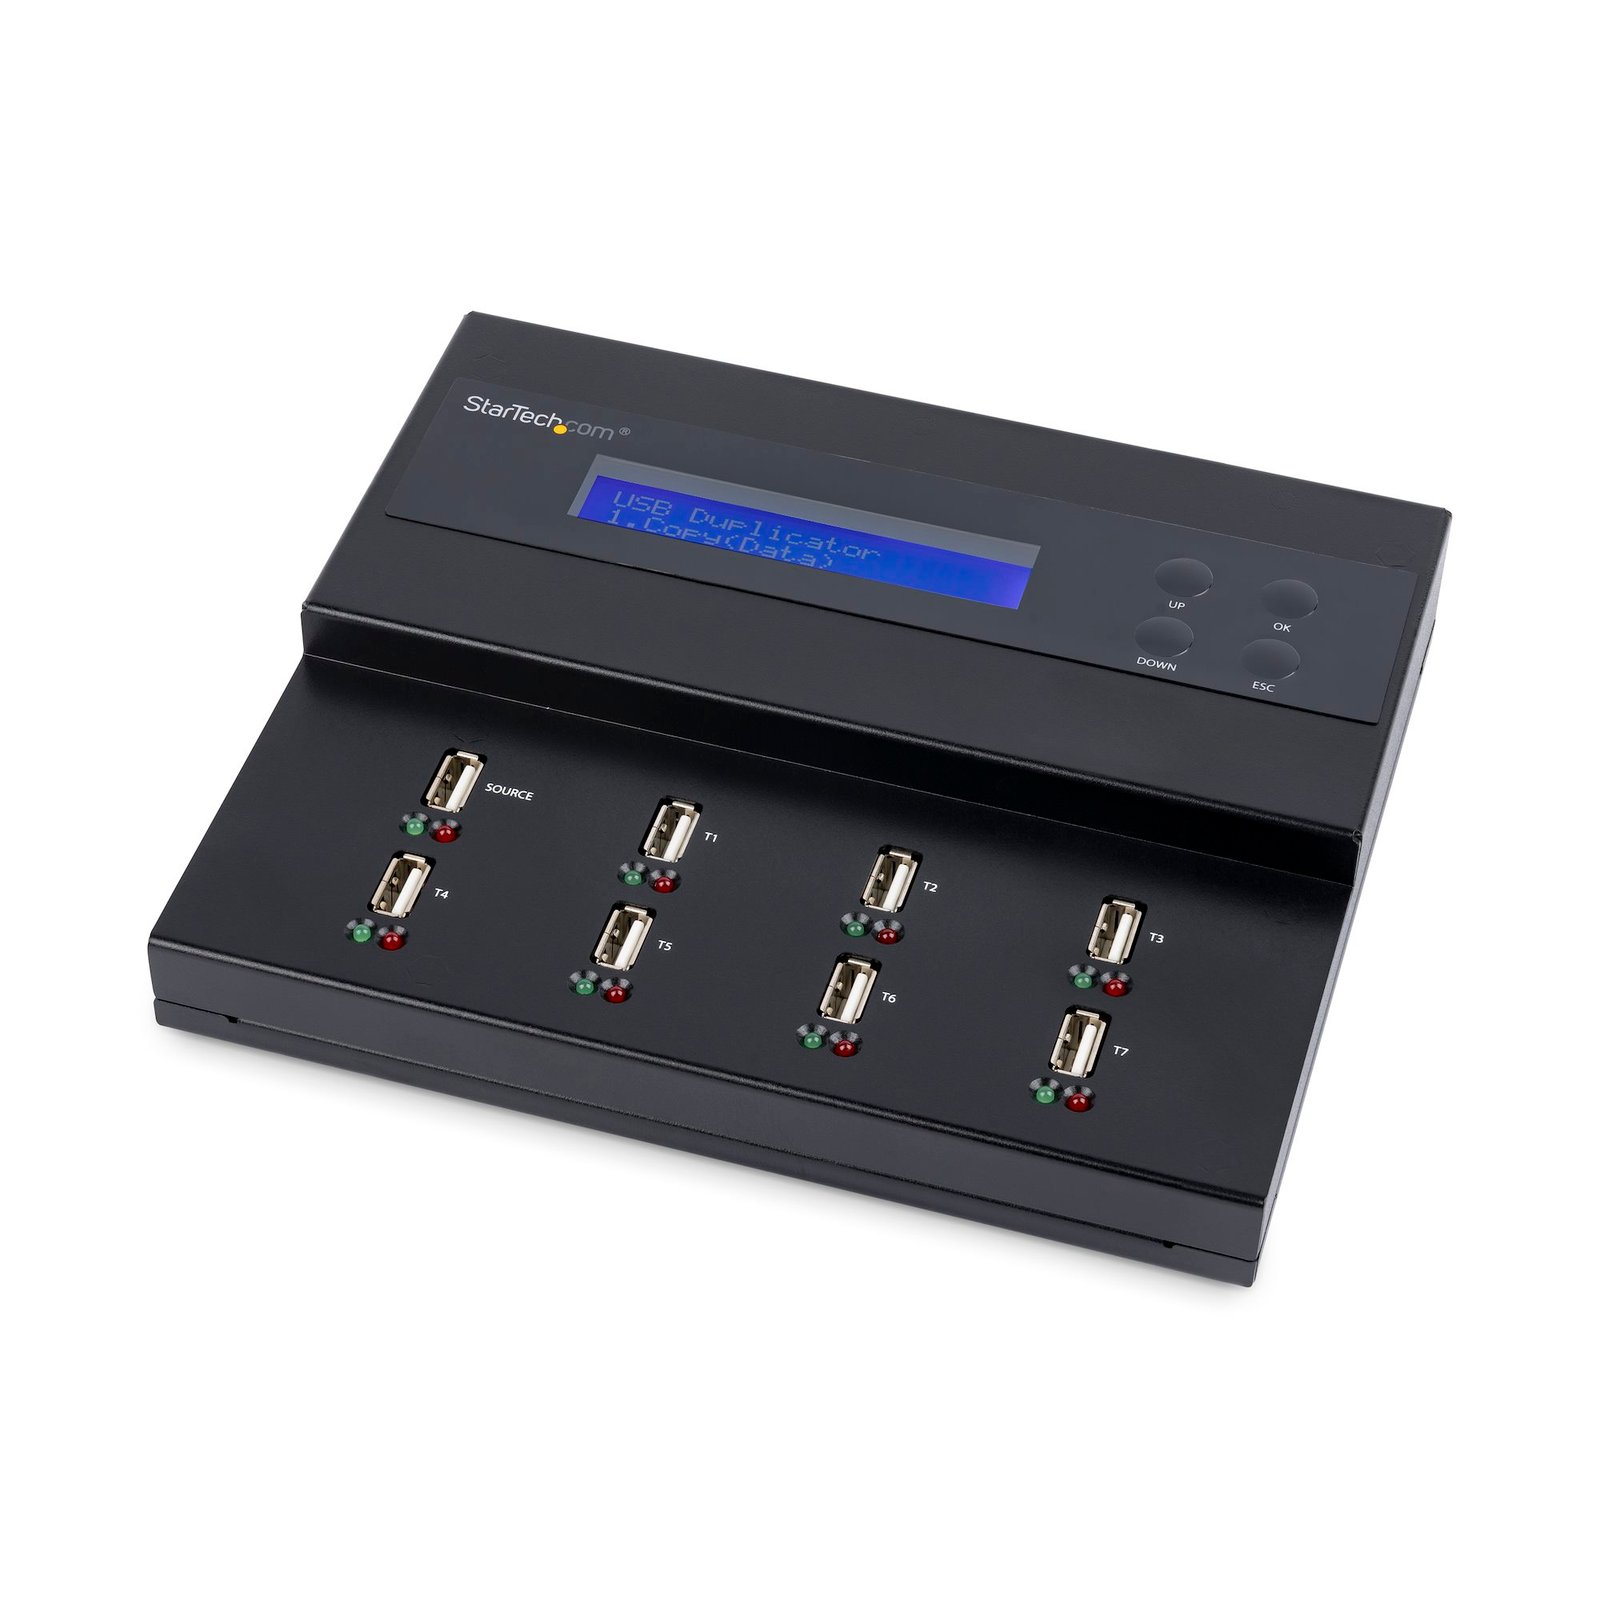
Standalone 1 to 7 USB Thumb Drive Duplicator and Eraser, Multiple USB Flash Drive Copier, System and File and Whole-Drive Copy at 1.5 GB/min, Single and 3-Pass Erase, LCD Display - TAA
$803.59
Standalone 1 to 7 USB Thumb Drive Duplicator & Eraser, Flash Drive Copier
Specifications & Compliance
- UPC
- 065030870733
- Brand
- StarTech.com
- Included in Package
- 1 - duplicator and eraser, 1 - universal power adapter (NA/JP, UK, EU, ANZ), 1 - instruction manual
- Shipping (Package) Weight
- 6.7 lb [3.0 kg]
- Weight of Product
- 2.3 lb [1.1 kg]
- Product Length
- 7.5 in [19 cm]
- Product Width
- 6.3 in [16 cm]
- Product Height
- 1.4 in [34.6 mm]
- Package Depth
- 9.3 in [23.7 cm]
- Package Width
- 18.5 in [47 cm]
- Package Height
- 3.7 in [95 mm]
- Color
- Black
- Warranty
- 2 Years
- Connector 1
- USB-A (480Mbps, 2.5W)
- Connector 1 (Quantity)
- 8
- Package Quantity
- 1
- Operating Temperature
- 5°C ~ 45°C (41°F ~ 113°F)
- Storage Temperature
- -20°C ~85°C (-4°F ~ 185°F)
- Humidity
- 20% ~ 80%
- Material
- Steel
- Power Source
- AC Adapter Included
- Chipset ID
- Xilinx - Spartan (XC3S700A)
- Input Voltage
- 100 - 240 AC
- Output Voltage
- 12V DC
- Power Consumption
- 108W
- MTBF
- 176,549 hours
- LED Indicators
- 8 - Green (Activity/Successful Copy), 8 - Red (Error)
- Bus Type
- USB 2.0
- Input Current
- 1.6A Max
- Output Current
- 9
- System and Cable Requirements
- For duplication, the destination drives must be of equal or greater capacity than the source drive., For erasing, only the destination ports are active, the source port cannot be used. This helps to prevent erasing a source drive accidentally., Supports copying/cloning/erasing to Hard Drives or Solid State Drives through a Hard Drive docking station or USB enclosure (sold separately) if supported by the storage media
- Plug Type
- 4-pin DIN
- Compatible Drive Types
- USB Flash Drive
- Number of Drives
- 7
- Drive Installation
- Removable
- Insertion Rating
- 1500 times
- Max Drive Capacity
- 3TB
- Buffer Size
- 128 MB
- Duplication Modes
- System and File, Sector by Sector (Whole Drive)
- Duplication Speed
- 1.5GBpm
- Erase Modes
- Quick Erase, 1-Pass Overwrite (NIST SP 800-88 Rev 1 - Clear), 3-Pass Overwrite
Questions & Answers
How do I initialize a brand new hard drive in Windows or Mac OS?
Windows 10 Before you can access a new or formatted drive in your operating system, you need to initialize it first and then create a partition on the drive. A partition defines an area of the drive to use for storing data. The partition uses a file system (for example, ex-FAT, NTFS, and so on). Initialize a drive Note: You typically only need to initialize a drive if the drive is new. If you cannot find an uninitialized drive in Disk Management, skip the following steps and try to partition your device. Press the Windows key + R , type compmgmt.msc , and click Run to open Computer Management . Navigate to Disk Management . When prompted to, initialize your disk(s). If you are running Windows ® 7 or later and are using a drive larger than 2TB, initialize the disk(s) with GPT. If you are running an earlier version of Windows, initialize the disk(s) with MBR. For more information, visit the following FAQ: https://www.startech.com/en-us/support/faqs/technical?topic=harddrives#mbr-vs-gpt . Click OK . Create a partition in a drive Note: The following steps create an NTFS partition that uses the entire drive space. To use a different file system, select a different option in step 6. Right-click Unallocated or RAW volume , and select New Simple Volume . In the New Partition Wizard , click Next . Select Primary partition . Leave the partition size set to default , and click Next . Assign a drive letter or leave it set to the default, and click Next . Enter the following settings to format the partition: In the File System field, enter NTFS . Set the Allocation unit size to Default . In the Volume label field, enter < your name/reference >. Select the Perform a quick format check box. Clear the Enable file and folder compression check box. Click Next > Finish . The new drive should appear in Windows Explorer. Mac OS Before you can access a new or formatted drive in your operating system, you need to initialize it first and then create a partition on the drive. A partition defines an area of the drive to use for storing data. The partition uses a file system (for example, HFS+, ex-FAT, NTFS, and so on). Initialize a drive Mac OSX detects a drive that needs to be initialized and automatically prompts you to initialize the drive. If you are prompted to initialize the drive, click Initialize . If you are not prompted to initialize the drive and you cannot find the drive in Finder , you will need to create a partition on the drive. Create a partition on a drive Note: The following steps create an HFS+ (Mac OS Extended (Journaled)) partition that uses the entire drive space. To create a partition on a new drive, complete the following: Open Finder . Navigate to Applications and click Utilities . Open Disk Utility . Select the new drive and click the Partition tab. Click Options and verify that it is set to GUID Partition Table . Enter a name for the partition. Click Partition . The drive should now be accessible in Finder. For products related to this article, click here .
Related products
-
1:1 Standalone Hard Drive Duplicator & Eraser, SATA HDD / SSD Disk Cloner / Copier / Wiper / Sanitizer, Drive Cloning / Recovery Tool, LCD Display, TAA Compliant - OS Independent
$388.46 Add to cart -

Single Bay Hard Drive Eraser, Standalone HDD/SSD Sanitizer, USB 3.0 to SATA II (3 Gbps), 9 Erase Modes, LCD Display, Secure Erase Hard Disk Sanitizer Dock, DB-9 Printer Port, TAA Compliant
$274.69 Add to cart -
Portable eSATA USB to SATA Standalone HDD Hard Drive Duplicator Dock HDD
$38.99 Add to cart -

USB to SATA Standalone Hard Drive Duplicator Dock
$29.99 Add to cart