
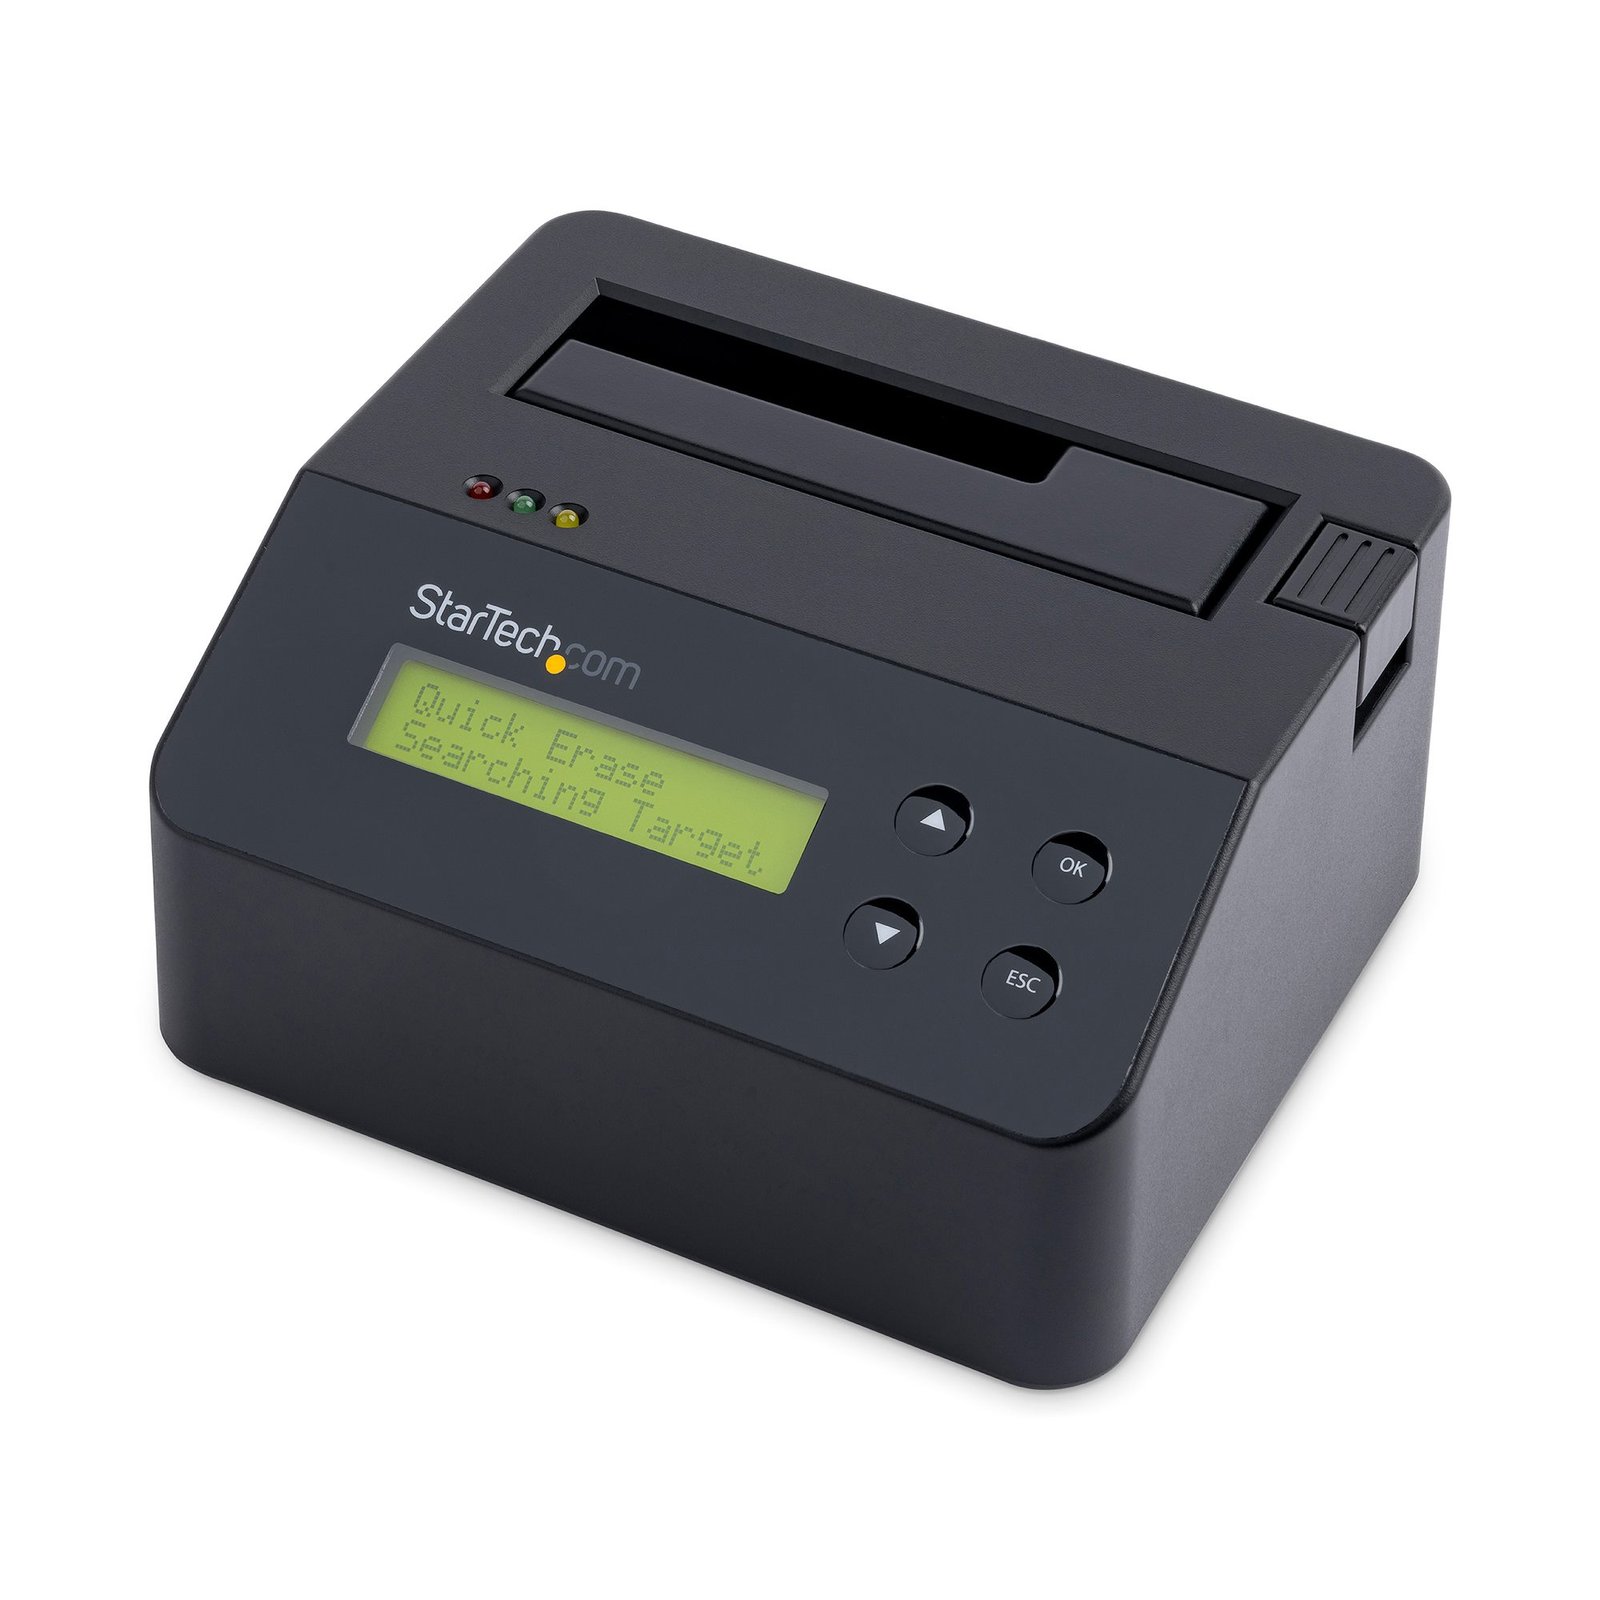
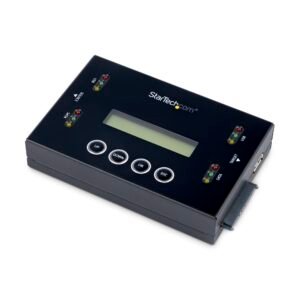
Single Bay Hard Drive Eraser, Standalone HDD/SSD Sanitizer, USB 3.0 to SATA II (3 Gbps), 9 Erase Modes, LCD Display, Secure Erase Hard Disk Sanitizer Dock, DB-9 Printer Port, TAA Compliant
$274.69
Single Bay Hard Drive Eraser, Standalone HDD/SSD Sanitizer, USB 3.0 to SATA
Specifications & Compliance
- UPC
- 065030861137
- Brand
- StarTech.com
- Included in Package
- 1 - hard drive eraser and USB 3.0 dock, 1 - USB 3.0 cable, 1 - universal power adapter, 4 - power adapter plug (NA/EU/UK/AU), 1 - quick start guide
- Shipping (Package) Weight
- 4.5 lb [2.0 kg]
- Weight of Product
- 23.2 oz [656 g]
- Product Length
- 5.5 in [14 cm]
- Product Width
- 4.8 in [12.3 cm]
- Product Height
- 2.8 in [70 mm]
- Package Depth
- 7.4 in [18.7 cm]
- Package Width
- 14.8 in [37.6 cm]
- Package Height
- 3.5 in [90 mm]
- Color
- Black
- Warranty
- 2 Years
- Connector 1
- DB-9 Serial
- Connector 1 (Quantity)
- 1
- Package Quantity
- 1
- Connector 2
- SATA (7-Pin + 15-Pin)
- Connector 2 (Quantity)
- 2
- Operating Temperature
- 0°C to 40°C (32°F to 104°F)
- Storage Temperature
- -10°C to 65°C (14°F to 149°F)
- Humidity
- 10% ~ 90% RH
- Material
- Plastic
- Maximum Data Transfer Rate
- 3Gbps
- Power Source
- AC Adapter Included
- Special Notes
- Receipt printing through the RS232 serial port requires a printer which supports the ESC/P printer control language.
- Input Voltage
- 100 - 240 AC
- Output Voltage
- 12V DC
- Power Consumption
- 60
- LED Indicators
- 1 - 2-Line LCD display on top, 1 - Power & Activity LED, 1 - HPA/DCO Detect LED
- Interface
- USB 3.2 Gen 1 (5Gbps)
- Input Current
- 1.4 A
- Output Current
- 5
- Type and Rate
- USB 3.0 (5Gbps)
- Host Connector 1
- USB-B (5Gbps, 4.5W)
- Host Connector 1 (Quantity)
- 1
- Plug Type
- M
- Center Tip Polarity
- Positive
- SATA Type and Rate
- SATA II (3 Gbps)
- Compatible Drive Types
- SATA
- Number of Drives
- 1
- Drive Size
- 2.5in & 3.5in
- Max Drive Capacity
- Currently tested with up to 6TB 7200 RPM
- Hot Swap Capability
- Yes
- Erase Modes
- Quick Erase, 1-Pass Overwrite (NIST SP 800-88 Rev 1 - Clear), 3-Pass Overwrite, 7-Pass Overwrite, Custom Erase, Secure Erase (NIST SP 800-88 Rev 1 - Purge), Enhanced Secure Erase (NIST SP 800-88 Rev 1 - Purge)
Questions & Answers
The data on my drive is not accessible. How do I fix this?
The drive may be damaged. Test with a known-working drive, or test the drive directly to a PC. The operating system on the computer may not support reading and writing to the file system on the docked hard drive or SSD. Remember, Windows cannot read Mac or Linux file systems. Also, macOS can read but not write to NTFS drives. If the drives came from a RAID (Redundant Array of Independent Disks), they would not be accessible in our docking stations. If the drive uses 4Kn sectors, check the technical specifications of the docking station, and ensure it can read 4Kn drives.
Why are my hard drives entering an idle state using this docking station?
This docking station allows the hard drive to enforce its own power state, as opposed to enforcing a power state that keeps the hard drive active at all times. Since most newer hard drives have low-power energy conservation modes, this will cause the hard drive to enter an idle state if it is not used for a certain amount of time.
My hard drive eraser dock appears to be done erasing long before the estimated time has elapsed. How can I tell if the erase function is complete?
The power and link LED on the hard drive eraser dock is illuminated while the drive is being erased. When the process is complete, the yellow LED is no longer illuminated. The suggested time that the erase process will take is a conservative estimate based on the characteristics of the individual hard drive, including the maximum read and write speeds and overall health of the hard drive. The erase mode that you select can also impact the time it takes to erase the drive, as the more in-depth erase modes require more resources.
What type of serial cable should I use to connect my SDOCK1EU3P to my serial printer?
To connect your SDOCK1EU3P to your serial printer, use the same type of serial cable (straight-through or null modem) that you used to connect your serial printer to your computer. If you aren't sure which cable to use to connect your serial printer to your computer, consult the website of the serial printer manufacturer.
When should I upgrade my device's firmware?
You should not upgrade your device's firmware if you do not have any issues with the functionality of your device. The only time you should consider an upgrade is if you are experiencing a problem with the device, and you have confirmed that the firmware addresses this problem. You can confirm this is the case by reviewing the documentation included with the firmware or by consulting with our Technical Support team. Incorrectly upgrading firmware can result in diminished performance so it is best to contact StarTech.com if you would like to perform this operation.
What factors affect erase performance and estimated erase time on the StarTech.com SDOCK1EU3P?
Erase duration and performance on the StarTech.com SDOCK1EU3P depend on the selected erase mode and the speed and condition of the storage media. Explanation: The StarTech.com SDOCK1EU3P determines erase performance based on both the erase method and the characteristics of the connected drive. Erase mode: More intensive erase modes, such as multi-pass overwrite methods, take longer than quick erase options. Drive speed: Storage devices with higher read and write speeds complete erase operations faster. Drive condition: Drives with errors or degraded performance may increase erase time. The estimated erase time is a conservative approximation and may vary depending on actual drive performance and selected erase settings.
Will my hard drive be compatible with a StarTech.com docking station or duplicator?
A hard drive will work with a StarTech.com docking station or duplicator only if the device supports the drive’s interface, form factor, capacity, and power requirements. Explanation: To confirm compatibility with a StarTech.com docking station or duplicator, review the product’s technical specifications and verify the following: Interface compatibility: The hard drive must match the supported interface (for example, SATA, IDE, or M.2). For M.2 drives, you must also confirm the protocol (SATA vs. NVMe) and keying (B-key, M-key, or B+M), as not all M.2 drives are supported by all devices. Form factor support: The physical size of the hard drive must match the device (for example, 2.5-inch or 3.5-inch drives). Capacity support: Specifications may list a “tested capacity.” Many modern devices can support larger drives, but compatibility beyond the tested capacity is not guaranteed and depends on the device chipset and firmware. Power requirements: The power output of the docking station or duplicator must meet or exceed the drive’s requirements. This is typically sufficient for single-drive docks from reputable brands, but it becomes critical for dual-bay or multi-bay devices, high-capacity drives, or older models. When using multiple drives, the combined power draw must not exceed the device’s power supply. Compatibility is ultimately determined by the hardware design and controller limitations of the specific StarTech.com docking station or duplicator, so reviewing official specifications is required to ensure proper operation.
What DC barrel connector power plug types do StarTech.com products use, and what are their dimensions?
StarTech.com DC barrel connector plug types are defined in the “Plug Type” field of the technical specifications, using a letter code that specifies the connector’s outer diameter (OD) and inner diameter (ID) in millimeters for power adapter compatibility. Explanation: In StarTech.com technical specifications, the “Plug Type” field is a standardized identifier for the exact DC barrel connector size required to power a product. Each plug type is assigned a letter code that corresponds to a specific combination of outer diameter (OD) and inner diameter (ID), measured in millimeters. Common DC barrel plug type dimensions Plug Type OD ID A 2.35 mm 0.7 mm B 4.0 mm 1.7 mm C 4.75 mm 1.7 mm H 3.4 mm 1.3 mm L 5.0 mm 2.5 mm M 5.5 mm 2.1 mm N 5.5 mm 2.5 mm The DC barrel connector plug type must match both the outer diameter and inner diameter exactly. A mismatch between the StarTech.com product requirement and the power adapter connector can prevent proper fit or stable power delivery, which may result in device startup failure or intermittent operation. The plug type defines only the physical connector size. The plug type does not define electrical power requirements such as voltage, current, or polarity. The power adapter used with a StarTech.com product must match the product’s specified electrical requirements. Using an incompatible power adapter can cause device malfunction or permanent damage. This standardized DC barrel connector plug type system enables IT professionals and procurement teams to verify connector dimensions, ensure power adapter compatibility, standardize hardware deployments, and identify the correct replacement power supply for StarTech.com products.
How do I initialize a brand new hard drive in Windows or Mac OS?
Windows 10 Before you can access a new or formatted drive in your operating system, you need to initialize it first and then create a partition on the drive. A partition defines an area of the drive to use for storing data. The partition uses a file system (for example, ex-FAT, NTFS, and so on). Initialize a drive Note: You typically only need to initialize a drive if the drive is new. If you cannot find an uninitialized drive in Disk Management, skip the following steps and try to partition your device. Press the Windows key + R , type compmgmt.msc , and click Run to open Computer Management . Navigate to Disk Management . When prompted to, initialize your disk(s). If you are running Windows ® 7 or later and are using a drive larger than 2TB, initialize the disk(s) with GPT. If you are running an earlier version of Windows, initialize the disk(s) with MBR. For more information, visit the following FAQ: https://www.startech.com/en-us/support/faqs/technical?topic=harddrives#mbr-vs-gpt . Click OK . Create a partition in a drive Note: The following steps create an NTFS partition that uses the entire drive space. To use a different file system, select a different option in step 6. Right-click Unallocated or RAW volume , and select New Simple Volume . In the New Partition Wizard , click Next . Select Primary partition . Leave the partition size set to default , and click Next . Assign a drive letter or leave it set to the default, and click Next . Enter the following settings to format the partition: In the File System field, enter NTFS . Set the Allocation unit size to Default . In the Volume label field, enter < your name/reference >. Select the Perform a quick format check box. Clear the Enable file and folder compression check box. Click Next > Finish . The new drive should appear in Windows Explorer. Mac OS Before you can access a new or formatted drive in your operating system, you need to initialize it first and then create a partition on the drive. A partition defines an area of the drive to use for storing data. The partition uses a file system (for example, HFS+, ex-FAT, NTFS, and so on). Initialize a drive Mac OSX detects a drive that needs to be initialized and automatically prompts you to initialize the drive. If you are prompted to initialize the drive, click Initialize . If you are not prompted to initialize the drive and you cannot find the drive in Finder , you will need to create a partition on the drive. Create a partition on a drive Note: The following steps create an HFS+ (Mac OS Extended (Journaled)) partition that uses the entire drive space. To create a partition on a new drive, complete the following: Open Finder . Navigate to Applications and click Utilities . Open Disk Utility . Select the new drive and click the Partition tab. Click Options and verify that it is set to GUID Partition Table . Enter a name for the partition. Click Partition . The drive should now be accessible in Finder. For products related to this article, click here .
Related products
-
Standalone 1 to 15 USB Thumb Drive Duplicator and Eraser, Multiple USB Flash Drive Copier, System and File and Whole-Drive Copy at 1.5 GB/min, Single and 3-Pass Erase, LCD Display - TAA
$1,263.81 Add to cart -
Standalone 1 to 7 USB Thumb Drive Duplicator and Eraser, Multiple USB Flash Drive Copier, System and File and Whole-Drive Copy at 1.5 GB/min, Single and 3-Pass Erase, LCD Display - TAA
$803.59 Add to cart -
Standalone 1:3 SATA 2.5 / 3.5” Hard Drive Duplicator and Eraser w/ Daisy Chaining
$692.99 Add to cart -
1:1 Standalone Hard Drive and USB Flash Disk Duplicator and Eraser, USB Thumb Drive and SATA HDD/SSD Disk Cloner and Eraser, Hardrive Copier/Sanitizer/Wiper, LCD display, TAA
$600.64 Add to cart