
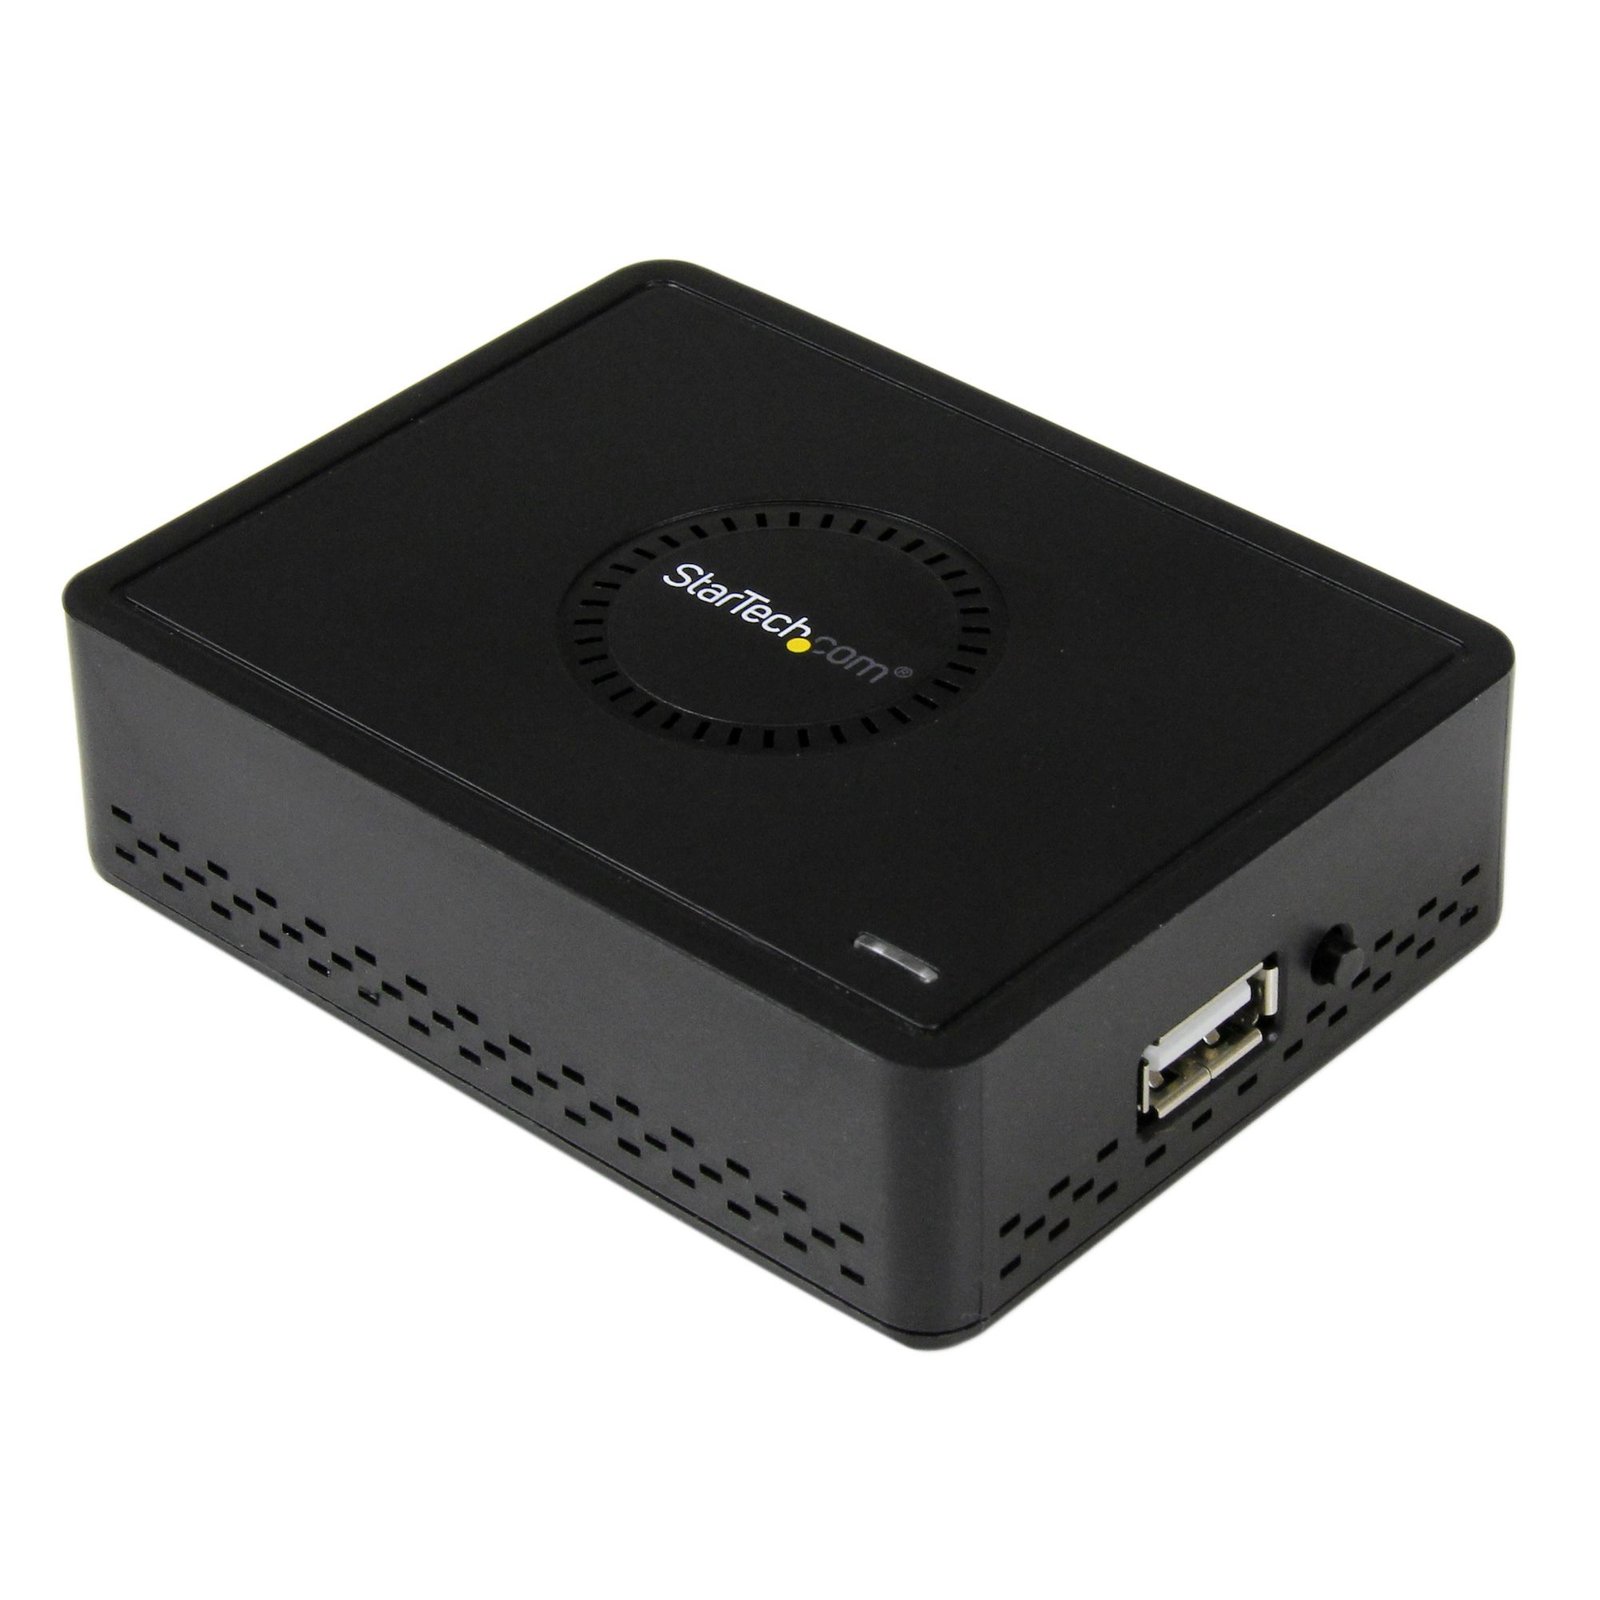
Wireless Display Adapter with HDMI - 1080p
$79.99
Connect - Collaborate - Communicate
Specifications & Compliance
- UPC
- 065030852777
- Brand
- StarTech.com
- Included in Package
- 1 - Wireless Display Adapter, 1 - Power Adapter (NA), 1 - USB Cable to Power Adapter Port (optional for USB Power source), 1 - 4 position A/V cable, 1 - Quick Installation Guide
- Shipping (Package) Weight
- 14.0 oz [396 g]
- Weight of Product
- 2.8 oz [79.0 g]
- Product Length
- 2.6 in [65.0 mm]
- Product Width
- 3.3 in [85.0 mm]
- Product Height
- 1.0 in [26.0 mm]
- Package Depth
- 8.5 in [21.6 cm]
- Package Width
- 6.0 in [15.2 cm]
- Package Height
- 2.1 in [54 mm]
- Color
- Black
- Warranty
- 2 Years
- Connector 1
- Wi-Fi 4 (802.11n, 600Mbps)
- Connector 1 (Quantity)
- 1
- Package Quantity
- 1
- Connector 2
- USB-A (480Mbps, 2.5W)
- Connector 2 (Quantity)
- 1
- Operating Temperature
- 0°C to 45°C (32°F to 131°F)
- Storage Temperature
- -20°C to 60°C (-4°F to 140°F)
- Humidity
- 20%~80%
- Material
- Plastic
- Power Source
- AC Adapter Included
- Input Voltage
- 100 - 240 AC
- Output Voltage
- 5 DC
- Connector 3
- HDMI
- Connector 3 (Quantity)
- 1
- Power Consumption
- 5
- LED Indicators
- 1 - Power/Activity LED
- Number of Ports
- 1
- Output Current
- 1
- Maximum Digital Resolutions
- 1920x1080/1080p
- Audio
- Yes
- Connector 4
- RJ-45
- Connector 4 (Quantity)
- 1
- General Specifications
- Supported File Formats in Media Server Mode: AVI, MPEG-1, MPEG-2, MPEG-TS, MPEG-4, 3GP, 3GP2, MOV, WMV and DVR-MS
- AV Input
- HDMI
- AV Output
- HDMI
- Wide Screen Supported
- Yes
- Cascadable
- No
- Connector 5
- 3.5mm (3 Conductors, TRS)
- Connector 5 (Quantity)
- 1
- Cabling
- Wireless Ethernet
Questions & Answers
How do I install and use AirFun in Windows Vista / 7 / 8? [Firmware 2.0.0 to 2.0.4]
Note: In firmware 2.0.2, you need to press the Mode button to show the PC , NB , Phone , or Tablet splash screen. Complete the following steps to install the AirFun software. To connect to your device, do any of the following: If you are using a wired setup, use an Ethernet cable to connect to your device. If you are using a wireless setup, add your device to the network. If you are in AP mode, connect your device directly to its own wireless network. See the home screen on the TV, monitor, or projector for instructions. To open the web interface, open a web browser and type the IP address on the home screen into the address bar. Note: You need to be on the same subnet as the WIFI2HDMC, which means that for an IP address similar to WWW.XXX.YYY.ZZZ, WWW, XXX, and YYY must be the same number, and ZZZ must be a different number. For more information about how to change your IP address, refer to the following FAQ: https://www.startech.com/en-us/support/faqs/technical?topic=networking#ip-address-change-windows-mac-os . On the home screen of the web interface, click the Download For Windows button. Right-click the AirFunInstall setup file, and click Run as Administrator . Complete the following steps to run the AirFun software. Double-click the AirFun software. In the Device List , click WIFI2HDMC . To add items to playlists, drag and drop media files into the Photo/Music Playback playlist or the Video Playback playlist. Once media files are added to either playlist, the media starts playing immediately. Note: You cannot use both types of playlists at the same time. To stop using one playlist and switch to another, close the software and reopen it again. The AirFun software includes a media playback tool with basic features like repeat, previous, next, play or pause, volume control (for the WIFI2HDMC specifically), and a timer that displays how far into the song or video you are and how much is left.
I’m not seeing a video signal on the display. How do I fix this?
The power adapter may not be connected at the correct unit or may not be connected at all. Please check your product manual to see where your power adapter has to be positioned. An adapter to another video signal may be connected to the Transmitter or Receiver unit. Please avoid any converters for the initial setup. The Cat 5 or 6 cable coming from the transmitter or receiver unit may be connected to a network switch. Some of our video extenders will work in this configuration, but others will not. Please check your product manual to see if your model can be used connected to an IP network. For the initial setup, avoid connecting the Cat 5 or 6 cables to any network switch, hub, or router. The category of Unshielded Twisted Pair (UTP) cables may not meet StarTech.com’s requirements. Ensure at least Cat 5, 5e, or six cables are used, and they have eight wires. Some Cat 5 cables only have four wires. If using Cat 6 cables, be aware they have more twists per foot, so you may have to use shorter cable lengths if using Cat 6 cabling between your video extenders. Bundling up the UTP cabling connected to the extenders can cause crosstalk, which will prevent the video signal from showing on the display. Unwrapping the cable should resolve this issue.
The video signal is displayed, but the quality is not very good, or the colors are not accurate. How do I fix this?
Please check to see if your model has an adjustable Gain dial on the remote unit. If it does, use it to adjust the color until it is acceptable. Replace the VGA cable with a higher quality cable like StarTech.com’s MXT101MMHQ.
Everything is hooked up but nothing is working. What should I do?
When you troubleshoot issues with a video extender, there are some quick tests that you can complete to rule out potential problems. You can test to make sure that the following components are working correctly and are not the source of the issue: Video and Ethernet cables Video extender Video source (such as a DVD player or computer) Video destination (such as a monitor or projector) Note: When you are testing setup components, you should avoid using video adapters. For example, if you are converting a VGA source to HDMI for use with an HDMI extender, you should use an HDMI source when you test the components. To test your setup components, try the following: Use the cable, video extender, video source, and video destination in another setup to see if the problem is with the components or the setup. Use a different cable, video extender, video source, and video destination in your setup to see if the problem persists. Ideally, you should test a component that you know works in another setup. When you test your cables, it is recommended that you do the following: Test each cable individually. Use short cables when you are testing. When you test the video source and video destination, it is recommended that you do the following: Remove the video extender from your setup and test to make sure that the video source and video destination work together without the video extender. Test to make sure that the video source and video destination work together at the resolution that you want to use. Note: In order for your setup to work properly, the video source, extender, and destination all need to support the resolution that you are using.
How do I use PlayTo in Windows 8.1? [Firmware 2.0.0 to 2.0.4]
PlayTo is an alternative to AirFun in Windows 8.1 only. Note: In Firmware version 2.0.2, you need to press the Mode button to open the PC, NB, phone, tablet, iPhone, iPad, Miracast, or WiDi splash screen. Use Windows Explorer to access PlayTo To connect to your device, do any of the following: If you are using a wired setup, use an Ethernet cable to connect to your device. If you are using a wireless setup, add your device to your network. If you are in AP mode, connect your device directly to its own wireless network. Use WiDi to connect to your device. Use Miracast to connect to your device. Right-click the media files that you would like to play. Click PlayTo . Click WIFI2HDMC . To add items to playlists, drag and drop media files to the playlist window. You can also rearrange the playlist by dragging and dropping the media files. Use Microsoft applications to access PlayTo Use a Microsoft application to play the media files. Press Windows key + C . Click Devices . Click Play . Click WIFI2HDMC . Note: The media files are still being played using the Microsoft app. You can follow the steps listed above with any app that comes in the Microsoft App Store or that comes installed on your computer, tablet, or phone.
How do I use Miracast in Windows 8.1? [Firmware 2.0.0 to 2.0.4]
Note: In firmware 2.0.2, you need to press the Mode button to open the Miracast or WiDi splash screen. Complete the following steps to check Miracast capability. To open the Charms menu, press the Windows key + C . Click Devices . Click Project . If you see an Add wireless display link, the computer supports Miracast. Note: If this option is missing, check for video card and wireless networking card driver updates. Complete the following steps to connect using Miracast. Click Add wireless display . Click WIFI2HDMC . The screen will mirror to your TV, monitor, or projector. The video card driver must support WDDM 1.3 or higher to use Miracast. To check this, do the following: Press Windows key + X . Click Run . Type dxiag.exe and press Enter . Click the Display tab. The wireless card driver must support NDIS 6.3 or higher. To check this, do the following: Press the Windows key + C . Click Search . Type Windows Powershell . Right-click Windows Powershell and click Run as administrator . Type Get-NetAdapater | Select Name, NdisVersion . Note: The wireless card and the video card must also support Miracast specifically.
How do I use Miracast with an Android device? [Firmware 2.0.0 to 2.0.4]
Note: Miracast must be natively supported by the device. In firmware 2.0.2, you need to press the Mode button to show the Miracast or WiDi splash screen. To use Miracast with an Android device, do the following: If you are using a wired setup, use an Ethernet cable to connect to your device. If you are using a wireless setup, add your device to your network. If you are in AP mode, connect your device directly to its own wireless network. See the home screen on the TV, monitor, or projector for instructions. Click Settings . Select the Screen Mirroring option. You should see a mirror image of the Android device on the TV, monitor, or projector. Note: Samsung devices with Miracast may require a patch from the Google Play store to function correctly with Miracast and WIFI2HDMC .
How do I use Miracast in Windows Vista / 7 / 8? [Firmware 2.0.0 to 2.0.4]
Note: The computer must be WiDi certified. WiDi is a built-in protocol that is based on Intel’s CPU and wireless networking cards. In firmware 2.0.2, you need to press the Mode button to show the Miracast or WiDi splash screen. To use Intel’s online Driver Update Utility to automatically check for new drivers and the WiDi application, navigate to http://www.intel.com/p/en_US/support/detect . Open the WiDi application on your computer. To start mirroring the screen, select the WIFI2HDMC option.
What network options do I have for connecting to the WIFI2HDMC, and what wireless encryption options are available? [Firmware 2.0.0 to 2.0.4]
Note: In firmware 2.0.2, you need to press the Mode button to switch between the two splash screens. The splash screens appear as follows: PC/NB, phone, tablet, iPhone and iPad Miracast and WiDi There are three ways that you can connect to the WIFI2HDMC, and they are listed below in order of performance. Wired The HDMI source is connected directly to the device using an Ethernet cable. By default, the IP address is assigned by DHCP but a static IP address can be set. AP Mode Note: This option is disabled when an Ethernet cable is connected or Wi-Fi is connected to another access point. The device acts as an access point that can be directly connected to and does not involve a network. The two encryption options are Open Network and WPA. Wireless The device is added to a wireless network and can be accessed by any other device on the network. The device is controlled by using the Web interface, which you can access by typing the IP address of the unit into a web browser. Initially, you need to set up some options. The IP address is assigned by DHCP, and a static IP address cannot be set by this device. The two encryption options are Open Network and WPA. Note: Miracast and WiDi use their own encryption methods.
My WIFI2HDMC is using firmware 2.0.0 and I need its MAC address. What do I do with a Windows based computer? [Firmware 2.0.0]
Note: The MAC address is listed on a splash screen with the 2.0.2 firmware update. Use an Ethernet cable to plug the device directly into a Windows computer. Click Start . If you are using a computer that is running Windows 8, press the Windows key + X . Do one of the following: Click Command Prompt or Run. Type cmd and press Enter . In the Command Prompt window, type arp -a and press Enter . A list of all of the IP addresses connected to the computer will be displayed, along with the MAC addresses associated with them. Note: The IP address for WIFI2HDMC is listed on one of the splash screens that is displayed when you move through the different modes. To determine the MAC address for WIFI2HDMC, compare the IP address displayed on the splash screen with the list displayed in the Command Prompt window.
What is this device’s default static IP address?
This device's default static IP address is 192.168.59.254.
When should I upgrade my device's firmware?
You should not upgrade your device's firmware if you do not have any issues with the functionality of your device. The only time you should consider an upgrade is if you are experiencing a problem with the device, and you have confirmed that the firmware addresses this problem. You can confirm this is the case by reviewing the documentation included with the firmware or by consulting with our Technical Support team. Incorrectly upgrading firmware can result in diminished performance so it is best to contact StarTech.com if you would like to perform this operation.
When should I use a longer video cable instead of a video extender?
Use a longer video cable whenever possible; use a video extender only when the required distance exceeds the reliable limits of standard or active cables. Explanation: Direct cabling is the preferred method for video connections because it maintains signal integrity and reduces complexity. Standard maximum cable lengths for common video signals are: Video standard Maximum length DisplayPort 50 ft. (15.2m) HDMI 50 ft. (15.2m) DVI 50 ft. (15.2m) VGA 200 ft. (71m) Active cables can extend these distances by incorporating built-in signal amplification and are designed to exceed standard length limits while maintaining specified performance. Video extenders are used when cable length requirements exceed what passive or active cables can reliably support. Extenders transmit the signal over longer distances by boosting and then restoring it, while maintaining the same video standard from input to output.
What is a video extender, and how can I tell if it will work in my setup?
A video extender (such as an HDMI extender or DisplayPort extender) transmits audio and video signals over longer distances than standard cables, and compatibility depends on signal type, bandwidth, resolution, distance, and cabling. Explanation: A video extender is a transmitter and receiver system that extends a video signal beyond standard cable limits by sending it over media such as Cat5e/Cat6 Ethernet, fiber optic cable, or wireless. Common types include HDMI extenders and DisplayPort extenders, often used for long-distance AV distribution. To determine if a video extender will work in a specific setup, verify the following: Signal compatibility: The extender must support the same video standard as the source and display (e.g., HDMI, DisplayPort) Resolution and bandwidth: Confirm support for required resolutions and bandwidth (e.g., 1080p, 4K, refresh rate, color depth) Distance and cable type: Ensure the extender supports the required distance over the intended medium (e.g., Cat6, fiber) Infrastructure type: Some extenders require direct point-to-point connections, while others (IP-based extenders) support network switches Latency requirements: Check latency specifications for real-time applications (e.g., gaming, AV control) Feature support: Verify support for audio, USB, IR control, HDCP, and EDID if needed Power requirements: Confirm power is available for transmitter and receiver units If the video extender does not match the signal type, bandwidth, or infrastructure, it may result in no signal, reduced resolution, increased latency, or unstable performance.
How can I connect this HDMI output to a VGA, DVI, or DisplayPort display?
An HDMI output can be connected to VGA, DVI, or DisplayPort displays using the appropriate adapter or video converter. The required solution depends on the input type of the display and whether HDCP-protected content is being used. Explanation: This device outputs HDMI video signals. If the display or video destination uses a different connection type, an adapter or active video converter may be required. Common conversion options include: VGA: An active HDMI to VGA converter is required because HDMI uses digital video signaling and VGA uses analog video signaling. DVI: A passive HDMI to DVI adapter or cable can be used because HDMI and DVI share compatible digital video signaling. DisplayPort: An active HDMI to DisplayPort converter is required because HDMI and DisplayPort use different signaling technologies. HDCP Considerations Before converting an HDMI signal, determine whether the source content is protected by High-bandwidth Digital Content Protection (HDCP). HDCP is commonly used by devices such as: Blu-ray players DVD players Streaming devices Gaming consoles If the HDMI source is transmitting HDCP-protected content, conversion to an analog video format such as VGA may not be supported because VGA does not support HDCP. In these situations, video may not display correctly or may not display at all. Best Practices For the most reliable results: Use the fewest possible adapters and converters. Verify the required resolution and refresh rate. Confirm that the converter supports the desired signal direction and video format. Consider HDCP requirements when converting protected content.
Related products
-
HDMI Signal Booster - HDMI Extender - 4K 60Hz - TAA
$79.94 Add to cart -
High Speed HDMI over Cat6 Active Extender - up to 80ft (25m)
$175.99 Add to cart -
HDMI over CAT6 Extender Kit - 4K 60Hz
$155.79 Add to cart -
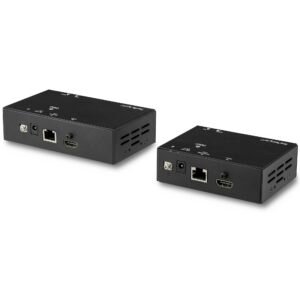
HDMI Over CAT6 Extender - Power Over Cable - Up to 70 m (230 ft.) - TAA
$308.51 Add to cart