
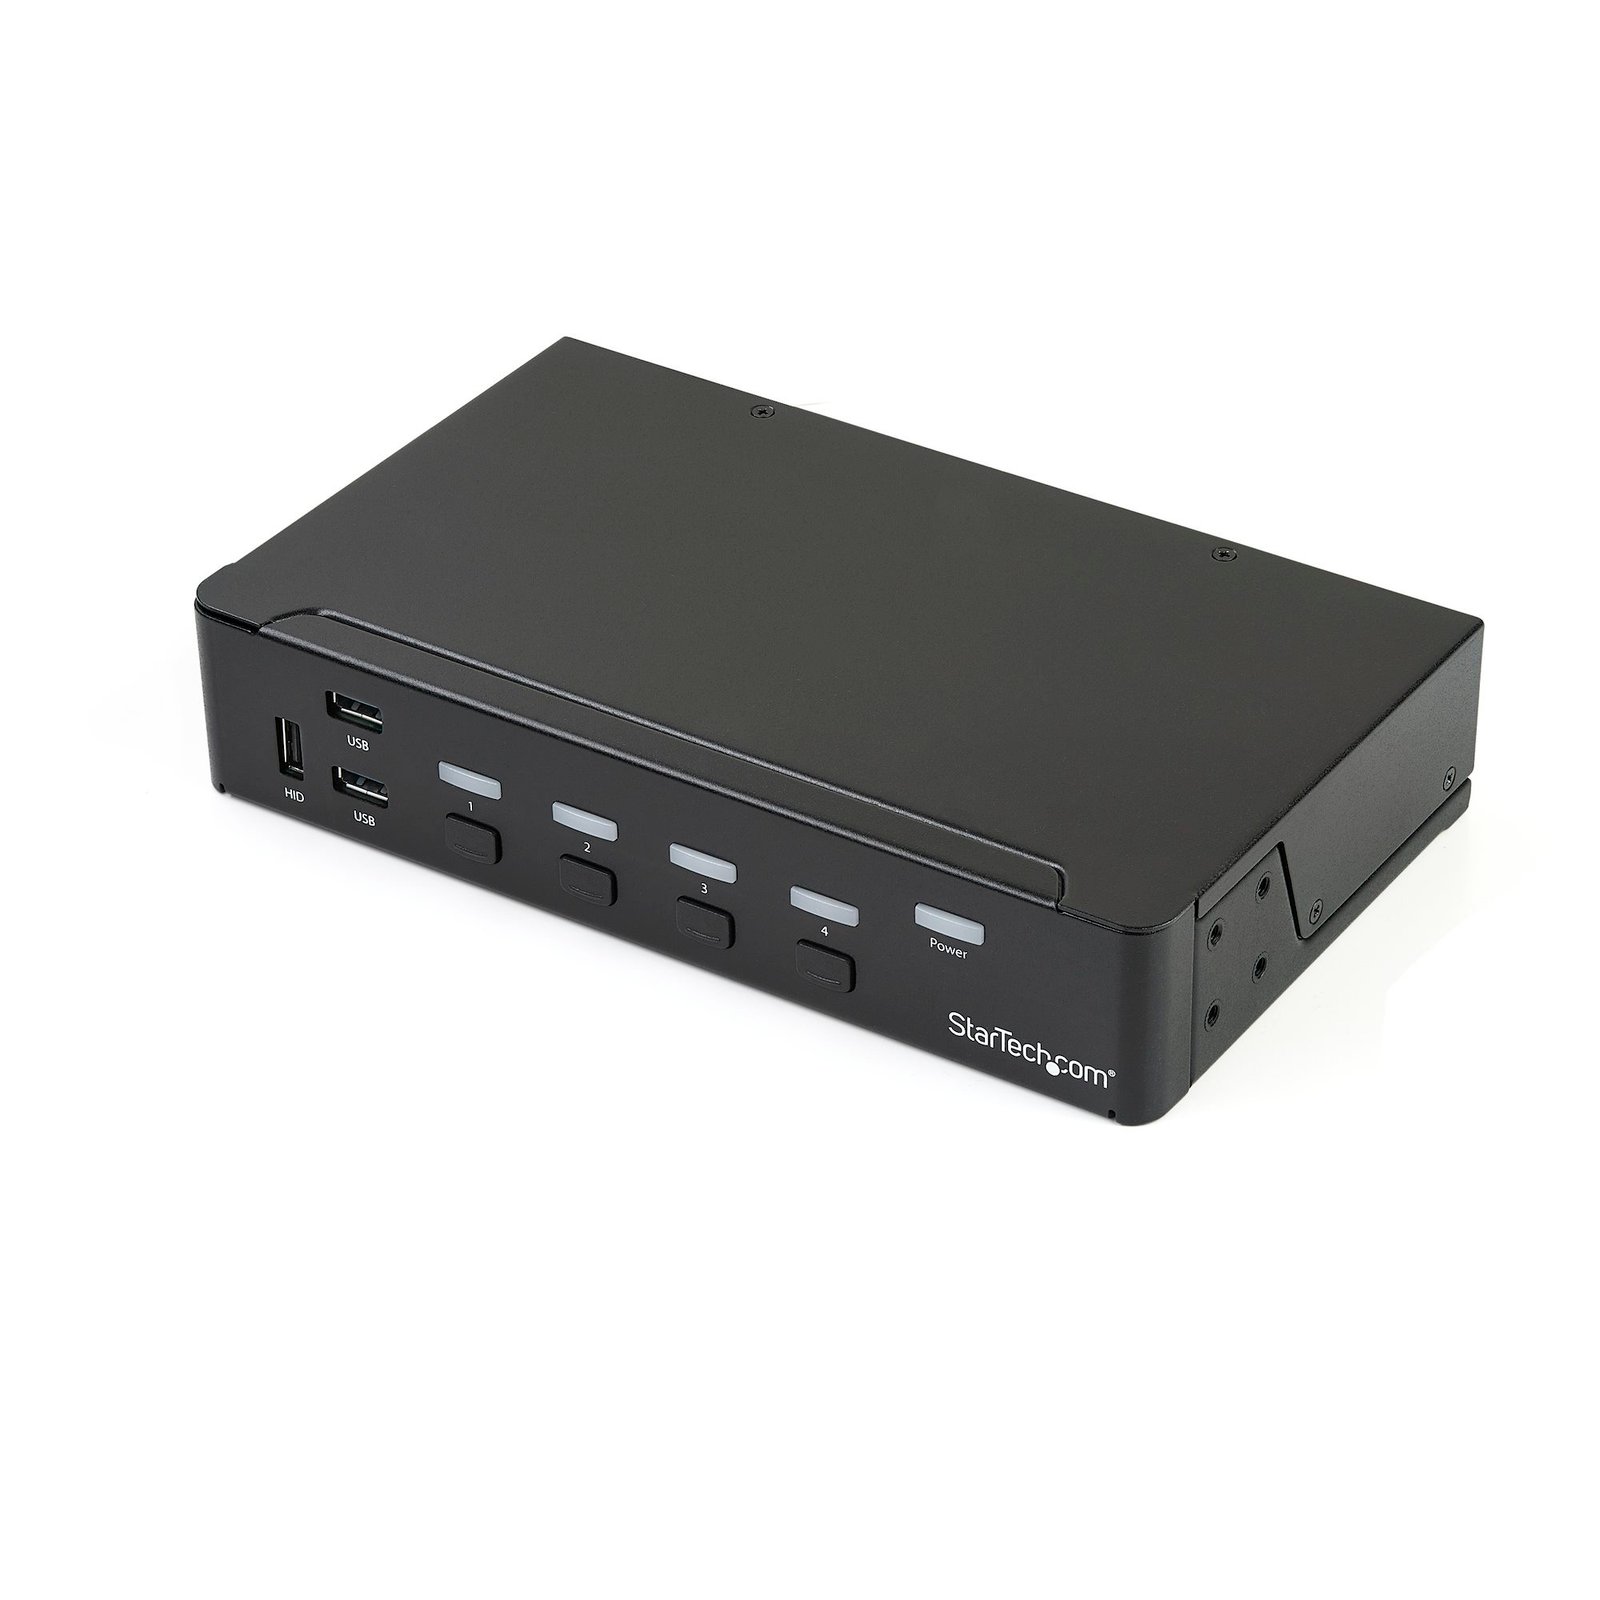
4-Port DisplayPort KVM Switch - USB 3.0 - 4K 30Hz - TAA
$474.56
Control four DP computers using a single console with a built-in USB 3.0 hub for sharing additional peripheral devices
Specifications & Compliance
- UPC
- 065030863728
- Brand
- StarTech.com
- Included in Package
- 1 - 4-port DisplayPort KVM switch, 4 - rubber feet, 1 - universal power adapter (NA, EU, UK, ANZ), 1 - quick start guide
- Shipping (Package) Weight
- 3.4 lb [1.6 kg]
- Weight of Product
- 2.3 lb [1.1 kg]
- Product Length
- 8.7 in [22 cm]
- Product Width
- 5.1 in [13 cm]
- Product Height
- 1.7 in [43 mm]
- Package Depth
- 9.8 in [25 cm]
- Package Width
- 11.7 in [29.7 cm]
- Package Height
- 3.5 in [88 mm]
- Color
- Black
- Warranty
- 2 Years
- Connector 1
- USB-A (5Gbps, 4.5W)
- Connector 1 (Quantity)
- 3
- Package Quantity
- 1
- Connector 2
- DisplayPort
- Connector 2 (Quantity)
- 1
- Operating Temperature
- 0°C to 40°C (32°F to 104°F)
- Storage Temperature
- -10°C to 60°C (14°F to 140°F)
- Humidity
- 0~80% RH Non-Condensing
- Industry Standards
- HDCP 2.2
- Power Source
- AC Adapter Included
- Special Notes
- <b>About video adapters</b><br> If you use a video adapter with this KVM switch, you must use an active video adapter. If you use a passive video adapter, you might encounter performance issues.<br> Check with the manufacturer to determine if the video adapter that you want to use is an active adapter.
- Input Voltage
- 100 - 240 AC
- Output Voltage
- 12V DC
- Connector 3
- 3.5mm (3 Conductors, TRS)
- Connector 3 (Quantity)
- 1
- Power Consumption
- 18
- MTBF
- 143000 hours
- LED Indicators
- 4 - port selection/link LEDs, 1 - power LED
- Output Current
- 1.5
- Maximum Digital Resolutions
- 3840x2160 @ 30 Hz
- Host Connector 1
- DisplayPort
- Host Connector 1 (Quantity)
- 4
- Audio
- Yes
- Plug Type
- M
- Connector 4 (Quantity)
- 4
- Wide Screen Supported
- Yes
- Maximum Cable Length
- 32.8 ft [10 m]
- Host Connector 2
- USB-B (5Gbps, 4.5W)
- Host Connector 2 (Quantity)
- 4
- Cascadable
- No
- Rack-Mountable
- Optional
- Number of KVM Ports
- 4
- IP Control
- No
- Supported Platforms
- USB 3.2 Gen 1 (5Gbps)
- PC Video Type
- DisplayPort
- Number of Monitors Supported
- 1
- On-Screen Display
- No
- Cables Included
- No
- Port Selection Support
- Push Button and Hotkeys
- Hot-Key Selection
- Yes
- Host Connector 3 (Quantity)
- 4
- CAC Support
- No
Questions & Answers
How do I set up my KVM switch?
Turn off all of the computers and monitors that will be connected to the KVM switch. Connect the power adapter to the KVM switch. Connect the video cables from your monitors to the console video port on the KVM switch. Turn on the monitors. Connect your keyboard and mouse to the console PS/2 or USB ports on the KVM switch. If you have not done so already, change the KVM switch to focus on port 1. Connect the video cables from PC1 to the KVM switch. Connect the PS/2 or USB cables from PC1 to the PC1 PS/2 or USB ports on the KVM switch. Turn on PC1. You should see the computer load the operating system that you are using on PC1. Make sure that the mouse and keyboard can control PC1. Repeat steps 4 to 8 for each additional computer that you want to connect to the KVM switch. Leave the computer in focus until you make sure that the mouse and keyboard can control the computer in step 8.
My Monitors are flickering when connected through the KVM Switch. What do I do?
Monitors may begin flickering when they receive a signal of insufficient quality. There are a few potential fixes available that will help to improve the signal quality in order to eliminate flickering: Replace Video Cables with high-quality Video Cables (e.g. upgrade DisplayPort 1.2 Cables to DisplayPort 1.4 Cables ). Use shorter Video Cables to reduce signal attenuation. When possible, remove Video Adapters to use native Video Connection Types (e.g. go from VGA to VGA , or DisplayPort to DisplayPort ) For DisplayPort Monitors , try changing the DisplayPort Version on the Monitor . For information on how to change your Monitor Settings refer to the Manual from the Monitor Manufacturer . Update the Drivers for the Computer’s GPU to the latest available from the Monitor Manufacturer .
Video and/or USB control works on one connected PC but not another. What do I do?
Ensure the video & USB cables are connected between each computer and the KVM switch Safely power off all computers. Unplug everything from the KVM switch and connect one computer at a time, swapping the inputs previously used (e.g., the computer connected to PC2 now connects to PC1). Power on each computer and confirm functionality before connecting the next one to the KVM switch. If using a KVM switch that supports multiple displays, ensure all video connections from the computer are from either the video card or motherboard, both cannot be used simultaneously on most systems.
Everything is hooked up but nothing is working. What should I do?
There are some quick tests that you can perform to rule out potential issues. Start by turning off all of the connected computers and peripherals, unplugging everything from the KVM, including power, and leaving it for 10 seconds. Then connect everything to the KVM following the procedure in the following FAQ: https://www.startech.com/faq/kvm-switches-setup . You can test to make sure that the following components are working correctly and are not the source of the issue: Video cables KVM switch Video source (such as a DVR or computer) Video destination (such as a monitor or projector) Note: When you are testing your setup components, it is recommended that you avoid using any video adapters. For example, if you are converting a VGA source to HDMI to be used with an HDMI extender, you should test with an HDMI source. To test your setup components, try the following: Use the video cable, KVM switch, video source, and video destination in another setup to see if the problem is with the components or the setup. Use a different video cable, KVM switch, video source, and video destination in your setup to see if the problem persists. Ideally, you should test a component that you know works in another setup. When you test your cables, it is recommended that you do the following: Test each cable individually. Use short cables when you are testing. When you test the video source and video destination, it is recommended that you do the following: Remove the KVM switch from your setup and test to make sure that the video source and video destination work together without the KVM switch. Test to make sure that the video source and video destination work together at the resolution that you want to use. Note: In order for your setup to work properly, the video source, KVM switch, and video destination all need to support the resolution that you are using.
My DisplayPort display is not working when I try to output 4K at 30Hz with this device. How do I resolve this issue?
To output 4K to a DisplayPort display at 30Hz, your monitor must support the resolution and refresh rate. If your monitor also supports 4K at 60Hz (DP 1.2 or higher), you may also need to set the monitor to work at 30Hz. To resolve this issue, use the buttons on your monitor to change the DisplayPort settings to DP1.1. For more information about how to change your monitor settings, refer to the website of the manufacturer of your monitor.
What is a KVM switch, and how do I determine if it is compatible with my setup?
A KVM switch allows you to control multiple computers with one keyboard, monitor, and mouse, and compatibility depends on matching the number of systems, connection types, and feature requirements. Explanation: A KVM (Keyboard, Video, Mouse) switch enables a single set of peripherals to control multiple computers. Many KVM switches also support additional devices such as USB peripherals and audio. There are several types of KVM switches designed for different use cases: Standard KVM switches : Connect multiple computers using a central unit. Cable KVM switches : Integrate cables into the design for simpler setups. Multi-monitor KVM switches : Support switching between multiple displays per computer. Secure KVM switches : NIAP-certified for secure environments. To ensure compatibility, verify the following: Number of computers : The KVM switch must support the total number of connected systems. Video interfaces : Match the video input/output types (such as HDMI, DisplayPort, or DVI) across all devices. Peripheral connections : Confirm support for USB or PS/2 keyboards and mice. Display requirements : Ensure the KVM switch supports the required resolution and number of monitors. Additional features : Check for audio support or hotkey switching if needed. Some KVM switches require specific or proprietary cables, which are included or listed as accessories for the product. Basic wired keyboards and mice are recommended, as wireless, gaming, or combined receiver devices may not function reliably with KVM switches.
What should I consider when choosing cables for a KVM switch?
KVM cable requirements depend on the specific KVM switch; some use standard cables, while others require proprietary cables designed for that model. Explanation: KVM switches connect multiple computers to a single set of peripherals, and each connected computer typically requires one set of cables. Cable requirements vary by KVM switch design: Standard KVM switches : Use standard video (such as HDMI, DisplayPort, or DVI) and USB or PS/2 cables. These cables can be purchased individually or as bundled kits for convenience. Opposite gender connections : Some KVM switches use different connector genders for computer and console ports to prevent incorrect connections. These setups may require extension cables or specific cable kits. Proprietary cable KVM switches : Some models, especially those designed for server environments, require proprietary cables. These cables combine video and USB or PS/2 signals into a single connector and cannot be replaced with standard cables. To determine the correct cables: Check the product’s Technical Specifications and “What’s in the Box” to see if cables are included. Review the Accessories section for compatible cable options. Inspect the port layout; if there are no standard USB or PS/2 ports for computers, proprietary cables are required. Using the correct cable type is essential to ensure proper functionality and compatibility with the KVM switch. If at this point you require further assistance in deciding which cables to purchase with your StarTech.com KVM switch, contact our technical support team.
Are all mice and keyboards compatible with this StarTech.com KVM switch?
No, not all mice and keyboards are compatible; standard HID-compliant wired devices are recommended, while advanced or high-power devices may not function correctly. Explanation: StarTech.com KVM switches are designed to support standard HID (Human Interface Device) keyboards and mice, including common wired and wireless models from major brands. However, compatibility depends on the device’s features and power requirements. Keyboards and mice with programmable keys, built-in USB or audio pass-through ports, or high power consumption (such as RGB lighting) may not work reliably through the dedicated HID ports. For consistent performance, use a basic wired keyboard and mouse. If a device does not function through the HID ports, it can be connected to the KVM switch’s USB hub ports, if available, which provide broader compatibility. However, when a keyboard is connected through the USB hub ports instead of the HID port, KVM-specific functions such as hotkey switching may not be supported.
Why do my windows resize/rearrange when I switch computers?
The Display Data Channel (DDC) communication from each connected computer can be disrupted when the focus of a KVM switch is switched between computers. This causes the computer to revert to a basic display configuration. In which any windows open may resize and/or move to a single display. This behavior is common among high-resolution or multi-display DisplayPort KVM switches and is not exclusive to StarTech.com products. To avoid this behavior: A DisplayPort EDID emulator can be connected between the computer and the DisplayPort KVM Switch. The DisplayPort EDID Emulator maintains the DDC communication to the connected computer, which prevents the computer from reverting to a more basic display configuration. In Windows this can be worked around by pressing “Windows Key + m” prior to switching and “Windows Key + Shift + m” when you have returned to that Computer.
What DC barrel connector power plug types do StarTech.com products use, and what are their dimensions?
StarTech.com DC barrel connector plug types are defined in the “Plug Type” field of the technical specifications, using a letter code that specifies the connector’s outer diameter (OD) and inner diameter (ID) in millimeters for power adapter compatibility. Explanation: In StarTech.com technical specifications, the “Plug Type” field is a standardized identifier for the exact DC barrel connector size required to power a product. Each plug type is assigned a letter code that corresponds to a specific combination of outer diameter (OD) and inner diameter (ID), measured in millimeters. Common DC barrel plug type dimensions Plug Type OD ID A 2.35 mm 0.7 mm B 4.0 mm 1.7 mm C 4.75 mm 1.7 mm H 3.4 mm 1.3 mm L 5.0 mm 2.5 mm M 5.5 mm 2.1 mm N 5.5 mm 2.5 mm The DC barrel connector plug type must match both the outer diameter and inner diameter exactly. A mismatch between the StarTech.com product requirement and the power adapter connector can prevent proper fit or stable power delivery, which may result in device startup failure or intermittent operation. The plug type defines only the physical connector size. The plug type does not define electrical power requirements such as voltage, current, or polarity. The power adapter used with a StarTech.com product must match the product’s specified electrical requirements. Using an incompatible power adapter can cause device malfunction or permanent damage. This standardized DC barrel connector plug type system enables IT professionals and procurement teams to verify connector dimensions, ensure power adapter compatibility, standardize hardware deployments, and identify the correct replacement power supply for StarTech.com products.
Related products
-
4-Port DisplayPort KVM Switch, 8K 60Hz / 4K 144Hz, Single Display, DP 1.4, 2x USB 3.0 Ports, 4x USB 2.0 HID Ports, Push-Button & Hotkey Switching, TAA Compliant - OS Independent, Metal Housing
$512.49 Add to cart -
2-Port USB-C Cable KVM Switch, 4K 60Hz DisplayPort Output, Compact KVM with 4ft/1.2m USB Type-C/Audio Integrated Cables, Bus Powered - Remote Push-Button/Hotkey Switching
$126.99 Add to cart -
2-Port Dual-Monitor DisplayPort KVM Switch, 4K 60Hz, 2x USB 5Gbps Hub Ports, 2x USB 2.0 HID Ports, Hotkey and Push-Button Switching, TAA Compliant - 3.5mm Audio, HDCP
$413.06 Add to cart -
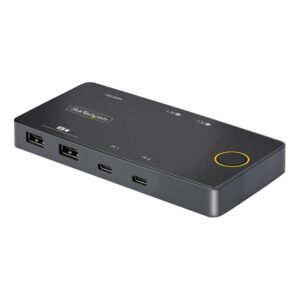
2-Port USB-C KVM Switch, Single-4K 60Hz HDMI Monitor, Dual-100W Power Delivery Pass-through Ports, Bus Powered, USB Type-C/USB4/Thunderbolt 3/4 Compatible - Small Form Factor - TAA
$209.09 Add to cart