
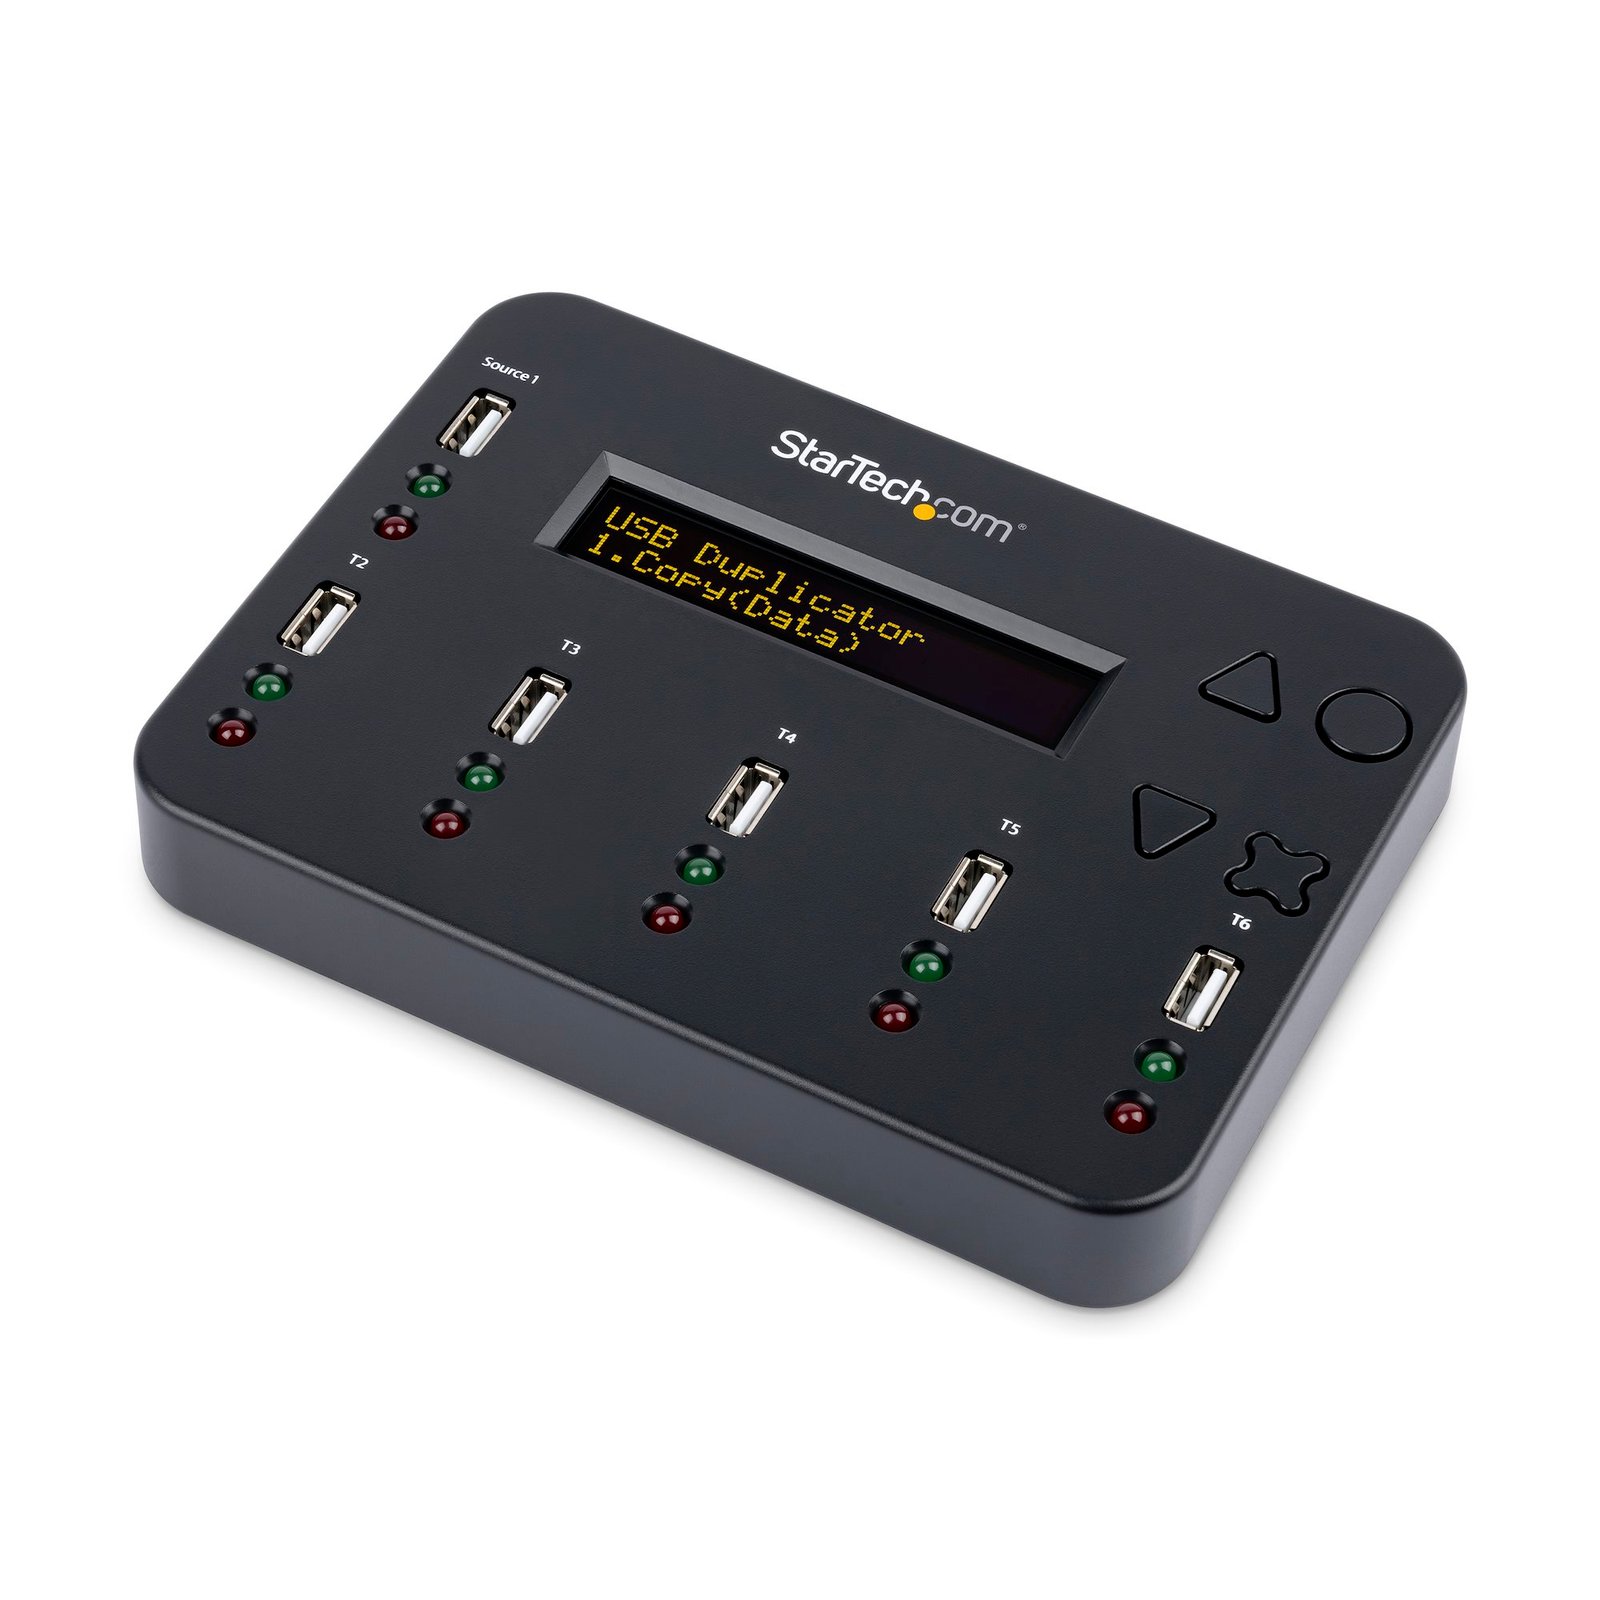
Standalone 1 to 5 USB Thumb Drive Duplicator and Eraser, Multiple USB Flash Drive Copier, System and File and Whole-Drive Copy at1.5 GB/min, Single and 3-Pass Erase, LCD Display - TAA
$479.99
Standalone 1 to 5 USB Thumb Drive Duplicator & Eraser, Flash Drive Copier
Specifications & Compliance
- UPC
- 065030856508
- Brand
- StarTech.com
- Included in Package
- 1 - Duplicator, 1 - Universal power adapter: comes ready for NA/EU/UK only when you buy in NA/EU/UK; comes ready for Australia and New Zealand only when you buy in Australia and New Zealand, 1 - Instruction Manual
- Shipping (Package) Weight
- 25.2 oz [714 g]
- Weight of Product
- 11.2 oz [318 g]
- Product Length
- 6.6 in [16.7 cm]
- Product Width
- 4.7 in [12 cm]
- Product Height
- 1.0 in [25 mm]
- Package Depth
- 7.0 in [17.7 cm]
- Package Width
- 9.0 in [22.9 cm]
- Package Height
- 3.3 in [83 mm]
- Color
- Black
- Warranty
- 2 Years
- Connector 1
- USB-A (480Mbps, 2.5W)
- Connector 1 (Quantity)
- 6
- Operating Temperature
- 5°C ~ 45°C (41°F ~ 113°F)
- Storage Temperature
- -20°C ~ 85°C (-4°F ~ 185°F)
- Humidity
- 5% ~ 95% RH
- Material
- Plastic
- Power Source
- AC Adapter Included
- Input Voltage
- 100 - 240 AC
- Output Voltage
- 12V DC
- Power Consumption
- 36
- MTBF
- 176,549 hours
- LED Indicators
- 5 - Green (Activity/Successful Copy), 5 - Red (Error)
- Bus Type
- USB 2.0
- Output Current
- 3
- System and Cable Requirements
- For duplication, the destination drives must be of equal or greater capacity than the source drive., For erasing, only the destination ports are active, the source port cannot be used. This helps to prevent erasing a source drive accidentally., Supports copying/cloning/erasing to Hard Drives or Solid State Drives through a Hard Drive docking station or USB enclosure (sold separately) if supported by the storage media
- Plug Type
- M
- Center Tip Polarity
- Positive
- Compatible Drive Types
- USB Flash Drive
- Number of Drives
- 6
- Drive Installation
- Removable
- Max Drive Capacity
- 2TB
- Buffer Size
- 64 MB
- Duplication Modes
- System and File, Sector by Sector (Whole Drive)
- Duplication Speed
- 1.5GBpm
- Erase Modes
- Quick Erase, 1-Pass Overwrite (NIST SP 800-88 Rev 1 - Clear), 3-Pass Overwrite
Questions & Answers
Everything is hooked up, but nothing is working. What do I do?
When you troubleshoot issues with a hard drive dock or duplicator, there are some quick tests that you can complete to rule out potential problems. You can test to make sure that the following components are working correctly and are not the source of the issue: IDE, SATA, and eSATA cables Hard drives Hard drive dock or duplicator To test your setup components, try the following: Use the cables, hard drives, and hard drive dock or duplicator in another setup to see if the problem is with the components or the setup. Use a different cable, hard drive, and hard drive dock or duplicator in your setup to see if the problem persists. Ideally, you should test a component that you know works in another setup. When you test the hard drive and hard drive dock or duplicator, it is recommended that you do the following: Note: For a hard drive duplicator you may need to switch the device to PC mode (if available). To check Disk Management, press the Windows key + R , type diskmgmt.msc , and press Enter . Check to see if your hard drive is listed. Do one of the following: If the hard drive is listed with unallocated space, the hard drive needs to be reformatted. Right-click unallocated and click New Simple Volume. Follow the on-screen instructions to complete the reformatting. Note: Formatting a hard drive erases all of the data on it. Make sure that you back up all of your data before you reformat the hard drive. If the hard drive is listed as healthy but does not have a drive letter, for example, C:, right-click healthy and click Change Drive Letter and Paths . Click Add , assign a drive letter, and click OK . Note: A formatted hard drive will not show up in Computer or My Computer until it has a drive letter assigned to it.
Do I need to format my target hard drive before I begin to duplicate it?
You do not need to format your target hard drive before you begin to duplicate it, because the target hard drive is automatically overwritten during the duplication process.
How do I get the full size of my hard drive after a duplication?
The hard drive duplicator copies the exact partition from the source drive to the target drive. Since it is required that you use a target drive that is equal or larger in size than the source drive a portion of the target drive appears as free space. You can append free space to the live partition on the target drive so that the full size of the drive can be utilized. Note: A partition cannot be extended on an operating system drive that is in use. You must extend the partition when it not being used by the operating system, and ideally when it is still connected to the duplicator. Extend a partition on a computer running Windows Note: Do not extend a System Reserved partition. Only extend the primary partition, which is typically the largest in size and formatted with NTFS or FAT32. After you have successfully duplicated a drive and the target drive is still connected to your computer system (for example, through the duplicator), complete the following: Press the Windows key + R . Type compmgmt.msc and click Ok . In Computer Management , on the left side of the screen, click Disk Management . Find the target drive. It will most likely be at the bottom of the list, have a partition that is the same size as the source drive, and have an unallocated area on the drive. On the target drive, right-click the last partition on the right side of the screen and click Extend Volume . In the Extend Volume wizard, click Next . By default, the remaining drive area is the amount of space used. Click Next > Finish . The primary partition on the drive now uses the entire drive area.
Is the source hard drive modified during a standalone duplication?
StarTech.com hard drive duplicators only read from the source drive and only write to the target drives while in standalone duplication mode . A duplication that fails or halts will not cause a problem with the source drive.
Can I use this device to duplicate an internal hard drive?
You can use this device to duplicate an internal hard drive with the stand alone duplicator function if you remove the hard drive from the computer and connect it directly to this device.
Why can’t a StarTech.com drive duplicator clone to a smaller drive or to another brand with the same advertised capacity?
A StarTech.com drive duplicator cannot clone to a smaller drive, and the target drive must have equal or greater sector capacity than the source drive, even if both drives have the same advertised size. Explanation: StarTech.com hard drive and flash drive duplicators use sector-by-sector cloning, which copies every sector from the source drive to the target drive, including empty sectors. This method requires the target drive to have at least the same total number of addressable sectors as the source drive. Drives with the same advertised capacity (for example, 500 GB) can have different actual sector counts depending on the manufacturer or model. A target drive with fewer sectors will not support the cloning process, even if both drives are labeled with the same capacity. Cloning performance is based on total drive capacity, not the amount of stored data. For example, cloning a 500 GB drive takes the same amount of time whether the drive contains 50 GB or 450 GB of data.
Can a StarTech.com hard drive duplicator clone encrypted drives or drives with HPA or EISA partitions, and why might cloning fail?
It depends: a StarTech.com hard drive duplicator can clone software-encrypted drives, but it cannot clone hardware-encrypted or BIOS-locked drives, and it typically cannot copy HPA or EISA protected partitions. Explanation: StarTech.com hard drive duplicators use sector-by-sector cloning, which copies all readable sectors exactly as stored on the source drive. Software-level encryption: Supported. The StarTech.com hard drive duplicator copies encrypted data as raw sectors without requiring decryption. Hardware-level encryption and BIOS drive locks: Not supported. These protections block access to sectors, preventing the StarTech.com hard drive duplicator from reading or writing data, which causes cloning to fail. HPA (Hidden Protected Area) and EISA partitions: Not supported in most cases. These protected regions restrict sector access, which can cause the duplication process to halt and fail. Select StarTech.com models (UNIDUPDOCK, SATDOCK22RE, SATDOCK4U3RE) provide support for copying HPA partitions. However, successful cloning depends on how the HPA partition is implemented and whether encryption is applied to those sectors.
Can a StarTech.com hard drive duplicator clone a failing or damaged hard drive with bad sectors?
No, a StarTech.com hard drive duplicator is not designed to clone failing or damaged drives, and cloning may fail if unreadable sectors are encountered. Explanation: StarTech.com hard drive duplicators use sector-by-sector cloning, which requires access to all readable sectors on the source drive. If the duplicator encounters a corrupt or unreadable sector, the cloning process typically halts and fails. Some StarTech.com duplicator models include a Read Error Skip feature, which allows the duplicator to bypass unreadable sectors and continue cloning. However, if the source drive contains too many bad sectors, the cloning process may still fail even with this feature enabled. StarTech.com hard drive duplicators are not data recovery tools. For drives with significant damage or corruption, specialized third-party data recovery software or dedicated recovery hardware is required to attempt data extraction.
Can a StarTech.com USB flash drive duplicator be used with external hard drives, and how does it affect copy speed?
Yes, a StarTech.com USB flash drive duplicator can be used with external hard drives, but copy performance is significantly slower due to USB interface limitations. Explanation: StarTech.com USB flash drive duplicators are designed for USB flash media but can also function with external hard drives connected through USB enclosures. However, USB flash drive duplicators operate at fixed duplication speeds that are typically optimized for flash media. For example, models such as the USBDUP12 and USBDUP15 duplicate data at approximately 1.5 GB per minute. Because of this speed limitation, using a high-capacity external hard drive as the source or target significantly increases total copy time. For example, cloning a 1 TB external hard drive can take approximately 11 hours. Performance is constrained by the duplicator’s maximum throughput rather than the potential speed of the external hard drive.
What DC barrel connector power plug types do StarTech.com products use, and what are their dimensions?
StarTech.com DC barrel connector plug types are defined in the “Plug Type” field of the technical specifications, using a letter code that specifies the connector’s outer diameter (OD) and inner diameter (ID) in millimeters for power adapter compatibility. Explanation: In StarTech.com technical specifications, the “Plug Type” field is a standardized identifier for the exact DC barrel connector size required to power a product. Each plug type is assigned a letter code that corresponds to a specific combination of outer diameter (OD) and inner diameter (ID), measured in millimeters. Common DC barrel plug type dimensions Plug Type OD ID A 2.35 mm 0.7 mm B 4.0 mm 1.7 mm C 4.75 mm 1.7 mm H 3.4 mm 1.3 mm L 5.0 mm 2.5 mm M 5.5 mm 2.1 mm N 5.5 mm 2.5 mm The DC barrel connector plug type must match both the outer diameter and inner diameter exactly. A mismatch between the StarTech.com product requirement and the power adapter connector can prevent proper fit or stable power delivery, which may result in device startup failure or intermittent operation. The plug type defines only the physical connector size. The plug type does not define electrical power requirements such as voltage, current, or polarity. The power adapter used with a StarTech.com product must match the product’s specified electrical requirements. Using an incompatible power adapter can cause device malfunction or permanent damage. This standardized DC barrel connector plug type system enables IT professionals and procurement teams to verify connector dimensions, ensure power adapter compatibility, standardize hardware deployments, and identify the correct replacement power supply for StarTech.com products.
How do I initialize a brand new hard drive in Windows or Mac OS?
Windows 10 Before you can access a new or formatted drive in your operating system, you need to initialize it first and then create a partition on the drive. A partition defines an area of the drive to use for storing data. The partition uses a file system (for example, ex-FAT, NTFS, and so on). Initialize a drive Note: You typically only need to initialize a drive if the drive is new. If you cannot find an uninitialized drive in Disk Management, skip the following steps and try to partition your device. Press the Windows key + R , type compmgmt.msc , and click Run to open Computer Management . Navigate to Disk Management . When prompted to, initialize your disk(s). If you are running Windows ® 7 or later and are using a drive larger than 2TB, initialize the disk(s) with GPT. If you are running an earlier version of Windows, initialize the disk(s) with MBR. For more information, visit the following FAQ: https://www.startech.com/en-us/support/faqs/technical?topic=harddrives#mbr-vs-gpt . Click OK . Create a partition in a drive Note: The following steps create an NTFS partition that uses the entire drive space. To use a different file system, select a different option in step 6. Right-click Unallocated or RAW volume , and select New Simple Volume . In the New Partition Wizard , click Next . Select Primary partition . Leave the partition size set to default , and click Next . Assign a drive letter or leave it set to the default, and click Next . Enter the following settings to format the partition: In the File System field, enter NTFS . Set the Allocation unit size to Default . In the Volume label field, enter < your name/reference >. Select the Perform a quick format check box. Clear the Enable file and folder compression check box. Click Next > Finish . The new drive should appear in Windows Explorer. Mac OS Before you can access a new or formatted drive in your operating system, you need to initialize it first and then create a partition on the drive. A partition defines an area of the drive to use for storing data. The partition uses a file system (for example, HFS+, ex-FAT, NTFS, and so on). Initialize a drive Mac OSX detects a drive that needs to be initialized and automatically prompts you to initialize the drive. If you are prompted to initialize the drive, click Initialize . If you are not prompted to initialize the drive and you cannot find the drive in Finder , you will need to create a partition on the drive. Create a partition on a drive Note: The following steps create an HFS+ (Mac OS Extended (Journaled)) partition that uses the entire drive space. To create a partition on a new drive, complete the following: Open Finder . Navigate to Applications and click Utilities . Open Disk Utility . Select the new drive and click the Partition tab. Click Options and verify that it is set to GUID Partition Table . Enter a name for the partition. Click Partition . The drive should now be accessible in Finder. For products related to this article, click here .
Related products
-
Standalone 1:3 SATA 2.5 / 3.5” Hard Drive Duplicator and Eraser w/ Daisy Chaining
$692.99 Add to cart -
1:1 Standalone Hard Drive Duplicator and Eraser, SAS and SATA HDD/SSD Cloner/Copier, Hard Disk Duplicator/Sanitizer, Harddrive Wiper, LCD Display, Toolless, No PC Required - TAA Compliant
$1,240.24 Add to cart -
Standalone 1 to 2 USB Thumb Drive Duplicator and Eraser, Multiple USB Flash Drive Copier, System and File and Whole-Drive Copy at 1.5 GB/min, Single and 3-Pass Erase, LCD Display - TAA
$142.46 Add to cart -
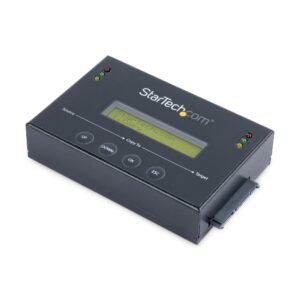
1:1 Standalone Hard Drive Duplicator with Disk Image Manager For Backup and Restore, Store Several Disk Images on one 2.5/3.5" SATA Drive, HDD/SSD Cloner, No PC Required - TAA
$342.34 Add to cart