
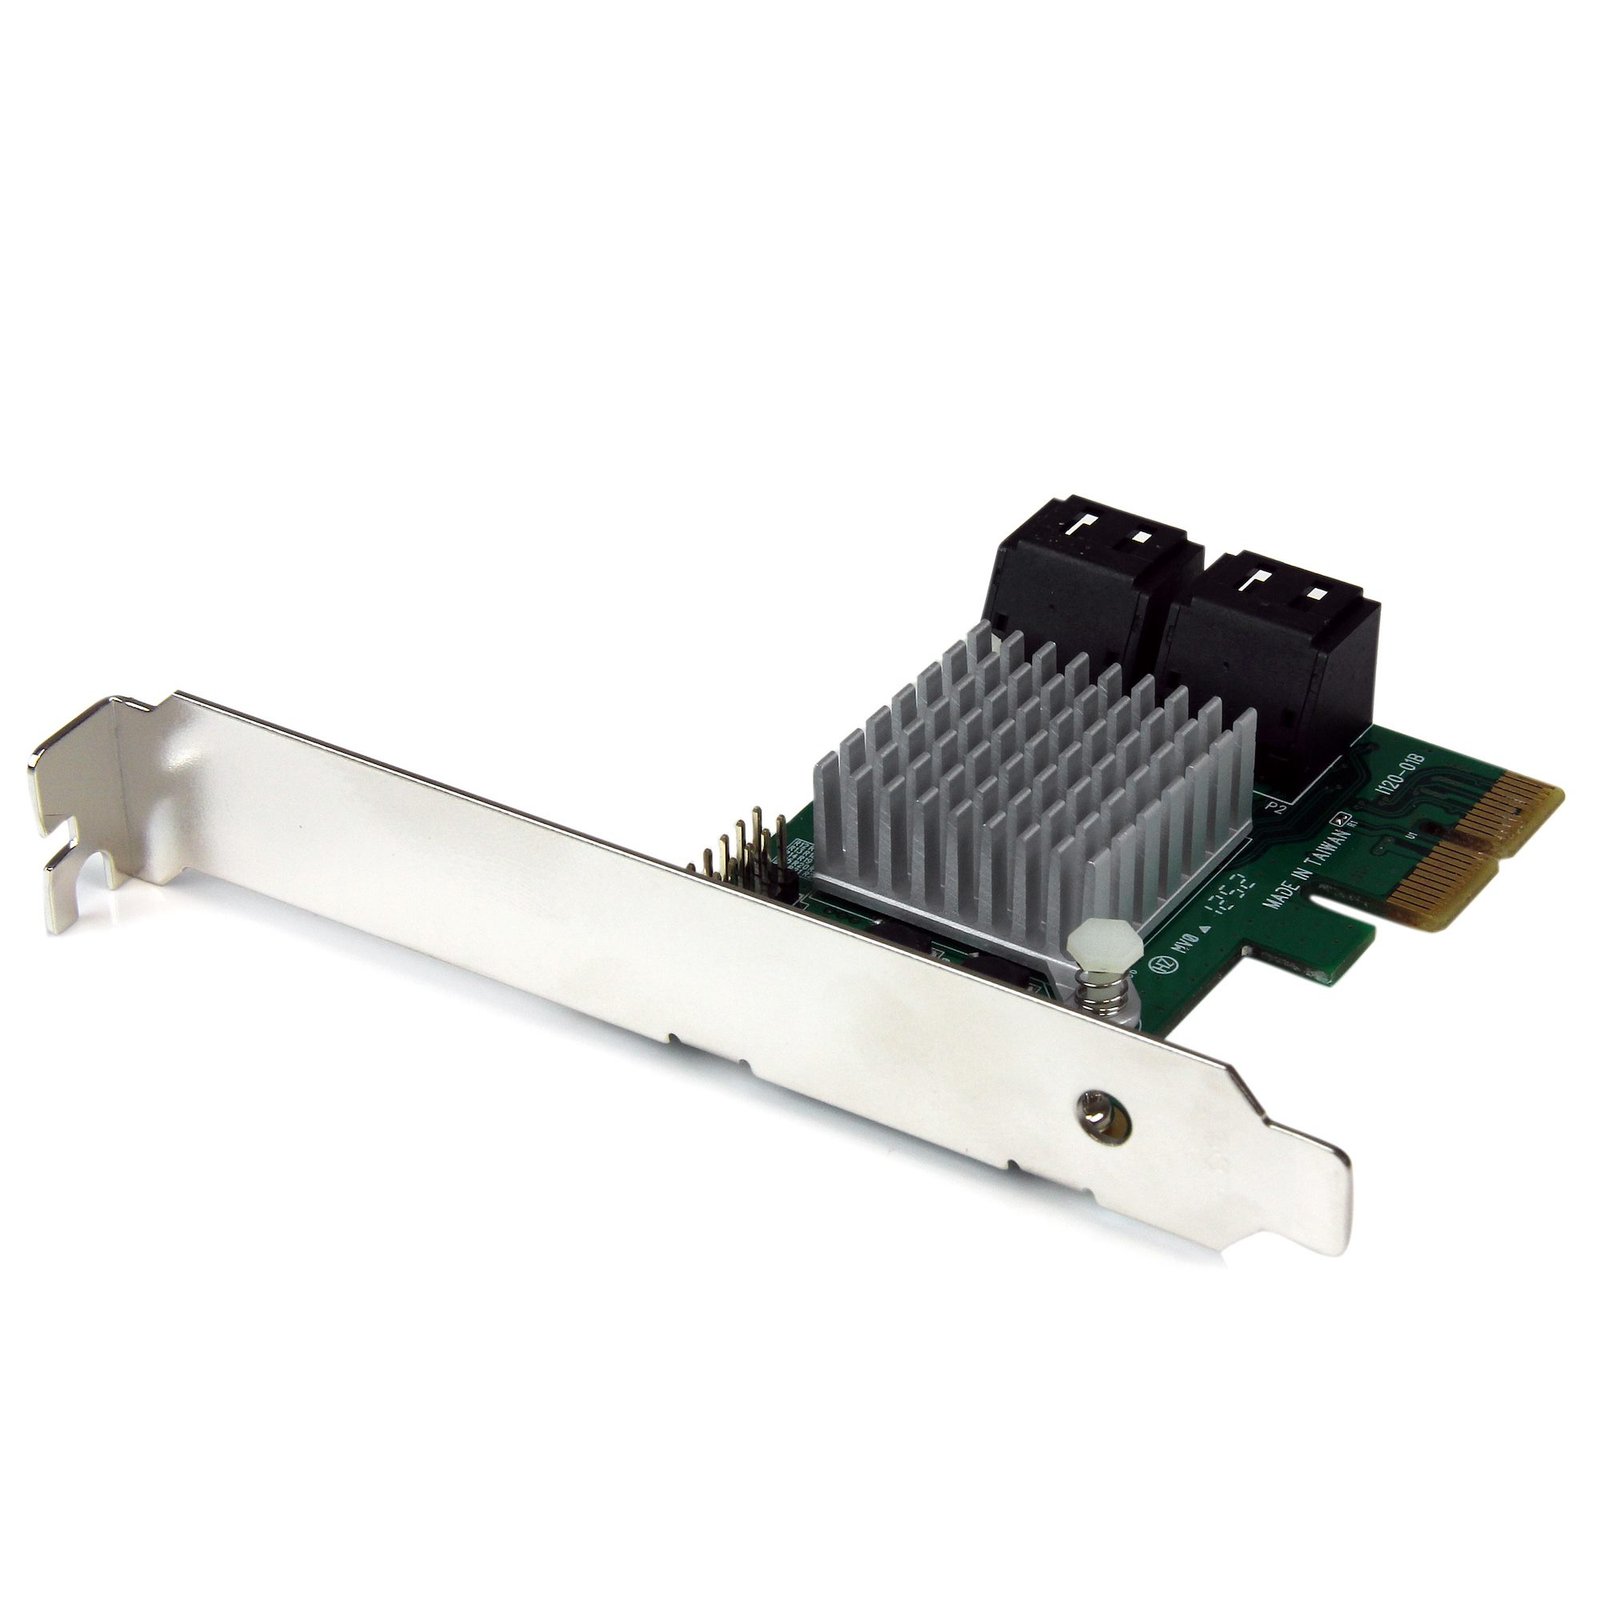
4 Port PCI Express 2.0 SATA III 6Gbps RAID Controller Card with HyperDuo SSD Tiering - TAA
$98.39
Add 4 Internal SATA III (6Gbps) ports to a computer through a PCI Express x2 slot
Specifications & Compliance
- UPC
- 065030849951
- Brand
- StarTech.com
- Included in Package
- 1 - PCIe SATA Controller Card, 1 - Low Profile Bracket, 1 - Driver CD, 1 - Instruction Manual
- Shipping (Package) Weight
- 5.5 oz [156 g]
- Weight of Product
- 1.7 oz [49 g]
- Product Length
- 2.8 in [70 mm]
- Product Width
- 4.7 in [12 cm]
- Product Height
- 0.8 in [20 mm]
- Package Depth
- 5.7 in [14.4 cm]
- Package Width
- 6.9 in [17.4 cm]
- Package Height
- 1.2 in [30 mm]
- Color
- Green
- Warranty
- 2 Years
- Connector 1
- PCI Express x2
- Connector 1 (Quantity)
- 1
- Package Quantity
- 1
- Connector 2
- SATA (7-Pin)
- Connector 2 (Quantity)
- 4
- Operating Temperature
- 5°C ~ 50°C (41°F ~ 122°F)
- Storage Temperature
- -25°C ~ 70°C (-13°F ~ 158°F)
- Humidity
- 20% ~ 80% RH
- Material
- Steel
- Industry Standards
- Serial ATA 3.0 specification, PCI Express 2.0
- Chipset ID
- Marvell - 88SE9230
- Special Notes
- <p>The maximum throughput of this card is limited by the bus interface. If used with PCI Express Gen 1.0 enabled computers, the max throughput is 2.5 Gbps per lane. If used with PCI Express Gen 2.0 enabled computers, the max throughput is 5 Gbps per lane.</p> <p>Only one port can use the Port Multiplier feature at a time. Supports up to 4 drives connected via Port Multiplier, 7 drives total.</p> <p>Port Multiplier not supported in Mac OS.</p> <p>Note: Connected drives cannot be used as System / Primary drive in Windows Server 2012, 2012 R2, 2016, 2019, 2022, 2025<p>, <p>The Marvell Storage Utility application requires macOS 10.9 to 10.14.<p>
- Input Voltage
- 12V DC
- Output Voltage
- 12V DC
- Number of Ports
- 4
- Interface
- SATA
- Bus Type
- PCI Express
- System and Cable Requirements
- Available PCI Express x2 slot (backward compatible with x4, x8, and x16 slots)
- Card Type
- Standard Profile (LP bracket incl.)
- SATA Type and Rate
- SATA III (6 Gbps)
- Port Style
- Integrated on Card
- RAID
- Yes
- Max Drive Capacity
- Currently tested up to 4TB per drive
- Hot Swap Capability
- Yes
- Port Multiplier
- Yes
Questions & Answers
Why are my drives not detected during Windows installation, and how do I make them available?
If the storage drives are not visible during Windows installation, you may need to load the RAID or storage controller driver before the installer can detect the drives. Explanation: During Windows Setup, storage drives connected to certain RAID or storage controllers may not appear automatically because the required controller driver is not included with the Windows installation media. If you reach the "Where do you want to install Windows?" screen and no drives are listed: Select Load Driver. Connect a USB flash drive or insert media containing the storage controller or RAID driver. Browse to the driver location and load the driver that matches the operating system being installed. Once the driver is loaded, Windows Setup should detect the connected storage drives and make them available for installation. Without the appropriate controller driver, Windows Setup may not be able to detect drives connected through RAID or specialized storage controllers.
How do I install my hard drive controller card in Windows 7, Windows 8, Windows 10, or Windows 11? (.exe method)
To install your hard drive controller card in Windows, download the latest driver package from StarTech.com, extract the files, run Setup.exe as an administrator, and restart the computer if prompted. Explanation: Before installing the hard drive controller card, ensure that Windows is fully updated with the latest service packs, security updates, and feature updates available for your operating system. To install the driver: Download the latest driver package from the StarTech.com Drivers & Downloads page. Extract the contents of the downloaded ZIP file. Open the extracted folder. Right-click Setup.exe and select Run as administrator . Follow the on-screen instructions to install the driver. Restart the computer if prompted. After Windows restarts, the operating system will complete the driver installation and the hard drive controller card will be ready to use. Note: If Run as administrator is not available, ensure that you are launching Setup.exe from the extracted folder rather than directly from within the ZIP file.
How do I install my hard drive controller card in Windows XP? (.exe method)
Before you install the device, make sure that your operating system is current (for example, the most recent service pack is installed). Download the latest drivers from the StarTech.com website at http://www.startech.com/Support . The part number and product ID are on the product packaging. Note: Windows usually saves the files to the Downloads folder that is associated with your user account (for example, C:Documents and Settings your_name My DocumentsDownloads). After the download is complete, right-click the zip folder that you downloaded, click Extract All , and complete the instructions. In the list of extracted files, double-click the Setup.exe file. Complete the instructions to install the device drivers, and restart your computer when prompted to. Your computer will automatically complete the driver installation and your device should be ready to use.
My computer will not boot up with the card installed. How do I fix this?
Try updating the Motherboard BIOS and use the card in another PCI Express slot. If that does not help experiment with disabling any onboard RAID controllers or other SATA controllers.
Everything is hooked up but nothing is working. What should I do? (Windows)
When you troubleshoot issues with a hard drive controller card, there are some quick tests that you can complete to rule out potential problems. You can test to make sure that the following components are working correctly and are not the source of the issue: IDE, SATA, and eSATA cables Hard drives Hard drive controller card To test your setup components, try the following: Use the IDE, SATA, or eSATA cable, hard drive, and hard drive controller card in another setup to see if the problem is with the components or the setup. Use a different IDE, SATA, or eSATA cable, hard drive, and hard drive controller card in your setup to see if the problem persists. Ideally, you should test a component that you know works in another setup. When you test your cables, it is recommended that you do the following: Test each cable individually. Use short cables when you are testing. When you test the hard drive and hard drive controller card, it is recommended that you do the following: To open the Device Manager, press the Windows key + R , type devmgmt.msc , and press Enter . Check the IDE ATA/ATAPI controllers (for IDE) section, or the Storage controllers (for SATA) section. Do one of the following: If you do not see the hard drive controller card in Device Manager, refer to the following FAQ: https://www.startech.com/en-us/faq/pci-pcie-cannot-boot-os-or-detect-windows . If the device is listed with an error, reinstall the drivers by completing the instructions on the website. If the hard drive is listed with unallocated space, the hard drive needs to be formatted. Right-click unallocated and click New Simple Volume . Follow the on-screen instructions to complete the reformatting. Note: Formatting a hard drive erases all of the data on it. Make sure that you back up all of your data before you reformat the hard drive. To check Disk Management , press the Windows key + R , type diskmgmt.msc , and press Enter . Check to see if your hard drive is listed. If the hard drive is listed as healthy but does not have a drive letter, for example, C:, right-click healthy and click Change Drive Letter and Paths . Click Add , assign a drive letter, and click OK . Note: A formatted hard drive does not show up in Computer or My Computer until it has a drive letter assigned to it.
How do I rebuild my RAID array?
In order to rebuild a RAID array, you need to replace a physical drive with an identical drive on the same RAID controller. Although standard RAID levels are generally agreed upon throughout the industry, the implementation varies between manufacturers. RAID arrays are typically not accessible when they are moved to another controller, and data may be unrecoverable if the drives are out of order or have been formatted or accessed by another RAID controller. If a RAID controller has failed, you should get the exact same model of RAID controller. Note: If a drive or drives were damaged, it is possible that the RAID array may be permanently unrecoverable. RAID should not be considered a replacement for backing up your data. If critical data is going onto a RAID array, you should back up the data on another physical drive or logical set of drives. Rebuild a RAID array With the following RAID modes, recovery is possible using the same StarTech.com product. Refer to the following table for the appropriate method to use to recover your RAID array. RAID mode Max # of failed drives Procedure RAID 1 Only one drive is needed for recovery. Determine which drive is operational by using the RAID management utility (if available) or test each drive individually on a different hard drive controller (for example, a hard drive docking station or SATA controller). Replace the failed drive with an identical hard drive. The array will rebuild and is accessible during the rebuilding process. RAID 3 Single drive failure will rebuild. Determine which drive is defective by using the RAID management utility (if available) or with diagnosis LEDs on the controller or enclosure. Replace with an identical hard drive. Note: Do not change the order of the drives. The array may be accessible during the rebuild, but you should let the controller rebuild without interruption so that performance is not compromised. RAID 5 Single drive failure will rebuild. Determine which drive is defective by using the RAID management utility (if available) or with diagnosis LEDs on the controller or enclosure. Replace with an identical hard drive. Note: Do not change the order of the drives. The array may be accessible during the rebuild, but you should let the controller rebuild without interruption so that performance is not compromised. RAID 10 Only one drive in a mirrored set can fail. Determine which drive is defective by using the RAID management utility (if available) or with diagnosis LEDs on the controller or enclosure. Replace with an identical hard drive. Note: Do not change the order of the drives. The array may be accessible during the rebuild, but you should let the controller rebuild without interruption so that performance is not compromised.
When should I upgrade my device's firmware?
You should not upgrade your device's firmware if you do not have any issues with the functionality of your device. The only time you should consider an upgrade is if you are experiencing a problem with the device, and you have confirmed that the firmware addresses this problem. You can confirm this is the case by reviewing the documentation included with the firmware or by consulting with our Technical Support team. Incorrectly upgrading firmware can result in diminished performance so it is best to contact StarTech.com if you would like to perform this operation.
The RAID rebuild process has paused and will not finish. How can I complete the rebuild?
If you boot into the operating system and load the Marvell Storage Utility, the RAID rebuild will not complete. The RAID can only be rebuilt in the controller’s BIOS. To learn how to access your cards BIOS, please see the product information included with your card.
How do I confirm that Windows detects my expansion card?
To confirm that Windows detects your expansion card, complete the following: Press the Windows key+ R , type devmgmt.msc , and press Enter . In Device Manager , under the appropriate heading, confirm that your expansion card is listed and that there isn't an exclamation mark next to it. For example, a USB controller card would be under Universal Serial Bus controllers . Your expansion card is listed according to the name of the chipset. To determine the name of the chipset of your expansion card, navigate to www.StarTech.com and look on the Technical Specifications tab for your product.
How do I confirm that my expansion card is detected by the Mac OS?
To confirm that the Mac OS detects your expansion card, complete the following: Click the Apple icon. Click About This Mac . Click More Info or System Report . Under the appropriate heading, confirm that your expansion card is listed and that there isn't an error. For example, a network card would be under Ethernet Cards . Your expansion card is listed according to the name of the chipset. To determine the name of the chipset of your expansion card, navigate to www.StarTech.com and look on the Technical Specifications tab for your product.
I want to move the hard drive with my operating system installed to my StarTech.com hard drive controller. What do I do?
In order to use a hard drive plugged into a hard drive controller card as your operating system, you need to install the operating system onto the hard drive while it is plugged into the expansion card. To do this, complete the following: Note: Not all hard drive controller cards have drivers that allow you to install the operating system onto the hard drive. All of the hard drive controllers that display this FAQ include this capability. Before you begin, consult the documentation that came with the motherboard to make sure that the motherboard or BIOS supports booting from an expansion card. Back up any data on the hard drive. Make a copy of the drivers from the website onto a floppy disc, CD, DVD, or USB flash drive. The drivers that you download depends on the operating system that you want to install. Install the hard drive controller card onto your motherboard. Plug the hard drive into the controller card. Turn on your computer and open the operating system install wizard. Before you select the hard drive that you want to install the operating system onto, select the option to install third-party drivers. Point the driver installer to the floppy disc, CD, DVD, or USB flash drive. Install the drivers. Select the hard drive on the hard drive controller card as the location where you want to install the operating system. Complete the on-screen instructions to finish installing the operating system.
Is this SATA controller card compatible with Serial Attached SCSI (SAS) drives?
No, this SATA controller card is not compatible with SAS drives. Explanation: Serial Attached SCSI (SAS) drives require a controller that supports the SAS command set. SATA controllers only support the SATA command set and cannot process SAS commands. Although a SAS drive may be physically connected to a SATA controller using an adapter, the SATA controller cannot communicate with the SAS drive. As a result, SAS drive compatibility is not supported on this SATA controller card.
Is this device compatible with optical drives such as CD-ROM, DVD-ROM, and Blu-ray drives?
Yes, this device is compatible with CD-ROM, DVD-ROM, and Blu-ray drives that use the ATA Packet Interface (ATAPI) protocol. Explanation: This device supports the ATA Packet Interface (ATAPI), which is the required communication protocol for most optical drives, including CD-ROM, DVD-ROM, and Blu-ray drives. Any optical drive that uses ATAPI will function with this device. Optical drives that do not use the ATAPI standard are not supported. Compatibility depends on the optical drive adhering to ATAPI specifications.
What is RAID and What Are the Different RAID Modes?
RAID (Redundant Array of Independent Disks) is a storage technology that combines multiple physical drives into a single logical storage volume. Different RAID modes are designed to improve performance, provide data redundancy, or achieve both depending on the RAID level used. Explanation: RAID combines two or more physical storage drives into a single virtual disk or storage array. Depending on the RAID mode selected, RAID can: Increase storage performance Provide protection against drive failure Combine both performance and redundancy benefits RAID is commonly used in external storage enclosures, servers, workstations, and network storage systems. Not all StarTech.com storage devices support every RAID mode. Refer to the product manual or product page for the RAID modes supported by a specific device. Common RAID terminology includes: Striping: Data is divided and written across multiple drives to improve read and write performance. Mirroring: Identical copies of data are written to multiple drives to provide redundancy. Parity: Calculated data used to rebuild information if a drive fails. RAID does not replace regular data backups. Critical data stored on a RAID array should also be backed up to a separate storage device or backup system. RAID can help protect against hardware failure, but it does not protect against accidental deletion, file corruption, malware, or catastrophic system failure. Refer to the following table for the list of various RAID modes: RAID mode Description Operation Advantages Disadvantages Recovery RAID 0 Striped disks Data is split evenly between two or more disks. Large size and the fastest speed. No redundancy. If one or more drives fails, this results in array failure. RAID 1 Mirrored disks Two or more drives have identical data on them. A single drive failure will not result in data loss. Speed and size is limited by the slowest and smallest disk. Only one drive is needed for recovery. RAID 3 Striped set with dedicated parity Data is split evenly between two or more disks, plus a dedicated drive for parity storage. High speeds for sequential read/write operations. Poor performance for multiple simultaneous instructions. A single drive failure will rebuild. RAID 5 Striped disks with distributed parity Data is split evenly between three or more disks. Parity is split between disks. Large size, fast speed, and redundancy. The total array size is reduced by parity. A single drive failure will rebuild. RAID 10 1+0; Striped set of Mirrored Subset Four or more drives are made into two mirrors that are striped. Larger size and higher speed than RAID-1, and more redundancy than RAID-0. No parity. Only one drive in a mirrored set can fail. JBOD Just a Bunch Of Disks Any number of drives are accessed independently by the operating system. Software RAID modes can be used. Hardware RAID may have better performance. N/A Big Spanning or Concatenation Data is written on one drive until it is full, and then the next drive(s) until it or they are full. Creates a very large and simple array. No redundancy. N/A Clone RAID 1 + Spare Two drives have identical data, plus one drive is used for rebuilding in case of a primary array failure. Seamless operation when one drive fails in a RAID-1 array. Spare drive is not accessible to the user. Only one drive is needed for recovery.
What is ATAPI?
Advanced Technology Attachment Packet Interface (ATAPI) is a protocol that allows a greater variety of devices to be connected to a computer than ATA (PATA / IDE and SATA) on its own would allow. ATAPI allows IDE and SATA controllers to support optical drives. ATA on its own doesn't allow for specific functions required by optical drives, such as a "media eject" command or a way for the controller to determine whether media is present in the optical drive. Optical drives include CD-ROM drives, DVD-ROM drives, and Blu-ray players.
Related products
-
2 Port CardBus eSATA Laptop Controller Adapter Card
$8.99 Add to cart -
SATA PCIe Card - 2 Port PCIe SATA Expansion Card - 6Gbps - Full/Low Profile - PCI Express to SATA Adapter/Controller - ASM1062R SATA RAID - PCIe to SATA Converter - TAA
$59.99 Add to cart -
2 Port PCI Express eSATA Controller Adapter Card
$25.99 Add to cart -
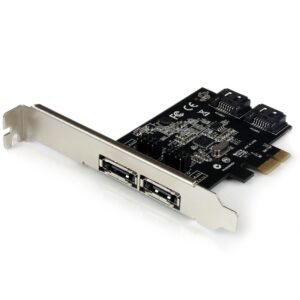
2 Port PCI Express SATA 6 Gbps eSATA Controller Card - Dual Port PCIe x1 SATA III Adapter with Configurable Internal/External Connectivity
$54.31 Add to cart