
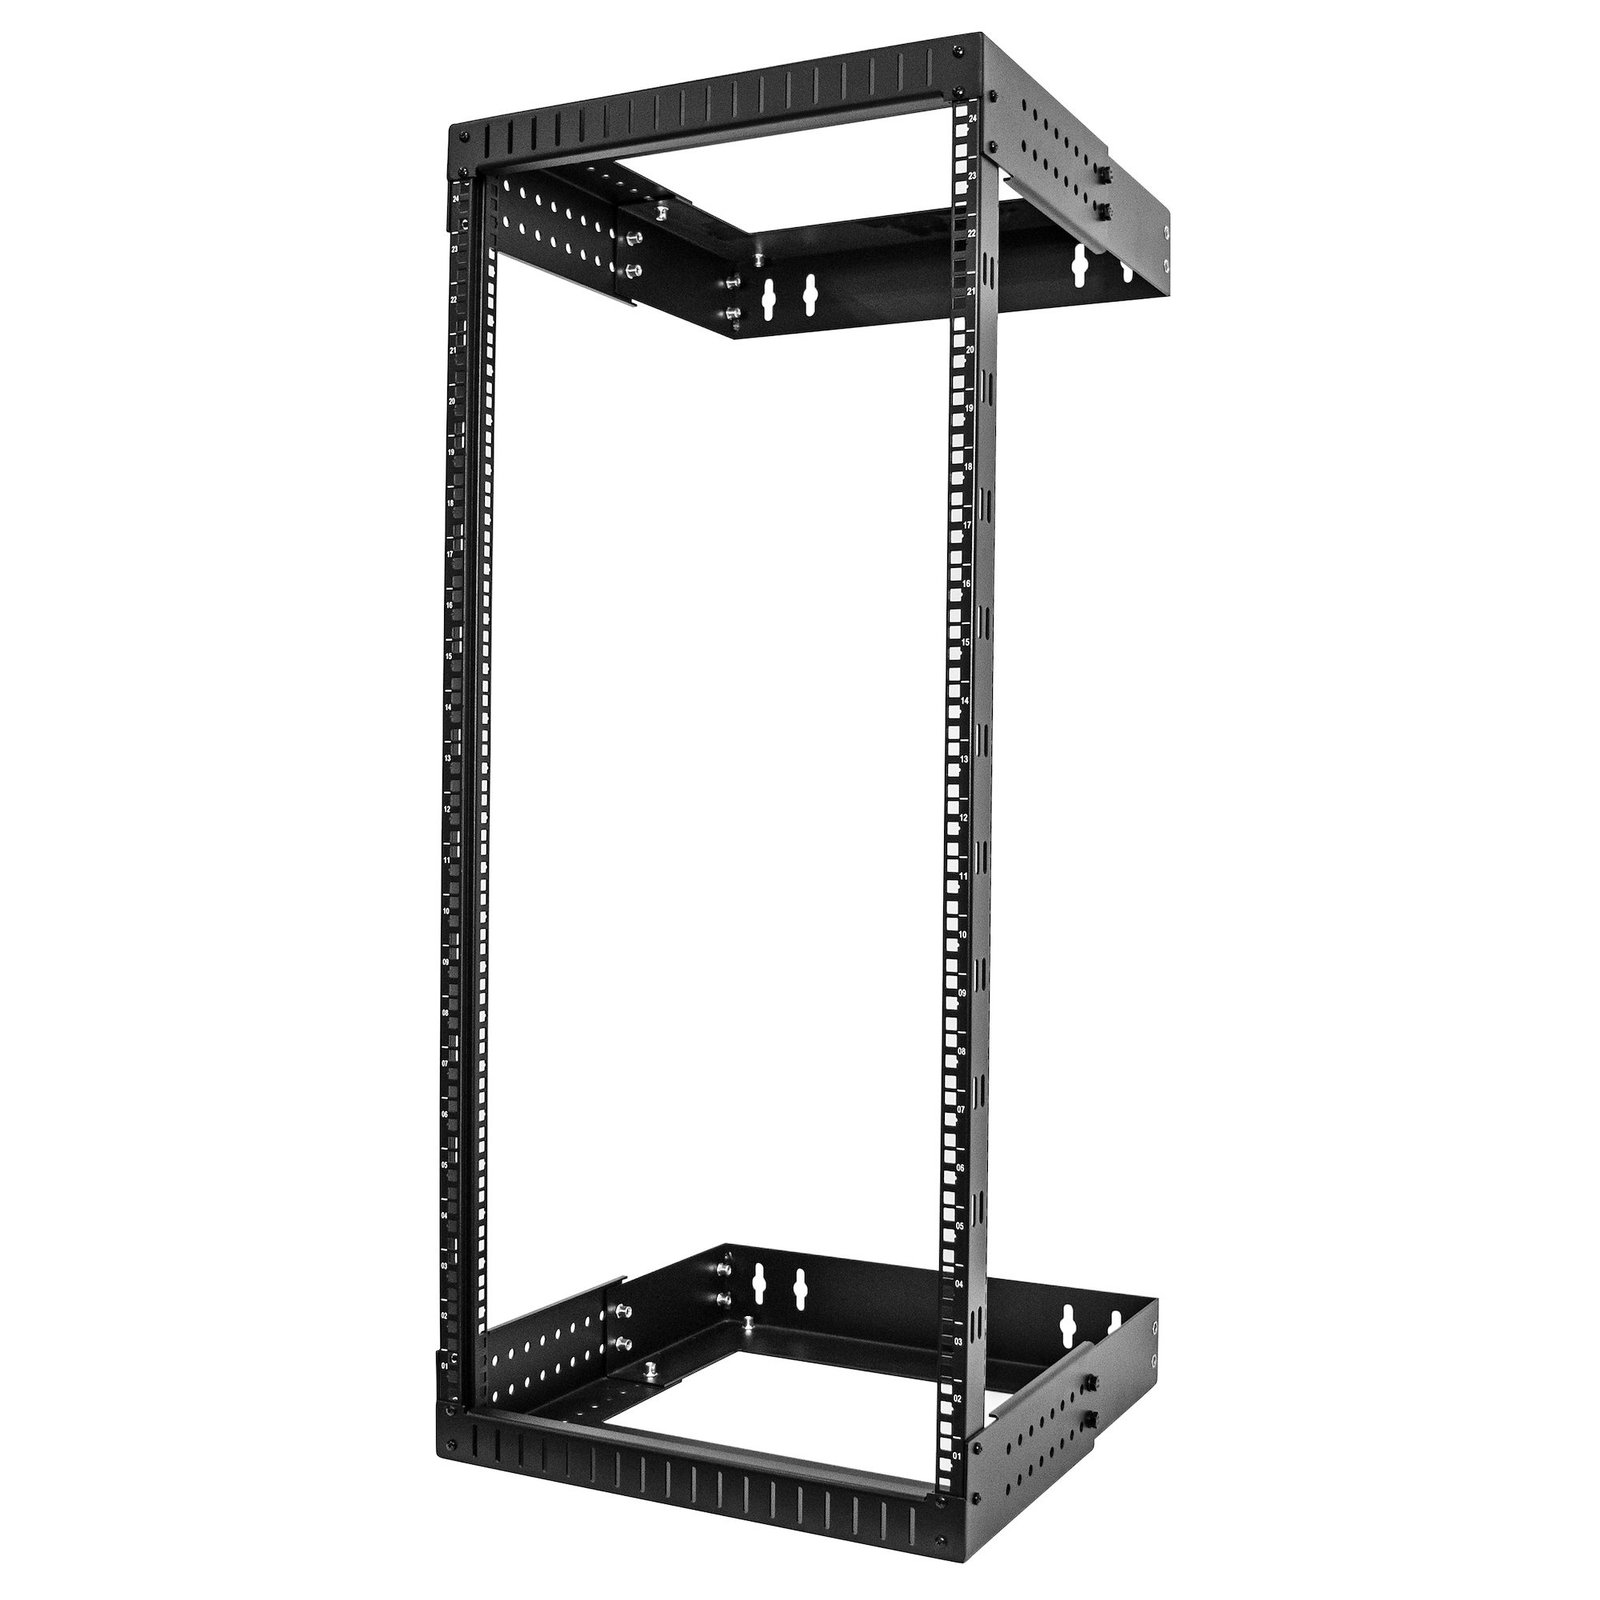
2-Post 24U Heavy-Duty Wall Mount Network Rack, 19" Open Frame Server Rack with Adjustable Depth, Wall Mount Data Rack for IT / AV / Patch Panel / Computer Equipment - Cage Nuts and Screws Included
$350.54
Mount your network and telecommunications equipment with the convenience of adjustable depth
Specifications & Compliance
- UPC
- 065030893923
- Brand
- StarTech.com
- Included in Package
- 2 - Front Horizontal Brackets, 2 - Rear Horizontal Brackets, 2 - Vertical Brackets, 96 - M6 Cage Nuts, 96 - M6 Cage Screws, 96 - Plastic Washers, 16 - M5x12mm Assembly Screws, 24 - M8x16mm Bolts, 24 - #8 Flat Washers, 1 - Quick-Start Guide
- Shipping (Package) Weight
- 44.8 lb [20.3 kg]
- Weight of Product
- 35.3 lb [16.0 kg]
- Product Length
- 20.0 in [50.8 cm]
- Product Width
- 19.8 in [50.4 cm]
- Product Height
- 3.8 ft [1.2 m]
- Package Depth
- 16.5 in [42 cm]
- Package Width
- 4.0 ft [1.2 m]
- Package Height
- 6.3 in [16 cm]
- Color
- Black
- Warranty
- 5 Years
- Package Quantity
- 1
- Industry Standards
- EIA/ECA-310-E
- U Height
- 24U
- Wallmountable
- Yes
- Frame Type
- Open Frame
- Construction Material
- Steel
- Rack Type
- 2-Post
- Mounting Hole Types
- Square (For Cage Nut)
- Mounting Rail Profile
- G-Shape
- Special Features
- Easy Assembly, Wall-Mountable
- Weight Capacity (No Casters)
- 198.5 lb [90 kg]
Questions & Answers
How do I assemble a StarTech.com server rack?
It depends on the StarTech.com server rack model. Follow the assembly order and fastening pattern in the product manual. In general, verify all parts and tools, set the adjustable beams to the same rack depth, assemble the vertical rails and brackets, confirm the orientation and fastening pattern, tighten all screws, and then install the casters and server rack accessories. Explanation : Before assembling a StarTech.com server rack, make sure there is enough space to build the rack. If the assembled rack will be moved, confirm that it will fit through the required doors and hallways. Before assembly: Remove all parts from the box and confirm that they match the parts listed in the product manual. Confirm that you have all required tools. Refer to the product manual for the correct assembly order and fastening pattern. During assembly: Assemble the adjustable beams first. The adjustable beams control the rack depth and are marked with index numbers. Select the appropriate index number for your equipment using the measurement chart in the product manual, and use the same index number on every adjustable beam. Initially tighten screws only finger-tight. This makes adjustments easier if components need to be repositioned. Use the adjustable beams to align one set of left and right vertical rails with the top and base brackets. Building the rack on its side may make assembly easier. Make sure the index numbers on the adjustable beams and vertical rails face the correct direction. Follow the fastening pattern specified in the product manual. The fastening pattern is essential to rack stability and must be consistent at each corner. For the rack described here, the screw passes through the top or base bracket, then through the vertical rail, and then into the adjustable beam. Attach the remaining two vertical rails and adjustable beams. Before fully tightening the screws, verify that: All adjustable beams are set to the correct and matching index numbers. The beams and rails face the correct direction. The fastening pattern is correct at every corner. All cable guides face the same direction. After confirming the assembly, tighten all screws without stripping them. Install the casters and other server rack accessories so they face the same direction. Inverting the server rack may make caster installation easier. If you experience problems assembling a StarTech.com server rack, contact StarTech.com Technical Support for assistance.
How do I safely install equipment in a server rack?
Install the heaviest server rack equipment at the bottom of the rack first to create a stable base and reduce the risk of the rack becoming top-heavy. Use cage nuts and mounting screws to secure compatible rack equipment, and verify that the equipment is securely installed after tightening the screws. Explanation : When installing server rack equipment, start with the heaviest equipment at the bottom of the rack. This approach provides a stable base and helps prevent the rack from becoming top-heavy and falling over, especially when installing multiple devices in a tall rack. For equipment that is long, heavy, unbalanced, or difficult to handle, have another person assist with the installation to help prevent injury or equipment damage. For equipment such as a patch panel that mounts using cage nuts, install the cage nuts in the rack first. Position the equipment, insert the mounting screws into the cage nuts, and tighten the screws without stripping or damaging them. Use extra care with electric tools because they can apply more torque. After installation, confirm that the rack equipment is securely mounted. If you have questions about installing equipment in a server rack, contact the technical support team for assistance.
How do I check if a StarTech.com shelf is compatible with my server rack?
A StarTech.com shelf will fit a server rack if the rack supports 19-inch standard mounting and the shelf depth is within the rack’s supported mounting depth range. Explanation: StarTech.com server racks use the industry-standard 19-inch width, so most shelves designed for 19-inch racks are physically compatible in width. However, compatibility depends primarily on mounting depth and mounting type. Mounting depth compatibility: For shelves that mount on all four posts (4-post racks or cabinet racks), the shelf depth must fall within the rack’s minimum and maximum mounting depth. Both values are listed in the Technical Specifications of the rack and shelf product pages. If the shelf depth exceeds or does not reach the supported range, the shelf cannot be installed. Front-mount shelves: For shelves that mount only on the front posts (2-post mounting), mounting depth is not a constraint. However, there must be sufficient rear clearance in the rack to accommodate the full depth of the shelf and any installed equipment. Accessory validation: If a shelf is listed under the “Accessories” tab on a specific StarTech.com server rack product page, it has been verified as compatible with that rack model.
Related products
-
42U Open Frame Server Rack - 994.5lbs capacity - 4 Post Adjustable Depth (22" to 40") Network Equipment Rack
$451.99 Add to cart -

25U Adjustable Depth 4 Post Open Frame Server Rack Cabinet
$416.99 Add to cart -

12U Adjustable 4 Post Server Equipment Open Frame Rack Cabinet
$312.99 Add to cart -

16U 2-Post Open Frame Desktop Server Rack, 19in Compact Space-Saving Floor IT Rack with 350lb (160kg) Weight Capacity
$169.11 Add to cart