
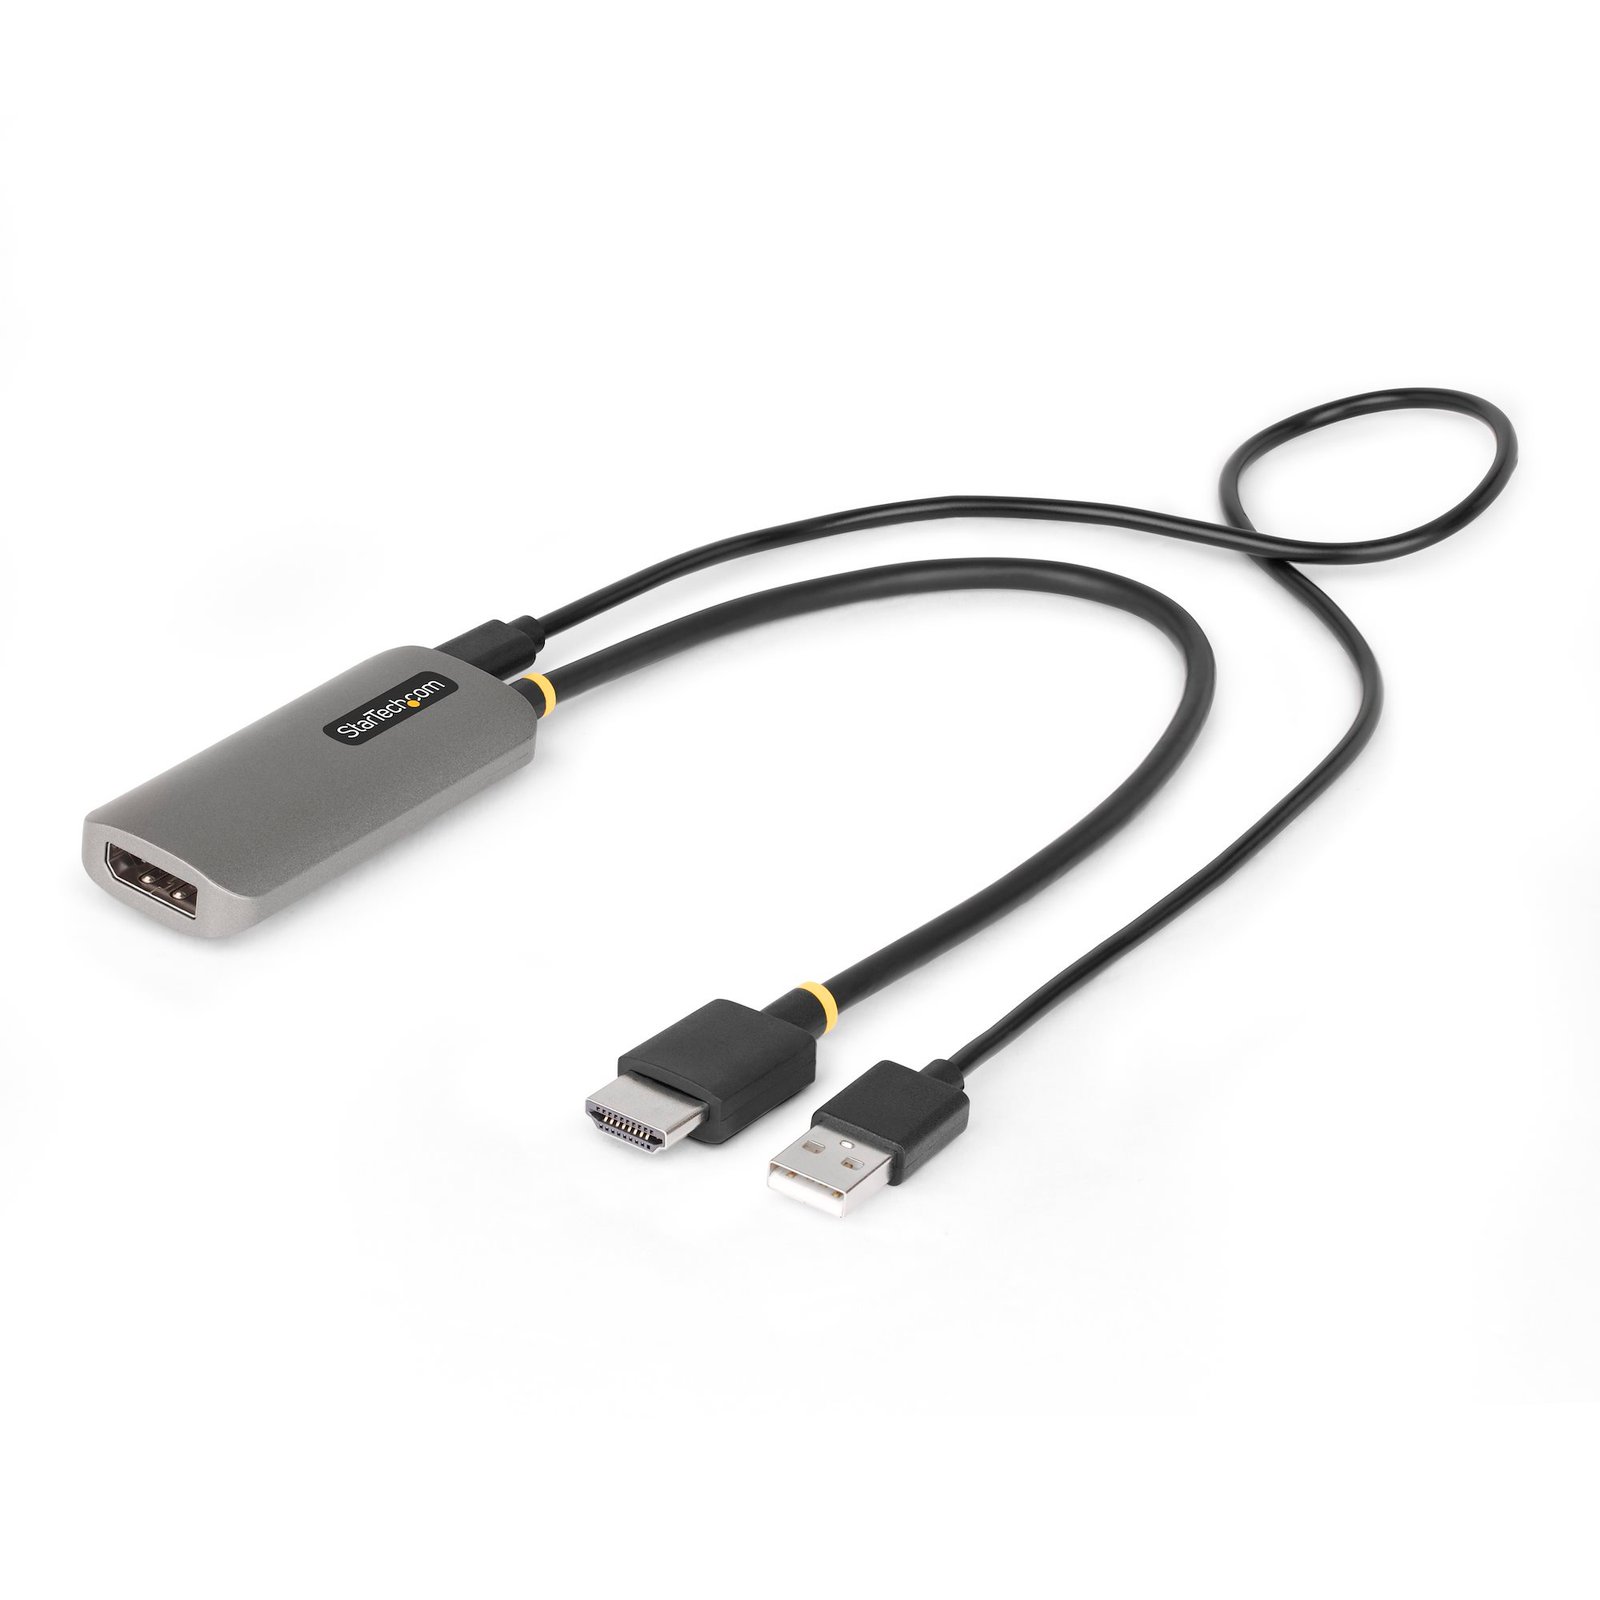
1ft (30cm) HDMI to DisplayPort Adapter Cable, 8K 60Hz, Active HDMI 2.1 to DP 1.4 Video Converter, USB Bus Powered with Included Cable
$73.79
Connect an HDMI-enabled source to a DisplayPort monitor with support for resolutions up to 8K at 60Hz
Specifications & Compliance
- UPC
- 065030900867
- Brand
- StarTech.com
- Included in Package
- 1 - HDMI to DisplayPort Adapter, 1 - Micro-USB Power Cable (50cm)
- Shipping (Package) Weight
- 1.7 oz [48 g]
- Weight of Product
- 1.6 oz [45 g]
- Product Length
- 14.8 in [37.7 cm]
- Product Width
- 1.2 in [31.0 mm]
- Product Height
- 0.5 in [12.0 mm]
- Package Depth
- 5.0 in [12.7 cm]
- Package Width
- 6.4 in [16.3 cm]
- Package Height
- 0.7 in [19 mm]
- Color
- Space Gray
- Cable Length
- 11.8 in [30 cm]
- Warranty
- 3 Years
- Connector 1
- HDMI
- Connector 1 (Quantity)
- 1
- Connector 2
- USB Micro-B (2.5W Power Only)
- Connector 2 (Quantity)
- 1
- Operating Temperature
- 0°C to 40°C (32°F to 104°F)
- Storage Temperature
- -10°C to 70°C (14°F to 158°F)
- Humidity
- 0% ~ 85% RH (non-condensing)
- Industry Standards
- HDMI 2.1, DisplayPort 1.4
- Chipset ID
- LT6711GX-U3
- Special Notes
- To achieve 8K resolution, both the source and the display must support it, To achieve 8K 60Hz, DSC support from the host and an 8K 60Hz DisplayPort monitor are required
- Connector 3
- DisplayPort
- Connector 3 (Quantity)
- 1
- Maximum Digital Resolutions
- 7680 x 4320 @ 60Hz
- Audio
- Yes
- Number of Displays
- 1
- AV Input
- HDMI
- AV Output
- DisplayPort - 1.4
- Wide Screen Supported
- Yes
- Active or Passive Adapter
- Active
- Supported Resolutions
- 7680 x 4320 @ 60Hz <br> 7680 x 4320 @ 30Hz <br> 5120 x 2880 @ 60hz <br> 3840 x 2160 @ 60hz <br> 3200 x 1800 @ 60hz <br> 3072 x 1728 @ 60hz <br> 2560 x 1440 @ 60hz <br> 2048 x 1536 @ 60hz <br> 1920 x 1200 @ 60hz <br> 2560 x 1440 @ 60hz <br> 1920 x 1080 @ 60hz <br> 1760 x 990 @ 60hz <br> 1680 x 1050 @ 60hz <br> 1600 x 1200 @ 60hz <br> 1600 x 900 @ 60hz <br> 1366 x 768 @ 60hz <br> 1280 x 1024 @ 60hz <br> 1280 x 720 @ 60hz <br> 1152 x 870 @ 60hz <br> 1128 x 634 @ 60hz <br> 1024 x 768 @ 60hz <br> 832 x 624 @ 60hz <br> 800 x 600 @ 60hz <br> 1280 x 720 @ 60hz <br> 1280 x 720 @ 100hz <br> 1280 x 720 @ 120hz <br> <i>Other resolutions and refresh rates may be supported</i>
- Audio Specifications
- DisplayPort - 2 Channel Audio
- HDR Support
- HDR10
- Video Revision
- DisplayPort 1.4, HDMI 2.1
Questions & Answers
Why am I experiencing issues converting from HDMI to VGA on certain devices?
Certain HDMI sources have known issues where they do not output enough power over HDMI to power HDMI adapters. In this case, it is best to consider HDMI adapters with external power over USB or with an external power adapter. This affects our HDMI to VGA adapters. See below for alternative solutions. Standard HDMI to VGA Our HD2VGAA2 has both audio and a USB Micro B port for external power. Micro HDMI to VGA Our MCHD2VGAA2 has both audio and a USB Micro B port for external power. Mini HDMI to VGA Our HDACFM lets you adapt from standard HDMI to Mini HDMI. You can pair this with our HD2VGAA2 to go from Mini HDMI to VGA with external power.
How to Arrange Windows Monitors to Fix Mouse Issues
In order for your mouse to move properly between your monitors you must rearrange your monitors in Windows to match the physical location of your monitors on your desk. To do so, complete the following based on your operating system: Windows 11 Click on the Windows Icon in the Taskbar (or the Windows key on the keyboard) and search for Display Settings . Click on Multiple Displays. Click Identify to display the numbers on each connected monitor, showing how the operating system has assigned their positions. Click and drag the monitor icons to best match your physical setup. Click Apply to confirm the changes and close the window. Windows 10 and Windows 8 On your keyboard, press the Windows key + X and select Control Panel . Click Appearance and Personalization , then click Display . Click the Resolution or Adjust Resolution option from the left column, which will display your monitors as numbered icons. Click Identify to display the numbers on each connected monitor, showing how the operating system has assigned their positions. Click and drag the monitor icons to best match your physical setup. Click OK to apply the changes and close the window. Windows 7 and Windows Vista Click the Start button and select Control Panel . Click Appearance and Personalization, then click Display . Click the Resolution or Adjust Resolution option from the left column, which will display your monitors as numbered icons. Click Identify to display the numbers on each connected monitor, showing how the operating system has assigned their positions. Click and drag the monitor icons to best match your physical setup. Click OK to apply the changes and close the window. Windows XP Click the Start button and select Control Panel . Double-click Display . Click the Settings tab, which will display your monitors as numbered icons. Click Identify to display the numbers on each connected monitor, showing how the operating system has assigned their positions. Click and drag the monitor icons to best match your physical setup. Click OK to apply the changes and close the window. To mirror the image from your primary monitor instead of extending your desktop, refer to the following FAQ: http://www.startech.com/faq/Windows_Mirroring_Monitors
Related products
-

10 ft DVI to VGA Active Converter Cable – DVI-D to VGA Adapter – 1920x1200
$50.99 Add to cart -
6.6ft (2m) HDMI to DisplayPort Cable 4K 30Hz - Active HDMI 1.4 to DP 1.2 Adapter Converter Cable with Audio - USB Powered - Mac & Windows - HDMI Laptop to DP Monitor - Male/Male
$77.89 Add to cart -
Compact HDMI to VGA Adapter Converter - Ideal for Chromebooks Ultrabooks & Laptops – 1920x1200/1080p
$26.99 Add to cart -
6ft (1.8m) HDMI to VGA Active Converter Cable - HDMI to VGA Adapter - 1920x1200 or 1080p
$38.94 Add to cart