
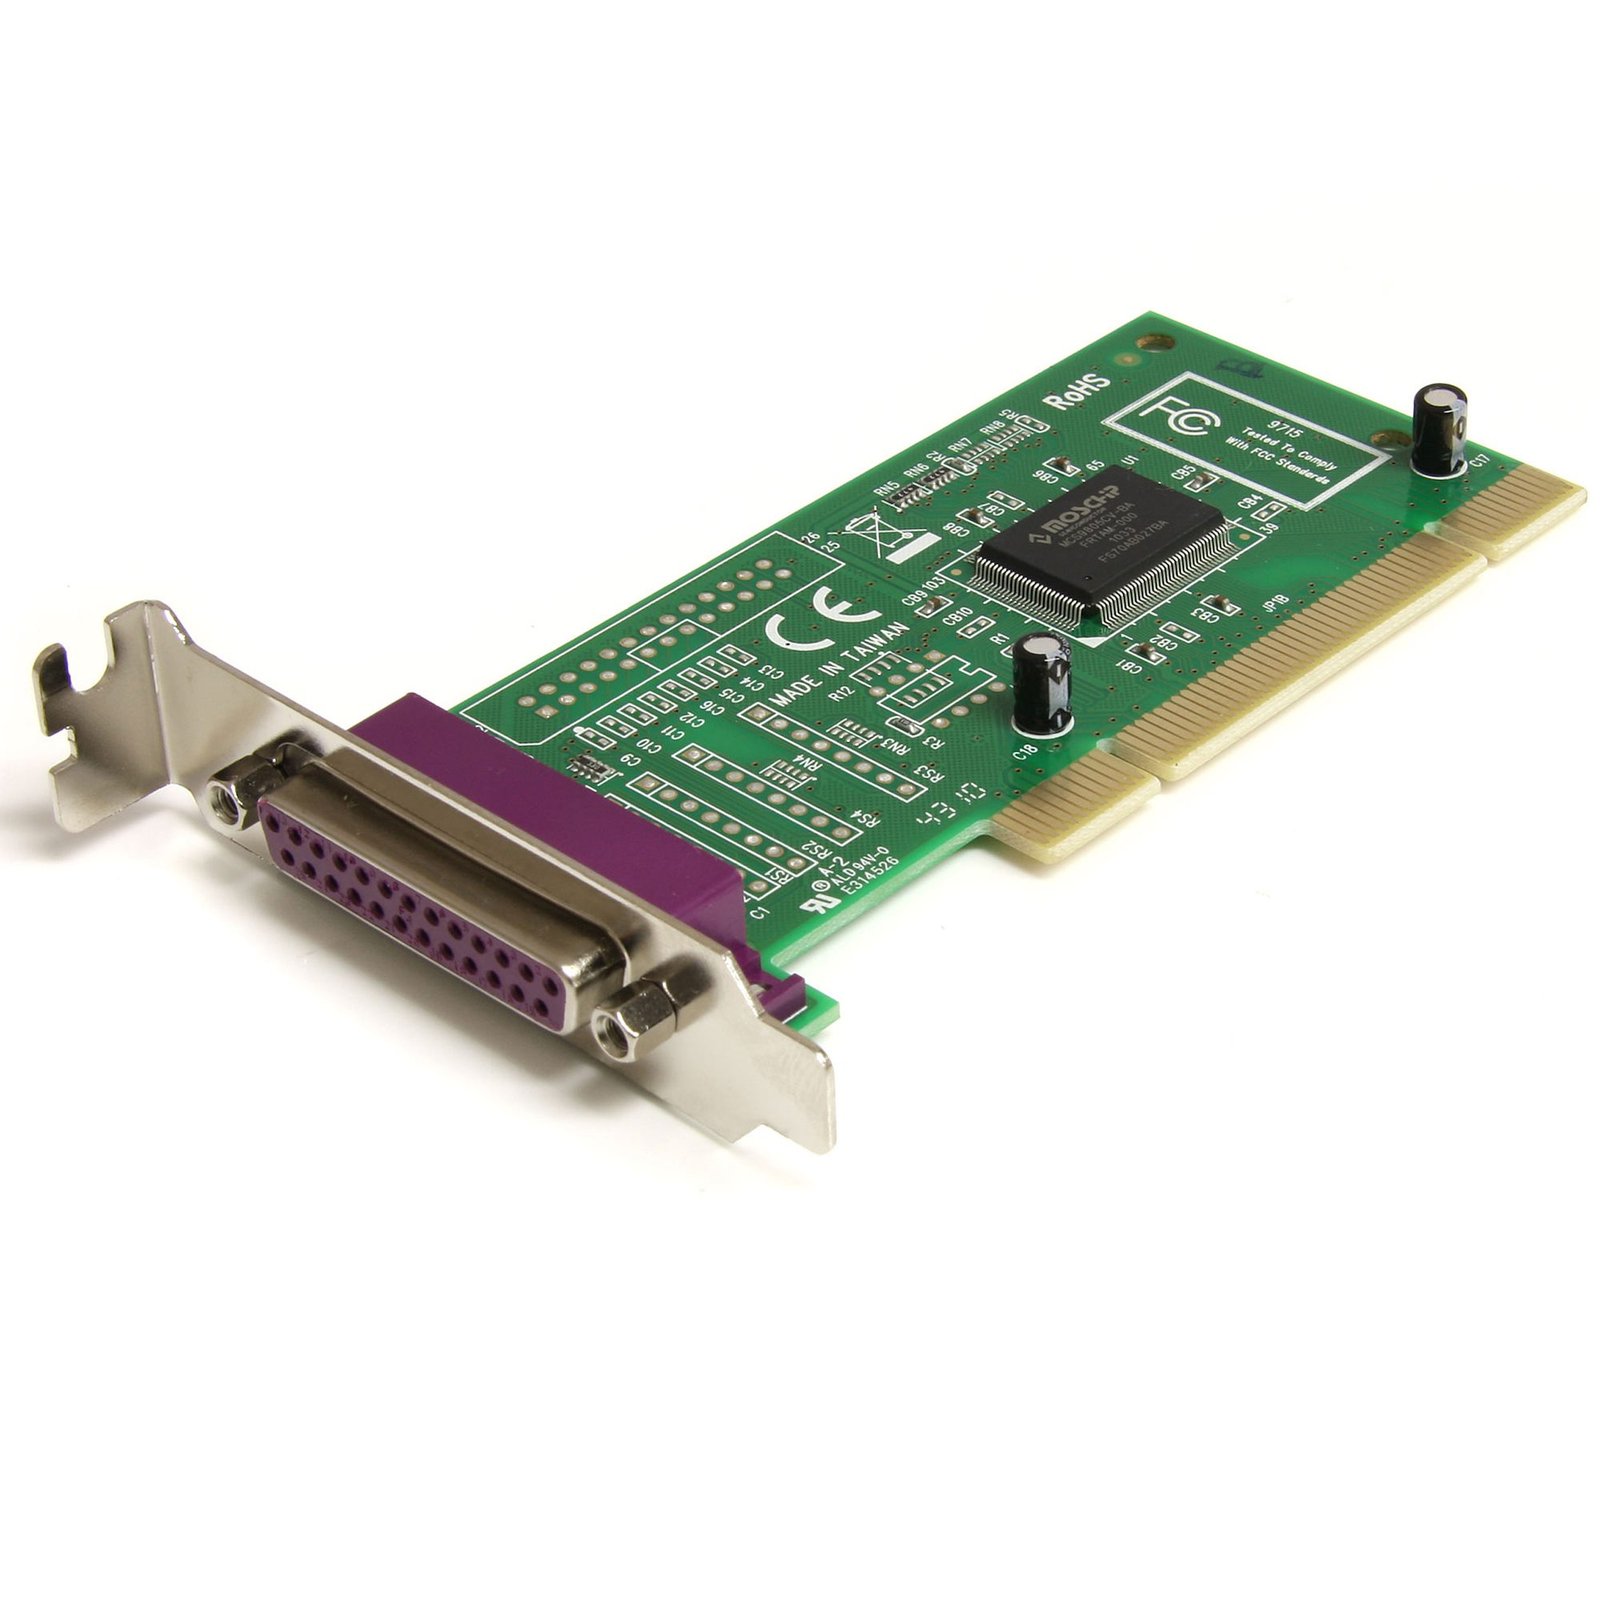
1 Port Low Profile PCI Parallel Adapter Card
$40.99
Add a parallel port to your low profile/small form factor computer through a PCI expansion slot
Specifications & Compliance
- UPC
- 065030788755
- Brand
- StarTech.com
- Included in Package
- 1 - Low Profile PCI Parallel Card, 1 - Standard profile bracket, 1 - Driver CD, 1 - Manual
- Shipping (Package) Weight
- 4.7 oz [132 g]
- Weight of Product
- 1.7 oz [49.0 g]
- Product Length
- 4.7 in [12.0 cm]
- Product Width
- 0.8 in [20.0 mm]
- Product Height
- 2.2 in [55.0 mm]
- Package Depth
- 6.9 in [17.5 cm]
- Package Width
- 5.7 in [14.5 cm]
- Package Height
- 1.2 in [31 mm]
- Warranty
- Lifetime
- Connector 1
- PCI / PCI-X
- Connector 1 (Quantity)
- 1
- Package Quantity
- 1
- Connector 2
- DB-25 Parallel / Serial
- Connector 2 (Quantity)
- 1
- Material
- Steel
- Maximum Data Transfer Rate
- 1.5 Mbps
- Industry Standards
- PCI 2.1, EPP, ECP, SPP, BPP
- Chipset ID
- ASIX - MCS9805CV
- Number of Ports
- 1
- Interface
- Parallel
- Bus Type
- PCI / PCI-X (5 / 3.3V)
- System and Cable Requirements
- Unused PCI slot
- Card Type
- Low Profile (SP bracket incl.)
- Port Style
- Integrated on Card
Questions & Answers
Is there an alternative method to install my parallel card driver in Windows Vista, Windows 7, Windows 8, Windows 10, or Windows 11?
Yes. If the standard Setup.exe installation method does not work, you can manually install the parallel card driver through Device Manager by selecting the driver's .INF file. Explanation: Before installing the parallel card, ensure that Windows is fully updated with the latest service packs, security updates, and feature updates available for your operating system. To manually install the driver: Download the latest driver package from the StarTech.com Drivers & Downloads page. Extract the contents of the downloaded ZIP file. Open Device Manager by pressing Windows Key + R , typing devmgmt.msc , and pressing Enter . Locate PCI Simple Communications Controller or the device with a yellow exclamation mark ( ! ) or question mark ( ? ). Right-click the device and select Update Driver . Select Browse my computer for drivers . Select Let me pick from a list of available drivers on my computer . If prompted, select Show All Devices and click Next . Click Have Disk . Browse to the extracted Drivers folder and open the folder that matches your system architecture (32-bit or 64-bit). Select the StnMF.inf or NmXpMf.inf file (only one will be present), then click OK and Next to install the controller driver. After the controller driver is installed: In Device Manager , locate each device under Ports (COM & LPT) that requires a driver. Repeat the manual installation process for each port. When prompted to select a driver file, choose StnPorts.inf or NmPorts.inf (only one will be present). Notes: The Show All Devices screen may not appear on all versions of Windows. If it does not appear, continue to the next step. To determine whether Windows is 32-bit or 64-bit, open System information in Windows Settings or System Properties. Once installation is complete, the parallel port will appear under Ports (COM & LPT) in Device Manager and be ready for use.
Is there a different or more advanced way to install my serial card in Windows XP?
Before you install the device, make sure that your operating system is current (for example, the most recent service pack is installed). Download the latest drivers from the StarTech.com website at www.startech.com/D ownloads. The part number and product ID are on the product packaging. Note: Windows usually saves the files to the Downloads folder that is associated with your user account (for example, C:Documents and Settings your_name My DocumentsDownloads). After the download is complete, right-click the zip folder that you downloaded, click Extract All , and complete the instructions. Press the Windows key + R , type devmgmt.msc , and press Enter to open the Device Manager. Right-click PCI Simple Communications Controller , which will have “!” or “?” next to it to indicate a driver issue. Click Update Driver . On the Hardware Update Wizard screen, click Install from a list or specific location (Advanced) , and then click Next . Select the Don’t search, I will choose the driver to install option, and then click Next . On the Hardware Type screen, click Show All Devices , and then click Next . Note: The Hardware Type screen does not appear on all systems. If you do not see this screen, skip this step. On the Select the Device Driver you want to install for this hardware screen, select the Have Disk option. In the Install from Disk dialog box, click Browse . Browse to the Drivers folder and open the 32-bit or the 64-bit folder, depending on your system type. Note: To view your system type, press Windows key + R, type control /name microsoft.system, and press Enter. Click the StnMF file or the NmXpMf file (only one of the file names is displayed). Click OK , and then click Next . The COM ports are listed in Device Manager under Ports (COM & LPT) . Complete steps 4 to 11 for each of the COM ports, and select the StnPorts file or the NmPorts file in step 11.
Everything is hooked up but nothing is working. What should I do? (Windows)
When you troubleshoot issues with a parallel device, there are some quick tests that you can complete to rule out potential problems. You can test to make sure that the following components are working correctly and are not the source of the issue: Parallel cables Parallel ports Parallel devices To test your setup components, try the following: Use the parallel cable, parallel port, and parallel device in another setup to see if the problem is with the components or the setup. Use a different parallel cable, parallel port, and parallel device in your setup to see if the problem persists. Ideally, you should test a component that you know works in another setup. When you test your cables, it is recommended that you do the following: Test each cable individually. Use short cables when you are testing. When you test the parallel ports and parallel device, it is recommended that you do the following: Press the Windows key + R , type devmgmt.msc , and press Enter . Check to see if the parallel ports and parallel device is listed under Ports (COM & LPT) . Make sure that the LPT port number is the correct number for the parallel device and that the software being used to connect the computer to the parallel device uses the correct LPT port number. If you do not see the LPT port number in Device Manager please see this FAQ for PCI/PCIe expansion cards: https://www.startech.com/en-us/faq/pci-pcie-cannot-boot-os-or-detect-windows or this FAQ for USB devices: https://www.startech.com/en-us/faq/usb-cannot-detect-windows If the device is listed with an error, follow the instructions on the website to reinstall the drivers. Note: Some parallel devices only work if the LPT port number is between a certain range, usually LPT1 or LPT2.
When I send jobs to my parallel port in Windows 10, it does not print. What do I do?
This issue was the result of a Windows update that has recently been fixed in the KB3140743 update. If you are still experiencing this issue, download the latest Windows update. You can also temporarily resolve the issue by completing the following: Press the Windows key + X . Click Device Manager . Expand the section for Ports (COM & LPT) . Right-click on the LPT port that is experiencing the issue. Click Properties . Click the Port Settings tab. Under Filter Resource Method, select an option that is not currently selected. Click OK .
How do I confirm that Windows detects my expansion card?
To confirm that Windows detects your expansion card, complete the following: Press the Windows key+ R , type devmgmt.msc , and press Enter . In Device Manager , under the appropriate heading, confirm that your expansion card is listed and that there isn't an exclamation mark next to it. For example, a USB controller card would be under Universal Serial Bus controllers . Your expansion card is listed according to the name of the chipset. To determine the name of the chipset of your expansion card, navigate to www.StarTech.com and look on the Technical Specifications tab for your product.
Will this PCI card work in a PCI-X slot?
Yes. This PCI card uses a universal PCI connector that is compatible with both 3.3V and 5V PCI and PCI-X slots. Explanation: This PCI card features a universal PCI connector that supports both 3.3V and 5V slot keying. As a result, it can be installed in compatible PCI and PCI-X slots that use either voltage standard. A universal PCI connector is easily identified by the presence of two keying notches on the edge connector. Standard PCI cards designed for only one voltage typically have a single notch. Because this card uses a universal PCI connector, slot voltage keying is not a compatibility concern.
Related products
-
1-Port Parallel PCIe Card - PCI Express to Parallel DB25 Adapter Card - Desktop Expansion LPT Controller for Printers, Scanners & Plotters - SPP/ECP - Standard/Low Profile
$39.96 Add to cart -
24in Internal USB Motherboard Header to Parallel Adapter
$21.99 Add to cart -
1 Port PCI Express Low Profile Parallel Adapter Card - SPP/EPP/ECP
$17.99 Add to cart -

2 Port PCI Express / PCI-e Parallel Adapter Card – IEEE 1284 with Low Profile Bracket
$33.99 Add to cart