
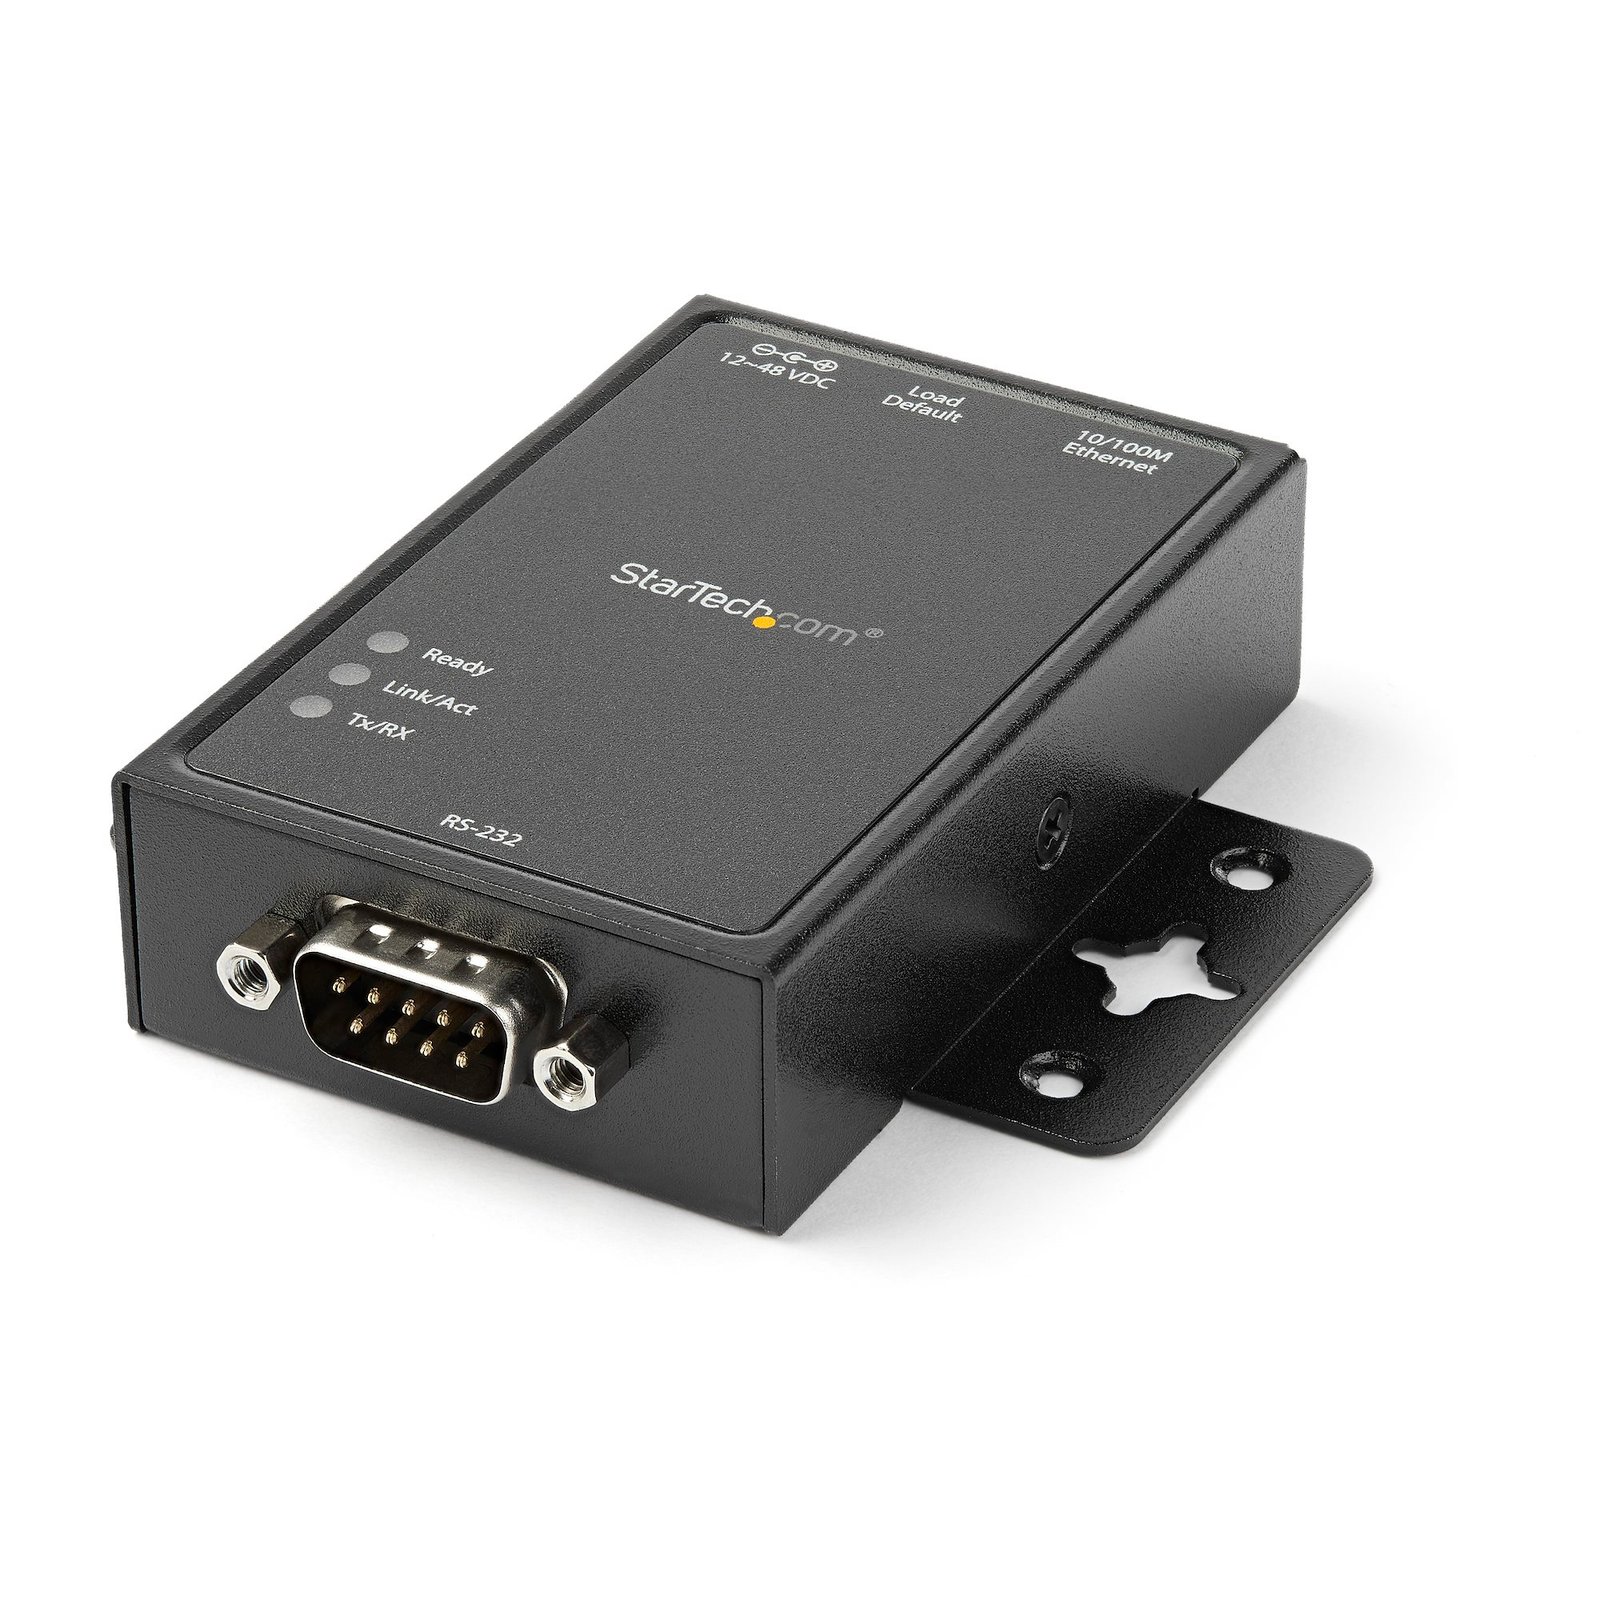
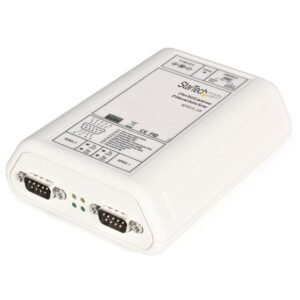
1-Port Serial-to-IP Ethernet Device Server, RS232, DIN Rail and Surface Mountable, Aluminum, TAA - Replaced by I13-SERIAL-ETHERNET
$147.99
Connect to, configure and remotely manage an RS-232 serial device over an IP network
Specifications & Compliance
- UPC
- 065030851459
- Brand
- StarTech.com
- Included in Package
- 1 - Serial over IP Device Server, 1 - DIN Rail Kit, 1 - Universal Power Adapter (NA/JP, EU, UK, ANZ), 1 - Instruction Manual
- Shipping (Package) Weight
- 14.5 oz [412 g]
- Weight of Product
- 3.2 oz [92.0 g]
- Product Length
- 3.4 in [86.0 mm]
- Product Width
- 2.1 in [53.0 mm]
- Product Height
- 0.9 in [23.0 mm]
- Package Depth
- 5.8 in [14.8 cm]
- Package Width
- 6.9 in [17.6 cm]
- Package Height
- 2.6 in [66 mm]
- Color
- Black
- Warranty
- 2 Years
- Connector 1
- DB-9 Serial
- Connector 1 (Quantity)
- 1
- Package Quantity
- 1
- Connector 2
- RJ-45
- Connector 2 (Quantity)
- 1
- Operating Temperature
- 0°C to 60°C (32°F to 140°F)
- Storage Temperature
- -10°C to 70°C (14°F to 158°F)
- Humidity
- 0~90% RH (Non-condensing)
- Material
- Aluminum
- Power Source
- AC Adapter Included
- Input Voltage
- 100 - 240 AC
- Output Voltage
- 12V DC
- Power Consumption
- 19.2
- LED Indicators
- 1 - Ready, 1 - Link / Act, 1 - Tx / Rx
- Number of Ports
- 1
- Interface
- Serial
- Input Current
- 0.36 A
- Output Current
- 1.6
- Plug Type
- M
- Compatible Networks
- 10/100 Mbps
- Center Tip Polarity
- Positive
- Auto MDIX
- Yes
- Serial Protocol
- RS-232
- Max Baud Rate
- 230.4 Kbps
- Supported Protocols
- DHCP, TCP/IP, UDP, HTTP, ICMP, ARP, Telnet
- Data Bits
- 5, 6, 7, 8
- Flow Control
- RTS/CTS, None
- Parity
- Even, Odd, None
- Stop Bits
- 1, 1.5, 2
Questions & Answers
Can VCOM run as a Windows service?
No, VCOM cannot run as a Windows service. A user must be logged in to the operating system in order to launch and use the VCOM software. Explanation: VCOM is designed to run within an active user session and does not support operation as a background Windows service. To use VCOM: A user must be logged in to Windows. The VCOM application must be launched from the user session. VCOM functionality is not available before user login. If the system is restarted or logged off, VCOM will not run until a user signs in and launches the software again.
How do I configure and use VCOM software with a StarTech.com network serial device?
To use VCOM software, install the latest VCOM software, configure the network serial device so the computer can communicate with it, and map the device to a virtual COM port. The network serial device then operates as though it is connected to a physical serial port on the computer. Explanation : Before configuring VCOM, confirm that the computer can communicate with the network serial device over the network. Install VCOM software Download and install the latest VCOM software from the StarTech.com Support website. Go to https://www.startech.com/Support and enter the network serial device's part number to locate the appropriate software. Configure the network serial device in VCOM If the network serial device is on the same subnet as the computer and can be pinged: Open VCOM. Click Search to detect the network serial device. Select the network serial device. Click Configure . If the network serial device is on a different network from the computer, click Search by IP and enter the range of IP addresses to search. VCOM provides the following configuration options: Administrator: Change the IP configuration of the network serial device. UART: Configure the serial port settings. Typically, these settings only need to be changed when the network serial device is used as a serial client in an IP serial extender setup. TCP: Configure client or server mode. For basic VCOM operation, set the network serial device to Server . No additional configuration is required to use the network serial device in UDP mode. Map a COM port in VCOM After configuring the network serial device for the network: Click COM Mapping > Add . Select the network serial device from the list. Change the COM port number if necessary. Click OK . The COM mapping should appear in the VCOM list. For instructions on verifying the COM port mapping in Windows, see the StarTech.com FAQ: https://www.startech.com/en-us/faq/com-port-listing-windows .
How do I set up the StarTech.com NETRS2321P network serial device in Windows?
To set up the StarTech.com NETRS2321P network serial device in Windows, first confirm that the Windows computer can communicate with the NETRS2321P over the network. Then install the NETRS2321P driver software and use the VCOM software to add and configure a virtual COM port. Explanation : To install the NETRS2321P driver software: Go to the StarTech.com Support website and search for product number NETRS2321P to download the latest drivers. After the download is complete, right-click the downloaded ZIP folder, select Extract All , and follow the on-screen instructions. In the extracted files, right-click vcomsetup.exe and select Run as administrator . Follow the on-screen prompts to complete the installation. Note: Windows typically saves downloaded files in the Downloads folder associated with the user account, such as C:Usersyour_nameDownloads. To configure a virtual COM port: Open VCOM from the Windows Start menu or desktop. Click Search . Double-click the server in the list. The NETRS2321P should appear under Device Info . In the left pane, select COM Mapping . Click Add . Select the server from the list. Keep the default settings, or change the COM port number if necessary. The computer must be able to communicate with the NETRS2321P over the network before completing this setup.
How do I access the NETRS2321P web interface?
To access the NETRS2321P web interface, connect the NETRS2321P and your computer to the same network, then open the unit’s IP address in a web browser and sign in. Explanation : Make sure the NETRS2321P and your computer are connected to the same network. Open a web browser and enter the NETRS2321P IP address. The default IP address is 10.1.1.1 . In the User Name field, enter the user name. The default user name is admin . In the Password field, enter the password. The default password is admin .
How do I ensure my computer and my serial device are on the same subnet?
In order for the serial device and your computer to communicate to each other, they both need to be on the same physical network and the same subnet. To connect your serial device and your computer to the same physical network, plug both devices into the same router. Typically, in order for devices to be on the same subnet, the first three numbers of the IP address must match. The fourth number of the IP address must be different, as two devices cannot have the same IP address. For example, if your computer’s IP address is 192.168.0.1, then the subnet is 192.168.0. XXX . You can replace the XXX with any number, as long as it is not currently in use by another device.
How can I make sure my serial port is working in Windows?
To check whether or not an RS-232 serial port is working, perform an RS-232 loopback test by doing the following: If your serial port is not female, convert it by taking a female/female cable or gender changer and plugging it into the serial port. Take a metal paperclip or wire and cross pins 2 and 3. If you look closely at the female end, the pins should be numbered. Open a telnet session on the COM port number of the device that you are testing. To find out the COM port number, refer to the following FAQ: https://www.startech.com/faq/com-port-listing-windows . Note: To open a telnet session on the COM port, you need a telnet client like PuTTY or Hyper Terminal. Windows XP comes with Hyper Terminal. When the session is open, anything you type into it you should see. The loopback test fails when you cannot see what you are typing. If the loopback test fails, make sure that the serial cable or gender changer that you are using works and that the adapter is in the correct port. You can check multiple ports at the same time by opening multiple sessions, putting the loopback adapter on one port, and trying to type into each session. When you can see what you are typing, you know that the COM port is working and you can see which port number the physical serial port is. Close the window for the port that you just tested to speed up the testing of the remaining serial ports. For products related to this article, click here .
What is this device’s default static IP address?
This device's default static IP address is 10.1.1.1.
How do I reset my device to the default factory settings?
To reset the NETRS2321P to the default factory settings, complete the following: Turn on the IP Device Server and wait for the Ready light to illuminate. Press and hold the Load Default button for more than 3 seconds but less than 10.
I cannot communicate with my serial over IP device over the network. What do I do?
To troubleshoot this issue, you can try the following: Ping the serial device. Connect the serial device directly to the computer and ping the device. Connect to the web interface (if there is one) or connect using the included software. Before you begin, make sure that the serial device is on the same network and subnet. For more information, see this FAQ: http://www.startech.com/faq/serial_ip_networks_and_subnets . If the device starts with an IP address that is not on your subnet, change your IP address to match the subnet being used before you continue. Ping the serial device If the serial device and your computer are on the same network and subnet, try pinging the device. To ping the device using a computer that is running a version of Windows XP, do the following: Click Start . Click Run . Type ping <IP address> and press Enter . For example, ping 192.168.0.20 . To ping the device using a computer that is running a version of Windows Vista or Windows 7, do the following: Click Start . Click Accessories . Click Command Prompt . Type ping < IP address > and press Enter . For example, ping 192.168.0.20 . To ping the device using a computer that is running a version of Windows 8, do the following: Press the Windows key + X . Click Run . Type cmd and press Enter . Type ping < IP address > and press Enter . For example, ping 192.168.0.20 . To ping the device using a computer that is running a version of Mac OS, do the following: Double-click the hard drive. Double-click Applications > Utilities > Network Utility . Click the Ping tab. Enter the IP address in the Please enter the network address to ping field. Enter the number of packets that you want to test with. If you receive replies from the IP address, then you can see the device on the network and the issue is with something else. Connect the serial device directly to the computer To connect the serial device directly to the computer that you are troubleshooting with, complete the following: Use a crossover Ethernet cable to connect the device and the computer. Try pinging the device again. If you cannot ping the device, use a different computer, Ethernet cable, and serial device (if one is available). Note: The second computer will need to be on the same network and subnet as the serial over IP device. If you still cannot ping the device, contact support. Make sure that you are working in a secure environment Unplug the connection between your modem and your router. Disable any firewalls (especially Windows Firewall), antivirus programs, and security programs that are currently running. Try accessing the web interface (if the device has one) or try to connect using the included software. If you still cannot connect to the device's web interface or by using the included software, contact support. If you can access the web interface or connect using the included software, one at a time turn on your firewalls, antivirus programs, and security programs. Each time that you turn on software and cannot connect to the web interface or by using the included software, add an exception for the serial device to what you last re-enabled.
What are the common uses for a network serial device?
A network serial device can be used to connect serial devices to a TCP/IP network, extend serial communications over a network, or convert network traffic into serial data. Common applications include virtual COM port mapping, serial-over-IP communication, and UDP-to-serial data conversion. Explanation: Network serial devices enable serial equipment to communicate over Ethernet networks, allowing serial devices to be accessed remotely or integrated into modern network environments. Virtual COM Port One of the most common uses for a network serial device is creating a virtual COM port. In this configuration: A serial device is connected to the network serial device's serial port. The network serial device is connected to an Ethernet network. Software installed on a computer maps the remote serial connection as a virtual COM port. The virtual COM port appears to the operating system and applications as a standard local serial port, allowing existing software to communicate with the remote serial device without modification. Serial-over-IP Extension A network serial device can also be used to extend a serial connection across a TCP/IP network. In this configuration: One network serial device is configured as a client. A second network serial device is configured as a server. Serial data is transmitted between the devices over the network. To ensure proper operation: Serial communication settings must match on both devices. UART settings must match the connected serial equipment. IP addresses and TCP ports must be configured correctly. This method allows serial devices to communicate over distances that exceed the limitations of traditional serial cabling. UDP-to-Serial Conversion Network serial devices can also convert UDP network traffic into serial communications. In this configuration: The network serial device listens for UDP traffic on specified IP addresses and ports. Received network data is transmitted through the serial port. UART settings are configured to match the requirements of the connected serial device. This application is commonly used to integrate serial equipment with network-based monitoring, control, and automation systems.
What DC barrel connector power plug types do StarTech.com products use, and what are their dimensions?
StarTech.com DC barrel connector plug types are defined in the “Plug Type” field of the technical specifications, using a letter code that specifies the connector’s outer diameter (OD) and inner diameter (ID) in millimeters for power adapter compatibility. Explanation: In StarTech.com technical specifications, the “Plug Type” field is a standardized identifier for the exact DC barrel connector size required to power a product. Each plug type is assigned a letter code that corresponds to a specific combination of outer diameter (OD) and inner diameter (ID), measured in millimeters. Common DC barrel plug type dimensions Plug Type OD ID A 2.35 mm 0.7 mm B 4.0 mm 1.7 mm C 4.75 mm 1.7 mm H 3.4 mm 1.3 mm L 5.0 mm 2.5 mm M 5.5 mm 2.1 mm N 5.5 mm 2.5 mm The DC barrel connector plug type must match both the outer diameter and inner diameter exactly. A mismatch between the StarTech.com product requirement and the power adapter connector can prevent proper fit or stable power delivery, which may result in device startup failure or intermittent operation. The plug type defines only the physical connector size. The plug type does not define electrical power requirements such as voltage, current, or polarity. The power adapter used with a StarTech.com product must match the product’s specified electrical requirements. Using an incompatible power adapter can cause device malfunction or permanent damage. This standardized DC barrel connector plug type system enables IT professionals and procurement teams to verify connector dimensions, ensure power adapter compatibility, standardize hardware deployments, and identify the correct replacement power supply for StarTech.com products.
How do I check to ensure the COM port is listed properly in Windows?
To ensure your serial device is installed properly, complete the following: Open the Device Manager by pressing the Windows Key + R . Type “devmgmt.msc” and press Enter . Expand the Ports (COM & LPT) section. You should see a COM number in brackets to the right of each port, and there should not be any exclamation points or question marks next to the entries in the list.
How to Change COM Port Number on Windows
Some serial devices require a specific COM port number to function. In these cases, consult the manual of your serial device to determine the correct number to use. To change the COM port number of a serial device in Device Manager, complete the following: Open the Device Manager by pressing the Windows Key + R . Type “devmgmt.msc” and press Enter . Expand the Ports (COM & LPT) section. Right-click the COM port and select Properties . Click the Port Settings tab and click Advanced . Change the COM port number to an available COM port number. Note : Multiple serial ports cannot share the same COM port number. Restart your computer. Note : Even if you change the COM port number back to the original number, you still need to restart your computer.
Related products
-
1-Port Serial to Ethernet Adapter, IP Serial Device Server For Remote RS232 Devices, Wall/DIN Rail Mountable, Metal Housing, RJ45 LAN to DB9 Serial Converter, TAA
$171.16 Add to cart -
1 Port Industrial RS-232 / 422 / 485 Serial to IP Ethernet Device Server - 2x 10/100Mbps Ports
$183.99 Add to cart -
2-Port Serial-to-IP Ethernet Device Server - RS232 - Metal and Mountable - TAA
$230.61 Add to cart -
2 Port RS232 Serial over IP Ethernet Device Server
$241.99 Add to cart