
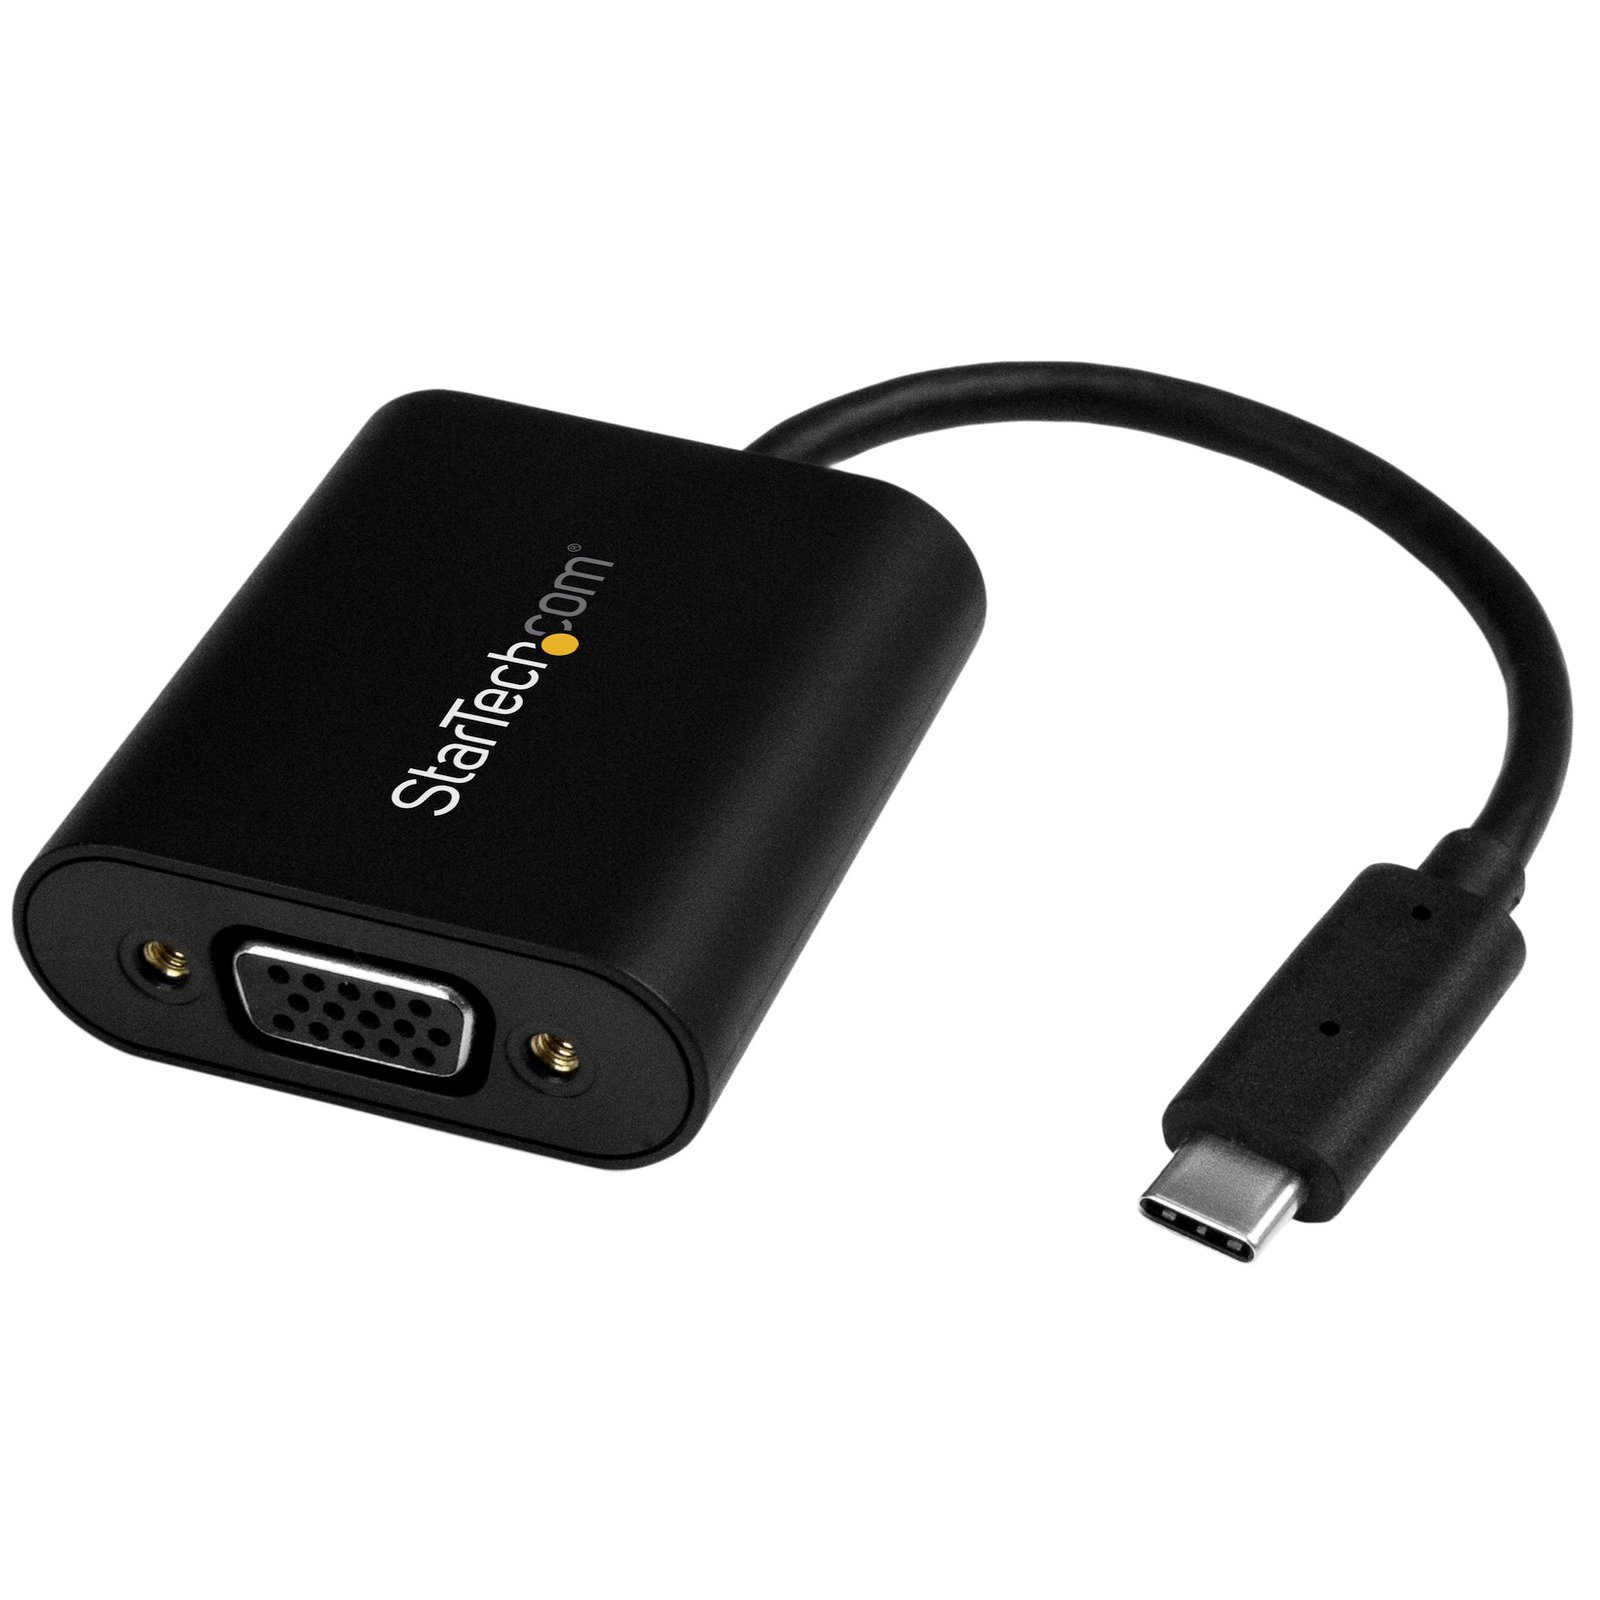
USB-C to VGA Adapter - 1920x1200 - TAA
$40.99
Connect your USB Type-C computer to a VGA display, monitor or projector
Specifications & Compliance
- UPC
- 065030866279
- Brand
- StarTech.com
- Included in Package
- 1 - USB-C to VGA video adapter, 1 - quick-start guide
- Shipping (Package) Weight
- 2.4 oz [68 g]
- Weight of Product
- 1.0 oz [29 g]
- Product Length
- 7.3 in [18.6 cm]
- Product Width
- 1.7 in [43 mm]
- Product Height
- 0.6 in [15 mm]
- Package Depth
- 3.1 in [80 mm]
- Package Width
- 9.2 in [23.3 cm]
- Package Height
- 0.8 in [21 mm]
- Color
- Black
- Cable Length
- 3.7 in [95 mm]
- Warranty
- 3 Years
- Connector 1
- USB-C DP++ (DP Alt-Mode)
- Connector 1 (Quantity)
- 1
- Connector 2
- VGA
- Connector 2 (Quantity)
- 1
- Operating Temperature
- 5°C to 35°C (41°F to 95°F)
- Humidity
- 25% to 85% RH Non-Condensing
- Power Delivery
- No PD Pass-Through
- Number of Ports
- 1
- System and Cable Requirements
- Your USB-C port must support DisplayPort over USB-C (DP Alt mode) in order to work with this adapter.
- Number of Displays
- 1
- AV Input
- USB-C
- AV Output
- VGA
- Wide Screen Supported
- Yes
- Supported Resolutions
- 1024 x 768<br> 1280 x 720<br> 1920 x 1080<br> 1920 x 1200<br> 2048 x 1280
- Audio Specifications
- VGA - No Audio Support
- HDR Support
- No
- Maximum Analog Resolutions
- 2048 x 1280, 1920 x 1200 @ 60hz
Questions & Answers
Does this device require drivers or additional setup?
No. This device is plug and play and does not require drivers or additional software. Simply connect the source device and the destination device to begin using it. Explanation: This device is designed for plug-and-play operation and is automatically recognized by the connected system. To use the device: Connect the source device (such as a computer). Connect the destination device (such as a monitor, projector, or other compatible peripheral). Power on the connected devices, if required. No driver installation, software configuration, or additional setup is necessary. If the device is not detected, verify that: All cables are securely connected. The source and destination devices are compatible with the product. The correct input and output ports are being used.
Everything is hooked up but nothing is working. What should I do? (Windows)
When you troubleshoot issues with a USB video adapter, there are some quick tests that you can complete to rule out potential problems. You can test to make sure that the following components are working correctly and are not the source of the issue: Video cables Video source Video destination USB video adapter To test your setup components, try the following: Use the video cables, video source, video destination, and USB video adapter in another setup to see if the problem is with the components or the setup. Use a different video cable, video source, video destination, and USB video adapter in your setup to see if the problem persists. Ideally, you should test a component that you know works in another setup. When you test your cables, it is recommended that you do the following: Test each cable individually. Use short cables when you are testing. When you test the video cables, video source, video destination, and USB video adapter, it is recommended that you do the following: Check Device Manager under Display adapters , Universal Serial Bus controllers , or USB Display adapters . To do this, press the Windows key + R , type devmgmt.msc , and press Enter to open Device Manager . If you do not see the USB video adapter in Device Manager, refer to the following FAQ: https://www.startech.com/en-us/faq/usb-cannot-detect-windows . If the device is listed with an error, reinstall the drivers following the instructions on the website. Check to see if your video card drivers are current. You can check what video card you have in Device Manager under Display adapters . It is recommended that you go directly to the video card manufacturer's website to check for the latest drivers. Check to see if the monitor is being detected by Windows. To check to see if Windows is detecting the monitor using a computer that is running a version of Windows XP, do the following: Right-click on the desktop and click Properties . Click the Settings tab. If you see Drag the monitor icons to match the physical arrangement of your monitors , it means that Windows is detecting more than a single monitor. You can click the drop-down menu under Display to see which monitors are detected. This option is not available if Windows only detects a single monitor. To check to see if Windows is detecting the monitor using a computer that is running a version of Windows Vista, Windows 7, or Windows 8, do the following: Right-click on the desktop and click Screen Resolution . You can click the drop-down menu under Display to see which monitors are detected.
How to Arrange Windows Monitors to Fix Mouse Issues
In order for your mouse to move properly between your monitors you must rearrange your monitors in Windows to match the physical location of your monitors on your desk. To do so, complete the following based on your operating system: Windows 11 Click on the Windows Icon in the Taskbar (or the Windows key on the keyboard) and search for Display Settings . Click on Multiple Displays. Click Identify to display the numbers on each connected monitor, showing how the operating system has assigned their positions. Click and drag the monitor icons to best match your physical setup. Click Apply to confirm the changes and close the window. Windows 10 and Windows 8 On your keyboard, press the Windows key + X and select Control Panel . Click Appearance and Personalization , then click Display . Click the Resolution or Adjust Resolution option from the left column, which will display your monitors as numbered icons. Click Identify to display the numbers on each connected monitor, showing how the operating system has assigned their positions. Click and drag the monitor icons to best match your physical setup. Click OK to apply the changes and close the window. Windows 7 and Windows Vista Click the Start button and select Control Panel . Click Appearance and Personalization, then click Display . Click the Resolution or Adjust Resolution option from the left column, which will display your monitors as numbered icons. Click Identify to display the numbers on each connected monitor, showing how the operating system has assigned their positions. Click and drag the monitor icons to best match your physical setup. Click OK to apply the changes and close the window. Windows XP Click the Start button and select Control Panel . Double-click Display . Click the Settings tab, which will display your monitors as numbered icons. Click Identify to display the numbers on each connected monitor, showing how the operating system has assigned their positions. Click and drag the monitor icons to best match your physical setup. Click OK to apply the changes and close the window. To mirror the image from your primary monitor instead of extending your desktop, refer to the following FAQ: http://www.startech.com/faq/Windows_Mirroring_Monitors
How do I configure additional displays in Windows?
Windows 11 To configure displays in Windows 11, complete the following: Press the Windows + I (capital letter i) keys together to open Settings Click 'System' > 'Display' Click 'Duplicate these displays' and choose 'Extend these displays' (if needed). Click ‘Identify’ to determine the number assigned to each display. Drag and drop each display accordingly to the physical layout on your desk. Click the Apply button. Windows 10 To configure displays on Windows 10, complete the following: Press the Windows + I (capital letter i) keys together. Click 'System' > 'Display' Under the ‘Multiple displays’ section, select ‘Extend Desktop To This Display.’ Click ‘Identify’ to determine the number assigned to each display. Drag and drop each display accordingly to the physical layout on your desk. Click the Apply button.
How do I arrange extended displays on macOS?
To arrange extended displays on macOS, complete the following. Navigate to the Apple Menu > System Preferences, click Displays , then click Arrangement . Make sure that the ‘ Mirror Displays ’ checkbox is not selected. Click on each display to determine what number each display is assigned to. Drag and drop each display accordingly to the physical layout on your desk.
What is USB-C?
USB-C is a reversible USB connector type that can support data transfer, video output, and power delivery, depending on the capabilities of the connected devices, cables, and host ports. Explanation: USB-C is a physical connector standard used by multiple USB and Thunderbolt technologies. Depending on the supported protocol and hardware, USB-C connections can support: USB data transfer speeds ranging from USB 2.0 up to USB4 performance levels USB 10Gbps, 20Gbps, 40Gbps, and higher data transfer rates, depending on the USB or Thunderbolt specification USB Power Delivery (USB PD) for bidirectional power delivery, including charging support up to 240W with supported devices and cables Alternate Modes, such as DisplayPort Alternate Mode (DP Alt Mode), for video output over USB-C Thunderbolt 3, Thunderbolt 4, and USB4 functionality on compatible systems Not all USB-C ports, cables, or devices support the same features or performance levels. For example, some USB-C connections may only support charging or basic USB data transfer, while others support video output, high-speed data transfer, or Thunderbolt functionality. To use a specific USB-C feature, such as DisplayPort video output, USB 40Gbps data transfer, or USB Power Delivery, the USB host port, cable, and connected device must all support that feature. Refer to the technical specifications provided by the manufacturer to verify compatibility. For more information about Thunderbolt capabilities over USB-C, refer to the following FAQ: https://www.startech.com/faq/thunderbolt-3-port-capabilities
What is the difference between mirroring, spanning, and extending monitors?
Mirroring monitors means that you see the same thing on multiple monitors. Spanning monitors means that your computer interprets all of the monitors that are spanning as one giant monitor. You can see different things on each monitor, and your desktop, taskbar, Start menu, and background are stretched across the monitors. Extending monitors means that your computer interprets the monitors that you are extending as separate devices. You can see different things on each monitor, and your desktop background is displayed on each monitor. In general, video splitters can only be used to mirror monitors. If you want to extend your desktop across monitors, you need to make a separate video connection for each monitor that you are attaching. If you want to attach more monitors than your computer has video ports for, you can read about USB Video Adapters here: www.startech.com/AV/USB-Video-Adapters/ . If you are using a video card with a DisplayPort connection that supports DisplayPort 1.2 you can use MST hubs from StarTech.com to extend your desktop to each monitor.
Related products
-
USB C to DisplayPort Adapter - 8K/4K 60Hz USB-C to DisplayPort 1.4 Adapter Dongle - USB Type-C to DP Monitor Video Converter - Works w/Thunderbolt 3 - w/12" Long Attached Cable
$19.99 Add to cart -

USB C to DisplayPort Adapter - 8K/5K/4K USB Type C to DP 1.4 Alt Mode Video Converter - HBR3/DSC/HDR - 8K 60Hz Thunderbolt 3 Compatible DisplayPort Monitor Display Adapter
$18.99 Add to cart -
USB C to DisplayPort Adapter with Power Delivery - 8K 60Hz /4K 120Hz USB Type C to DP 1.4 Video Converter w/ 60W PD Pass-Through Charging - HBR3 - Thunderbolt 3 Compatible
$27.99 Add to cart -
6.6ft (2m) USB-C to HDMI Adapter Cable, 8K 60Hz, 4K 144Hz, HDR10, USB Type-C to HDMI 2.1 Video Converter Cable, USB-C DP Alt Mode/USB4/Thunderbolt Compatible - USB-C Laptop to HDMI
$51.24 Add to cart