
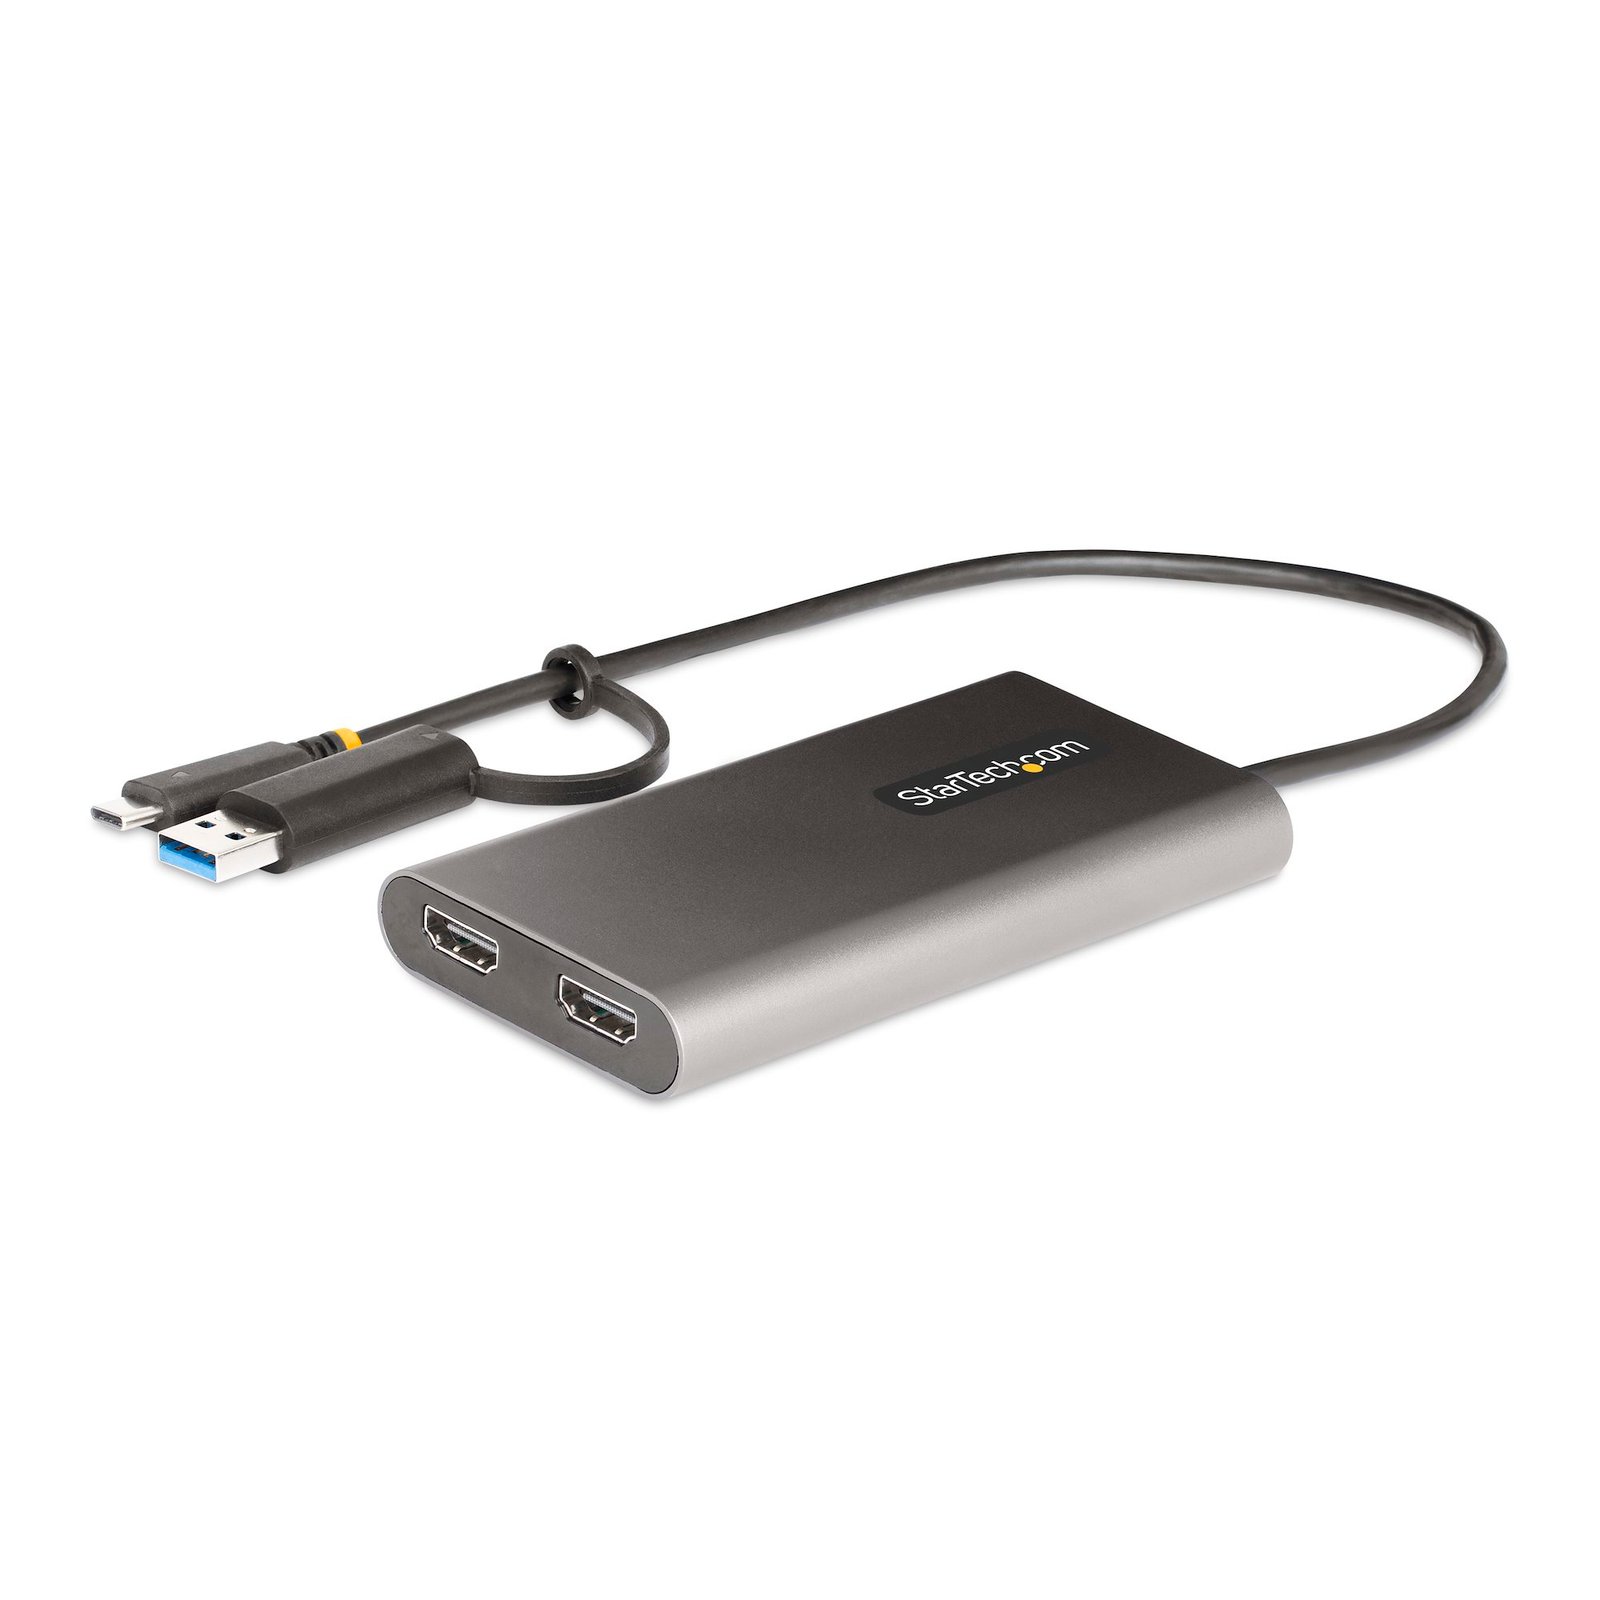


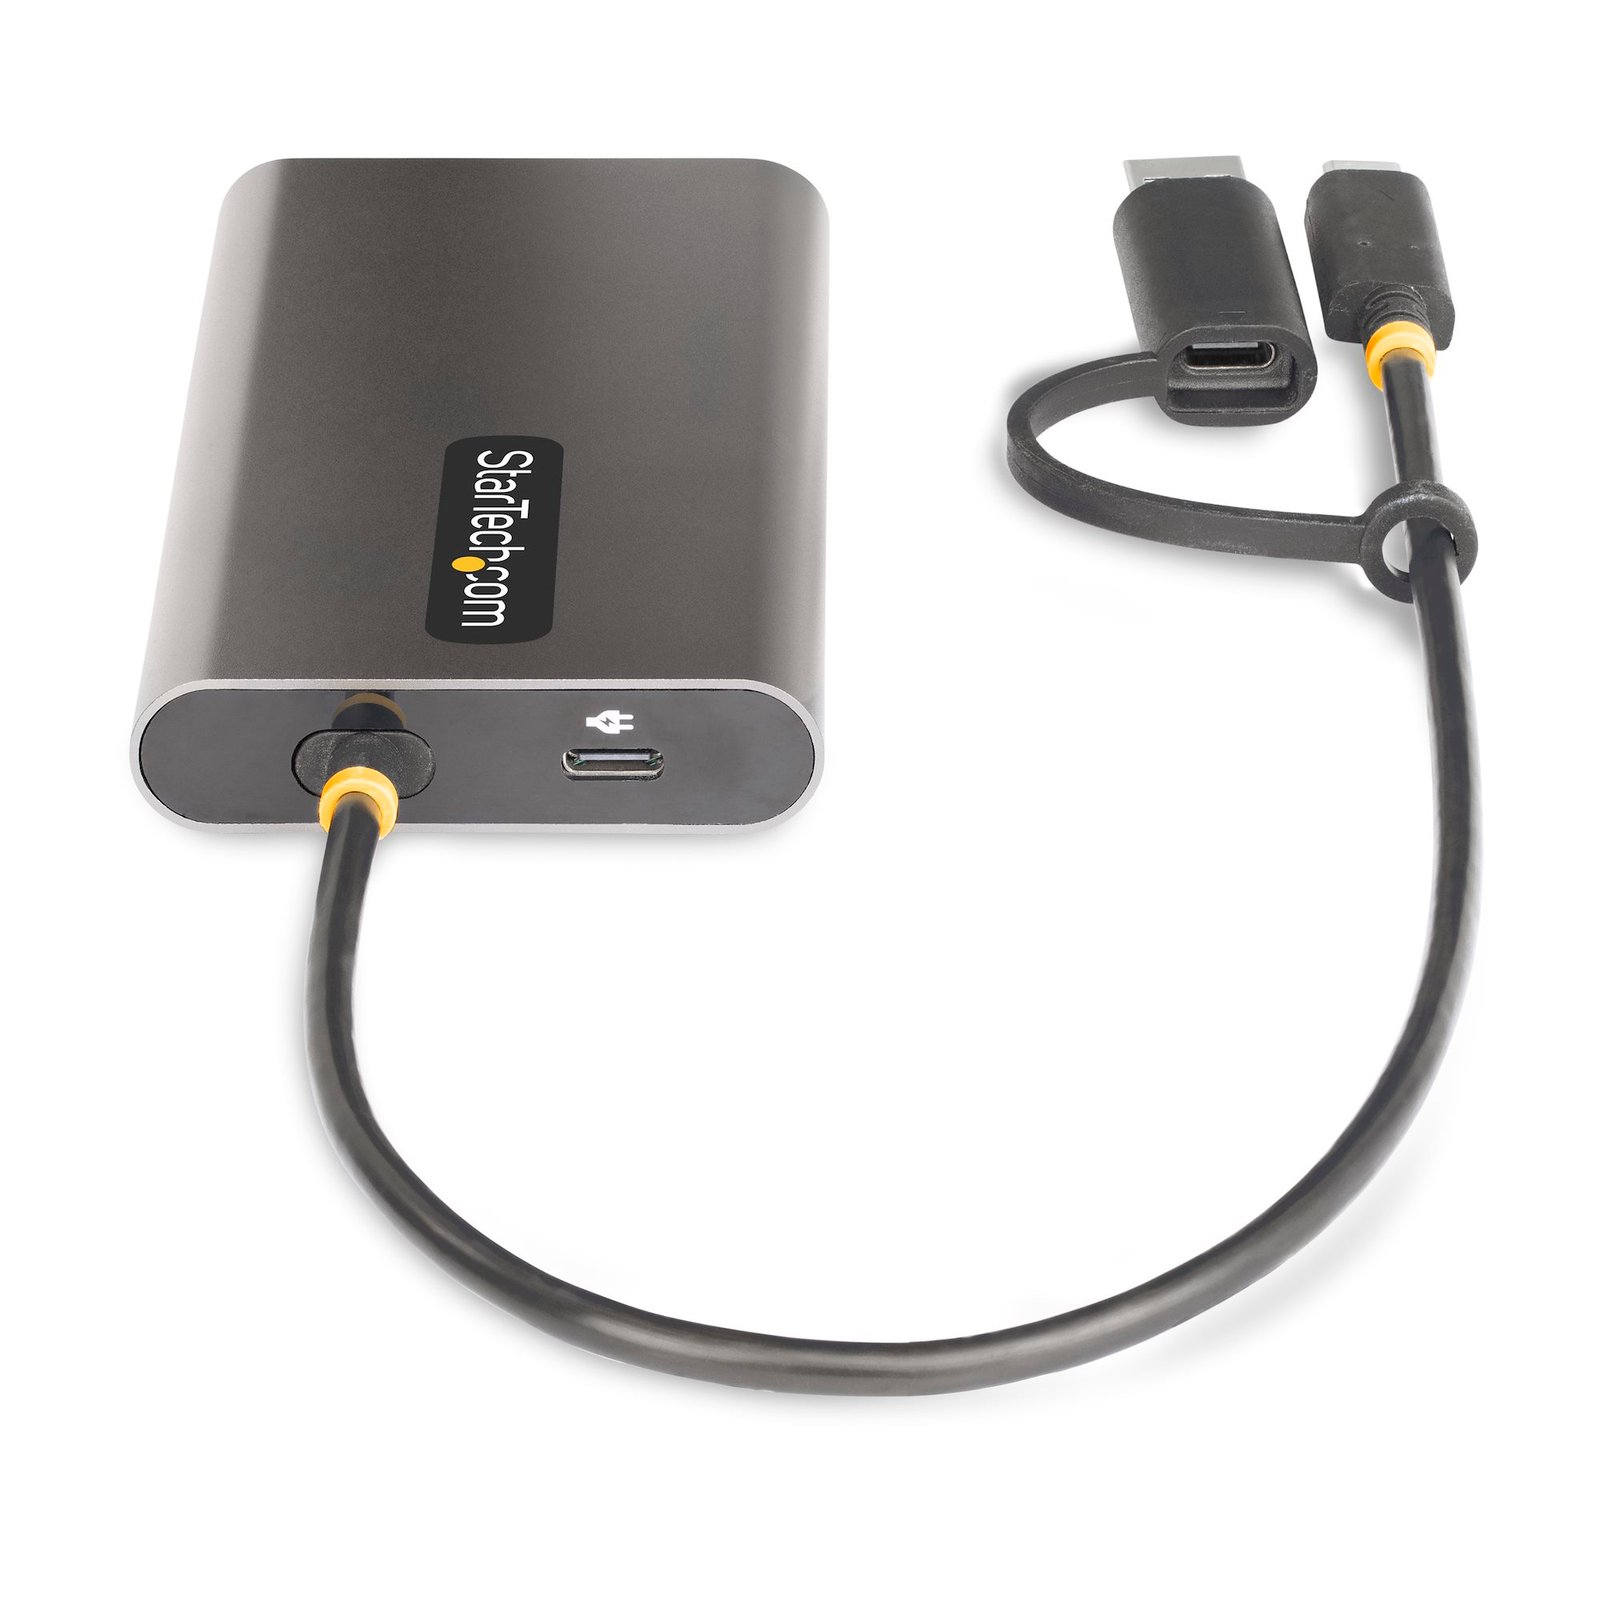


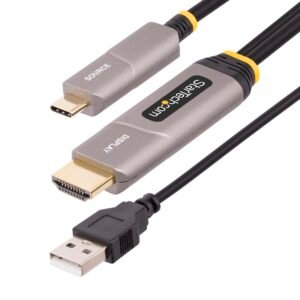
USB-C to Dual-HDMI Adapter - USB-C or A to 2x HDMI - 4K 60Hz - 100W Power Delivery Pass-Through - 1ft (30cm) Built-in Cable - USB to HDMI Multi-Monitor Converter for Laptop - TAA
$125.99
Dual 4K 60Hz HDMI Output | Attached USB-C to USB-A Dongle
Specifications & Compliance
- UPC
- 065030894579
- Brand
- StarTech.com
- Included in Package
- 1 - USB-C/USB-A to HDMI Adapter, 1 - Quick-Start Guide
- Shipping (Package) Weight
- 7.1 oz [200 g]
- Weight of Product
- 4.3 oz [121.0 g]
- Product Length
- 4.4 in [11.3 cm]
- Product Width
- 2.4 in [60.0 mm]
- Product Height
- 0.6 in [15.0 mm]
- Package Depth
- 6.9 in [17.4 cm]
- Package Width
- 5.6 in [14.3 cm]
- Package Height
- 1.2 in [30 mm]
- Color
- Gray
- Cable Length
- 11.8 in [30 cm]
- Warranty
- 3 Years
- Connector 1
- USB-C Dual-Role (5Gbps, 4.5W / 100W PD Input)
- Connector 1 (Quantity)
- 1
- Package Quantity
- 1
- Connector 2
- USB-A (5Gbps, 4.5W)
- Connector 2 (Quantity)
- 1
- Operating Temperature
- 0°C to 40°C (32°F to 104°F)
- Storage Temperature
- -20°C to 70°C (-4°F to 158°F)
- Humidity
- 20 to 80% RH
- Material
- Aluminum and Plastic
- Power Source
- Bus Powered and Host USB-C Power Adapter
- Chipset ID
- DisplayLink - DL6950
- Special Notes
- USB Power Delivery is only available when a USB-C power adapter is connected to the PD pass-through port, USB-C Power Delivery is not available if using the USB-C to USB-A dongle
- Power Delivery
- 100W
- Connector 3
- HDMI
- Connector 3 (Quantity)
- 2
- Power Consumption
- 10W
- Number of Ports
- 2
- Maximum Digital Resolutions
- 3840 x 2160 @ 60Hz
- Audio
- Yes
- Connector 4
- USB-C (100W PD Only)
- Connector 4 (Quantity)
- 1
- Number of Displays
- 2
- AV Input
- USB-C, USB 3.2 Gen 1 (5Gbps)
- AV Output
- HDMI
- Wide Screen Supported
- Yes
- Active or Passive Adapter
- Active
- Supported Resolutions
- 3840×2160, 2560×1440, 1920×1080, 1600×900, 1280×720<br> <i>Lower resolutions may be supported</i>
- Audio Specifications
- HDMI - 5.1 Channel Audio
- HDR Support
- No
- USB Pass-Through
- No
Questions & Answers
How do I install my USB video adapter in Mac OSX 10.8.x - 10.12.x, or 10.14.x?
Note: Do not physically connect the USB video adapter to your computer until instructed to (Step 7). Download the latest drivers from the StarTech.com website ( http://www.startech.com/Support ). You can find the part number and product ID on the product’s packaging. Note : Mac OS X will typically save the files to the Downloads folder that is associated with your user account (for example, hard_drive_name Users your_name Downloads). Double-click the DisplayLink.zip file. Double-click the MAC OS folder. Double-click the appropriate folder for your operating system . Double-click the DisplayLink Installer 75598.dmg file. Follow the prompts to install the new drivers. Restart the computer when prompted. Once Mac OS X has restarted, connect the USB video adapter to your computer. Note: Installation might take several seconds to complete. During the installation your display might flicker; this is normal. Once the installation has completed you will see your Macintosh desktop extended to the additional monitor.
How do I uninstall my USB video adapter in Windows 7, Windows 8, Windows 10, or Windows 11?
To uninstall the USB video adapter, disconnect the adapter from the computer, uninstall the DisplayLink Graphics Software, and restart the computer when prompted. Explanation: Before uninstalling the software, disconnect the USB video adapter from the computer. To remove the DisplayLink software: Open Control Panel . Select Programs and Features or Uninstall a Program . Locate DisplayLink Graphics in the list of installed programs. Right-click DisplayLink Graphics and select Uninstall . Follow the on-screen prompts to complete the removal process. Restart the computer when prompted.
How do I install DisplayLink on macOS 10.15 (Catalina) or later?
To use a DisplayLink-enabled device with macOS 10.15 (Catalina) or later, install the latest DisplayLink Manager application and grant the required macOS permissions for screen recording and accessibility. Explanation: DisplayLink devices require the DisplayLink Manager application to function on macOS 10.15 (Catalina) and later. To install DisplayLink: Download and install the latest DisplayLink Manager application. Connect the StarTech.com device to your Mac and external display. Complete the DisplayLink Manager setup process, including granting all required macOS permissions. Launch the DisplayLink Manager application. Enable the option to automatically launch DisplayLink Manager after login. For proper operation, verify that: DisplayLink Manager is running after installation. The required Screen Recording permissions have been granted in macOS System Settings. DisplayLink Manager is configured to launch automatically when you sign in. If external displays are not detected after installation, review the DisplayLink setup instructions and confirm that all required permissions have been enabled. Apple Silicon (M1, M2, M3, and Later) On Apple Silicon-based Macs, you may be prompted to install Rosetta during the DisplayLink installation process. If prompted, complete the Rosetta installation to ensure compatibility with DisplayLink software components that require it. Additional Resources For the latest installation instructions, troubleshooting information, and software updates, refer to the DisplayLink Manager documentation and support resources here .
There is no video signal shown on the display. How do I fix this?
Our driver may not be installed or is out of date. Install the latest driver from StarTech.com’s website. The primary display adapter for the computer has an outdated or basic driver installed. Update the video driver using the manufacturer’s support site. The product requires an existing video controller (onboard or discrete) from Intel, AMD, or NVIDIA. The video controller must have a WDDM (Windows Display Driver Model), compatible driver. Most video controllers from 2008 or newer will meet this requirement. An incompatible operating system is being used (i.e., MCT based adapter and macOS). If using a Mac, we recommend exchanging the product for a DisplayLink based version. The display connected to the StarTech.com adapter is set to the wrong video input. Use the display’s on-screen display menu to select the correct input. The following only applies to computers running Windows 8.1 or older operating systems. USB video adapters and some USB docking stations use different chipsets (ex. DisplayLink/Synaptics, MCT, Fresco, Silicon Motion). They will not work together on the same computer. If you are running into problems trying to use multiple USB video products, please check our Tech Specs to determine which chipset each product uses. If they do not match, then they will not work together.
I’m not able to install the driver. How do I fix this?
Your user account may require administrator privileges to install the driver. If the computer is managed by the IT department or service provider, they may need to be contacted to help with this step.
Audio is not working. How do I fix this?
Ensure the Sound Playback device in Windows (or Output device in macOS) has been set to be our USB audio device.
Some graphics are not rendered correctly on the USB connected display when using Microsoft Office applications or web browsers. How do I fix this?
If hardware acceleration is enabled on any of your software applications, it can result in poor resource management and limit the performance of your video device. If you experience this problem, you should disable hardware acceleration in the program(s) that were impacted. To disable hardware acceleration in common applications and operating systems, complete one of the following series of steps, depending on what software application(s) or operating system that you are running. Chromium-Based Microsoft Edge: Click the Options icon (it has three dots on it). Click Settings . Click System . Uncheck Use hardware acceleration when available . Internet Explorer 9 and later Note: Earlier versions of Internet Explorer do not use hardware acceleration. Click the Start button. Open Control Panel . Click Network and Internet . Click Internet Options . Click the Advanced tab. Browse to the Accelerated graphics screen. Select the Use software rendering instead of GPU rendering check box. Click Apply . Restart your computer. Mozilla Firefox Open Firefox. Press the Alt key. Click Tools and Options . Click the Advanced icon. Click the General tab. Under Browsing , clear the Use hardware acceleration when available check box. Click the OK button. Restart your web browser. Google Chrome Open Google Chrome. Click the Options icon (it has three horizontal lines on it). Click Settings . Click Show advanced settings . Scroll to the bottom of the screen and clear the Use hardware acceleration when available check box. Restart your web browser. Microsoft Office 2013 / 2010 Open any program in Microsoft Office (for example, Microsoft Word). Click the File tab. In the menu on the left side of the screen, click Options . Click Advanced . Under Display , select the Disable hardware graphics acceleration check box. Close and restart all of the Microsoft Office programs that you had open. Windows 10 / 8 Press the Windows key + X . Click Control Panel . Click Personalization . Select a high-contrast theme. Windows 7 / Vista Click the Start button. Click Control Panel . Click Personalization . Select a non-Aero theme. Ideally, you should select a basic and high-contrast theme. Windows XP Click the Start button. Open the Control Panel . Select Display . Click the Settings tab. Click Advanced . Click the Troubleshooting tab. Move the Hardware Acceleration slider to None . Restart your computer.
Why does one of my connected displays turn off when my USB video adapter is connected?
While the purpose of our USB Video Adapters are to add an additional video output to your laptop or desktop computer, these adapters still require some resources from your internal video card. On a small number of video cards, adding a USB Video Adapter can exceed the limit of available resources, causing one of the connected displays to turn off. As a possible workaround for this issue, we recommend using a more powerful USB Video Adapter that has a higher amount of integrated RAM, such as our USB32VGAPRO (512MB), USB32DVIPRO (512MB), or USB32HDDVII (1GB).
Will my touchscreen / all-in-one computer work with a USB Video Adapter?
Touchscreen Monitors A mixture of touchscreen and non-touchscreen displays can cause a conflict with your internal video card. Because of this limitation, touchscreen functions may be disabled when the USB Video Adapter is connected, or the USB Video Adapter may not work at all. Contact the manufacturer of your system to confirm whether your specific model can support a secondary display or not. All-in-One Computers Many all-in-one computer systems limit the number of possible monitors to one. This is a limitation in how all-in-one computers are typically manufactured, so adding an external display may not be possible regardless of which USB video adapter is used. Contact the manufacturer of your system to confirm whether your specific model can support a secondary display or not.
Why am I experiencing issues with remote desktop software and USB video adapters?
When you use remote desktop software to access a computer with a USB video adapter, keep the following things in mind: Not all remote desktop software supports multiple monitors. Not all remote desktop software supports monitors that use USB video adapters. If the primary monitor is a monitor that uses a USB video adapter, you might run into problems. If you do, try to continue to log in as the display might come back once you log in.
How to Arrange Windows Monitors to Fix Mouse Issues
In order for your mouse to move properly between your monitors you must rearrange your monitors in Windows to match the physical location of your monitors on your desk. To do so, complete the following based on your operating system: Windows 11 Click on the Windows Icon in the Taskbar (or the Windows key on the keyboard) and search for Display Settings . Click on Multiple Displays. Click Identify to display the numbers on each connected monitor, showing how the operating system has assigned their positions. Click and drag the monitor icons to best match your physical setup. Click Apply to confirm the changes and close the window. Windows 10 and Windows 8 On your keyboard, press the Windows key + X and select Control Panel . Click Appearance and Personalization , then click Display . Click the Resolution or Adjust Resolution option from the left column, which will display your monitors as numbered icons. Click Identify to display the numbers on each connected monitor, showing how the operating system has assigned their positions. Click and drag the monitor icons to best match your physical setup. Click OK to apply the changes and close the window. Windows 7 and Windows Vista Click the Start button and select Control Panel . Click Appearance and Personalization, then click Display . Click the Resolution or Adjust Resolution option from the left column, which will display your monitors as numbered icons. Click Identify to display the numbers on each connected monitor, showing how the operating system has assigned their positions. Click and drag the monitor icons to best match your physical setup. Click OK to apply the changes and close the window. Windows XP Click the Start button and select Control Panel . Double-click Display . Click the Settings tab, which will display your monitors as numbered icons. Click Identify to display the numbers on each connected monitor, showing how the operating system has assigned their positions. Click and drag the monitor icons to best match your physical setup. Click OK to apply the changes and close the window. To mirror the image from your primary monitor instead of extending your desktop, refer to the following FAQ: http://www.startech.com/faq/Windows_Mirroring_Monitors
How do I configure additional displays in Windows?
Windows 11 To configure displays in Windows 11, complete the following: Press the Windows + I (capital letter i) keys together to open Settings Click 'System' > 'Display' Click 'Duplicate these displays' and choose 'Extend these displays' (if needed). Click ‘Identify’ to determine the number assigned to each display. Drag and drop each display accordingly to the physical layout on your desk. Click the Apply button. Windows 10 To configure displays on Windows 10, complete the following: Press the Windows + I (capital letter i) keys together. Click 'System' > 'Display' Under the ‘Multiple displays’ section, select ‘Extend Desktop To This Display.’ Click ‘Identify’ to determine the number assigned to each display. Drag and drop each display accordingly to the physical layout on your desk. Click the Apply button.
How do I arrange extended displays on macOS?
To arrange extended displays on macOS, complete the following. Navigate to the Apple Menu > System Preferences, click Displays , then click Arrangement . Make sure that the ‘ Mirror Displays ’ checkbox is not selected. Click on each display to determine what number each display is assigned to. Drag and drop each display accordingly to the physical layout on your desk.
How to Mirror Displays on Windows
Windows 10 / 8 On your keyboard, press the Windows Key + X and select Control Panel . Click Appearance and Personalization , then click Display . Click the Resolution or Adjust Resolution option from the left column. Expand the drop-down menu next to “Multiple displays” and select Duplicate these Displays . Click OK to apply the changes and close the window. Windows 7 / Vista Click the Start button and select Control Panel . Click Appearance and Personalization, then click Display . Click the Resolution or Adjust Resolution option from the left column. Expand the drop-down menu next to “Multiple displays” and select Duplicate these Displays . Click OK to apply the changes and close the window. Windows XP Click the Start button and select Control Panel . Double-click Display . Click the Settings tab. Un-check the box beside Extend my Windows desktop onto this monitor . Click OK to apply the changes and close the window.
Can I use a USB video adapter if my computer does not have a functioning graphics card or integrated graphics?
No. A USB video adapter requires a functioning graphics card (GPU) or integrated graphics controller. A USB video adapter cannot replace or function as the computer’s primary graphics processor. Explanation: USB video adapters, including USB-to-HDMI and USB-to-DisplayPort adapters, expand a computer’s existing display connectivity. They rely on the computer’s graphics hardware and drivers to output video and do not contain a dedicated graphics processor that replaces a GPU. To use a USB video adapter: The computer must have a functioning dedicated GPU or integrated graphics controller. The system must boot using the existing graphics hardware so the primary display is recognized before the USB video adapter can output video. The USB video adapter can use technologies such as DisplayLink to extend or duplicate the computer’s display. The latest drivers for the existing graphics controller must be installed for proper operation. If the computer has no graphics hardware, or the graphics hardware is not recognized, the USB video adapter will not output video. A USB video adapter is designed to add display connectivity to a computer with existing graphics capabilities. It does not replace or emulate a graphics card.
The top and bottom portion of the video signal is cut off on the HDMI Display. How do I fix this?
Using the On-Screen Display menu for the display, enter the Menu system and go into “Picture Mode” then “Aspect ratio” and change from “16:9” to “Just scan” or “1:1 pixel mapping.” The wording may vary depending on the manufacturer of the display.
What is the difference between mirroring, spanning, and extending monitors?
Mirroring monitors means that you see the same thing on multiple monitors. Spanning monitors means that your computer interprets all of the monitors that are spanning as one giant monitor. You can see different things on each monitor, and your desktop, taskbar, Start menu, and background are stretched across the monitors. Extending monitors means that your computer interprets the monitors that you are extending as separate devices. You can see different things on each monitor, and your desktop background is displayed on each monitor. In general, video splitters can only be used to mirror monitors. If you want to extend your desktop across monitors, you need to make a separate video connection for each monitor that you are attaching. If you want to attach more monitors than your computer has video ports for, you can read about USB Video Adapters here: www.startech.com/AV/USB-Video-Adapters/ . If you are using a video card with a DisplayPort connection that supports DisplayPort 1.2 you can use MST hubs from StarTech.com to extend your desktop to each monitor.
Related products
-
USB C to DisplayPort Adapter - 4K 60Hz/8K 30Hz - USB Type-C to DP 1.4 HBR2 Adapter Dongle - Compact USB-C (DP Alt Mode) Monitor Video Converter - Thunderbolt 3 Compatible
$44.99 Add to cart -
6.6ft (2m) USB-C to HDMI Adapter Cable, 8K 60Hz, 4K 144Hz, HDR10, USB Type-C to HDMI 2.1 Video Converter Cable, USB-C DP Alt Mode/USB4/Thunderbolt Compatible - USB-C Laptop to HDMI
$61.99 Add to cart -
50ft (15m) USB-C to HDMI 2.0 Active Optical Cable (AOC), 4K 60Hz, CL3 Rated, Unidirectional USB Type-C to HDMI Adapter Cable
$177.99 Add to cart -

3.3ft (1m) USB C to DisplayPort 1.2 Cable 4K 60Hz - Bidirectional DP to USB-C or USB-C to DP Reversible Video Adapter Cable - HBR2/HDR - USB Type C/Thunderbolt Monitor Cable
$35.99 Add to cart