
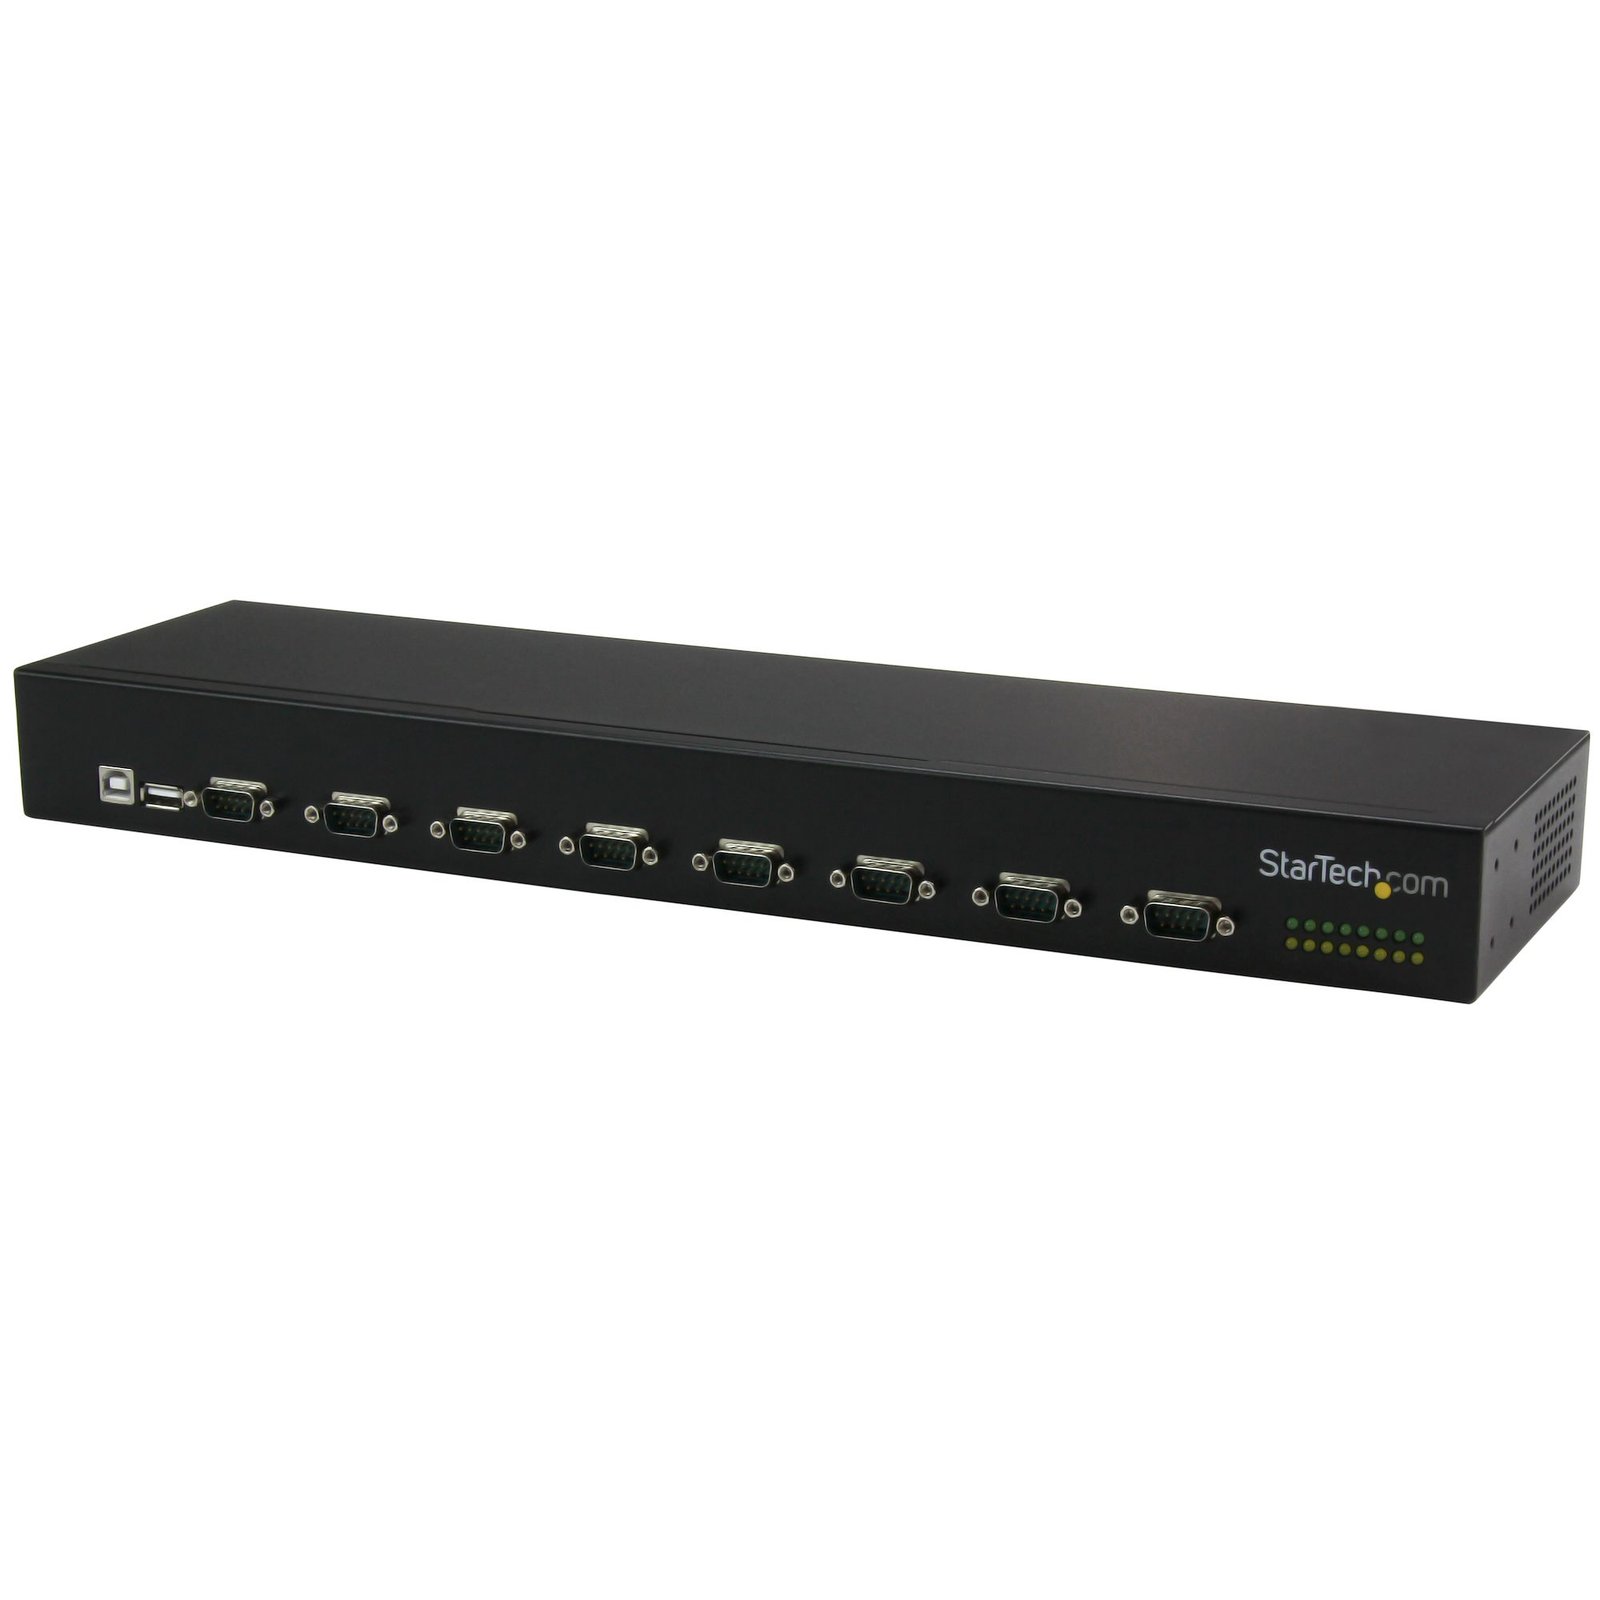
8-Port USB-to-Serial Adapter Hub - TAA
$311.59
Convert a single USB port into eight serial ports, and connect multiple hubs together for a scalable solution
Specifications & Compliance
- UPC
- 065030866705
- Brand
- StarTech.com
- Included in Package
- 1 - 8-port USB to RS232 hub, 1 - 18 in. [46 mm] USB 2.0 cable, 2 - rack-mounting brackets, 8 - rack-mounting screws, 2 - DIN-rail mounting brackets, 4 - DIN-rail mounting screws, 4 - washers, 4 - nuts, 1 - universal power adapter (NA/JP, UK, EU, ANZ), 1 - driver CD, 1 - terminal block plug, 1 - quick-start guide
- Shipping (Package) Weight
- 4.6 lb [2.1 kg]
- Weight of Product
- 3.0 lb [1.4 kg]
- Product Length
- 16.9 in [43 cm]
- Product Width
- 4.7 in [12 cm]
- Product Height
- 1.8 in [45 mm]
- Package Depth
- 8.6 in [21.8 cm]
- Package Width
- 17.9 in [45.4 cm]
- Package Height
- 2.5 in [64 mm]
- Color
- Black
- Cable Length
- 35.4 in [90 cm]
- Warranty
- 2 Years
- Connector 1
- USB-B (480Mbps, 2.5W)
- Connector 1 (Quantity)
- 1
- Package Quantity
- 1
- Connector 2
- DB-9 Serial
- Connector 2 (Quantity)
- 8
- Operating Temperature
- -40°C to 85°C (-40°F to 185°F)
- Storage Temperature
- -65°C to 150°C (-85°F to 302°F)
- Humidity
- 20~80% RH (Non-condensing)
- Material
- Aluminum
- Maximum Data Transfer Rate
- 480 Mbps
- Chipset ID
- FTDI - FT4232
- Input Voltage
- 100 - 240 AC
- Output Voltage
- 12V DC
- Power Consumption
- 36
- MTBF
- 67,114 hours
- LED Indicators
- 8 - Data Transmit, 8 - Data Receive
- Number of Ports
- 8
- Interface
- Serial
- Bus Type
- USB 2.0
- Input Current
- 1.5 A
- Output Current
- 3
- Plug Type
- B
- Center Tip Polarity
- Positive
- Port Style
- External Hub
- Serial Protocol
- RS-232
- Max Baud Rate
- 921.6 Kbps
- FIFO
- 256 Bytes
- Data Bits
- 7, 8
- Parity
- Odd, Even, Mark, Space, None
- Stop Bits
- 1, 2
Questions & Answers
How do I install my serial card in Windows 7, Windows 8, Windows 10, or Windows 11? (.exe method)
To install your serial card in Windows, download the latest driver package from StarTech.com, extract the files, run CDM21214_Setup.exe as an administrator, and restart the computer if prompted. Explanation: Before installing the serial card, ensure that Windows is fully updated with the latest security updates and feature updates available for your operating system. To install the driver: Download the latest driver package from the StarTech.com Drivers & Downloads page. Extract the contents of the downloaded ZIP file. Open the extracted folder. Right-click CDM21214_Setup.exe and select Run as administrator . Follow the on-screen instructions to install the driver. Restart the computer if prompted. After Windows restarts, the operating system will complete the driver installation and the serial card will be ready to use. Note: If Run as administrator is not available, ensure that you are launching CDM21214_Setup.exe from the extracted folder rather than directly from within the ZIP file.
Serial communication is not working. Is the problem caused by the adapter or my serial software application?
Older applications that use serial communication often use legacy hardware addresses that do not work with PCI, PCIe, or USB to Serial products. We recommend contacting the software provider/support team to check if this is the case.
Everything is hooked up but nothing is working. What should I do?
When you troubleshoot issues with a serial device, there are some quick tests that you can complete to rule out potential problems. You can test to make sure that the following components are working correctly and are not the source of the issue: Serial cables Serial ports Serial devices To test your setup components, try the following: Use the serial cable, serial port, and serial device in another setup to see if the problem is with the components or the setup. Use a different serial cable, serial port, and serial device in your setup to see if the problem persists. Ideally, you should test a component that you know works in another setup. When you test your cables, it is recommended that you do the following: Test each cable individually. Use short cables when you are testing. When you test the serial ports and serial device, it is recommended that you do the following: Press the Windows key + R , type devmgmt.msc , and press Enter to open Device Manager . Check to see if your device is listed under Ports (COM & LPT) . Make sure that the COM port number is the correct number for the serial device and that the software being used to connect the computer to the serial device uses the correct COM port number. If the device is listed with an error, follow the instructions on the website to reinstall the drivers. Note: Some serial devices work only if the COM port number is between a certain range. For example, COM1 to COM4. Perform a serial loopback test. See this FAQ on how to perform a RS-232 serial loopback test: http://www.startech.com/faq/serial_loopback_test_rs232_windows
How can I make sure my serial port is working in Windows?
To check whether or not an RS-232 serial port is working, perform an RS-232 loopback test by doing the following: If your serial port is not female, convert it by taking a female/female cable or gender changer and plugging it into the serial port. Take a metal paperclip or wire and cross pins 2 and 3. If you look closely at the female end, the pins should be numbered. Open a telnet session on the COM port number of the device that you are testing. To find out the COM port number, refer to the following FAQ: https://www.startech.com/faq/com-port-listing-windows . Note: To open a telnet session on the COM port, you need a telnet client like PuTTY or Hyper Terminal. Windows XP comes with Hyper Terminal. When the session is open, anything you type into it you should see. The loopback test fails when you cannot see what you are typing. If the loopback test fails, make sure that the serial cable or gender changer that you are using works and that the adapter is in the correct port. You can check multiple ports at the same time by opening multiple sessions, putting the loopback adapter on one port, and trying to type into each session. When you can see what you are typing, you know that the COM port is working and you can see which port number the physical serial port is. Close the window for the port that you just tested to speed up the testing of the remaining serial ports. For products related to this article, click here .
Why does my USB device stop working after my computer wakes back up from sleep mode in Windows?
If the USB device does not work after your computer has been in extended hibernation, it is likely that Windows has automatically turned off the USB Root hub to save power. The steps below outline how to configure the USB root hub to stay on during hibernation, to prevent this from happening. Windows 10 / 8 On your keyboard, press the Windows key + X and select Control Panel . Click Hardware and Sound , then click Power Options . Click Change plan settings for the plan you want to change. Click Change advanced power settings . Click the plus sign (+) next to “USB settings” and “USB selective suspend setting” to expand the options and change the setting to Disabled . Click OK to apply the setting. Note : You may need to disconnect and re-connect your USB device after applying these settings to re-establish the connection. Windows 7 / Vista Click the Start button and select Control Panel . Click Hardware and Sound , then click Power Options . Click Change plan settings for the plan you want to change. Click Change advanced power settings . Click the plus sign (+) next to “USB settings” and “USB selective suspend setting” to expand the options and change the setting to Disabled . Click OK to apply the setting. Note : You may need to disconnect and re-connect your USB device after applying these settings to re-establish the connection. Windows XP On your desktop, right-click the My Computer icon and select Properties . Click the Device Manager tab. Expand Universal Serial Bus controllers by clicking the arrow to the left of it. Right-click the first USB Root Hub device and select Properties . Click the Power Management tab. Clear the box next to Allow the computer to turn off this device to save power . Click OK to apply the setting. Repeat steps 4-7 for any remaining devices in the Universal Serial Bus Controllers section with “ Root Hub ” in the name. Note : You may need to disconnect and re-connect your USB device after applying these settings to re-establish the connection.
How do I confirm that Windows detects my USB device?
To confirm that Windows detects your USB device, complete the following: Press the Windows key+ R , type devmgmt.msc , and press Enter . In Device Manager , under the appropriate heading, confirm that your expansion card is listed and that there isn't an exclamation mark next to it. For example, a USB controller card would be under Universal Serial Bus controllers . Your USB device is listed according to the name of the chipset. To determine the name of the chipset of your USB device, navigate to www.StarTech.com and look on the Technical Specifications tab for your product.
How can I check if my USB device is properly detected by Mac OS?
To confirm that the Mac OS detects your USB device, complete the following: Click the Apple icon. Click About This Mac . Click More Info or System Report . Under the appropriate heading, confirm that your USB device is listed and that there isn't an error. For example, a network card would be under Ethernet Cards . You may need to refresh the System Information page after you plug in your device. To do so, press Command + R with the System Information page open. Your USB device is listed according to the name of the chipset. To determine the name of the chipset of your USB device, navigate to www.StarTech.com and look on the Technical Specifications tab for your product.
The COM numbers in Device Manager change after I reboot or re-connect the product. How do I fix this?
Use a USB to Serial product that features COM Port Retention. These products will store settings that are unique to the connected device in non-volatile memory, allowing you to retain the desired settings regardless of the USB Port to which the adapter is connected.
What DC barrel connector power plug types do StarTech.com products use, and what are their dimensions?
StarTech.com DC barrel connector plug types are defined in the “Plug Type” field of the technical specifications, using a letter code that specifies the connector’s outer diameter (OD) and inner diameter (ID) in millimeters for power adapter compatibility. Explanation: In StarTech.com technical specifications, the “Plug Type” field is a standardized identifier for the exact DC barrel connector size required to power a product. Each plug type is assigned a letter code that corresponds to a specific combination of outer diameter (OD) and inner diameter (ID), measured in millimeters. Common DC barrel plug type dimensions Plug Type OD ID A 2.35 mm 0.7 mm B 4.0 mm 1.7 mm C 4.75 mm 1.7 mm H 3.4 mm 1.3 mm L 5.0 mm 2.5 mm M 5.5 mm 2.1 mm N 5.5 mm 2.5 mm The DC barrel connector plug type must match both the outer diameter and inner diameter exactly. A mismatch between the StarTech.com product requirement and the power adapter connector can prevent proper fit or stable power delivery, which may result in device startup failure or intermittent operation. The plug type defines only the physical connector size. The plug type does not define electrical power requirements such as voltage, current, or polarity. The power adapter used with a StarTech.com product must match the product’s specified electrical requirements. Using an incompatible power adapter can cause device malfunction or permanent damage. This standardized DC barrel connector plug type system enables IT professionals and procurement teams to verify connector dimensions, ensure power adapter compatibility, standardize hardware deployments, and identify the correct replacement power supply for StarTech.com products.
How do I check to ensure the COM port is listed properly in Windows?
To ensure your serial device is installed properly, complete the following: Open the Device Manager by pressing the Windows Key + R . Type “devmgmt.msc” and press Enter . Expand the Ports (COM & LPT) section. You should see a COM number in brackets to the right of each port, and there should not be any exclamation points or question marks next to the entries in the list.
How to Change COM Port Number on Windows
Some serial devices require a specific COM port number to function. In these cases, consult the manual of your serial device to determine the correct number to use. To change the COM port number of a serial device in Device Manager, complete the following: Open the Device Manager by pressing the Windows Key + R . Type “devmgmt.msc” and press Enter . Expand the Ports (COM & LPT) section. Right-click the COM port and select Properties . Click the Port Settings tab and click Advanced . Change the COM port number to an available COM port number. Note : Multiple serial ports cannot share the same COM port number. Restart your computer. Note : Even if you change the COM port number back to the original number, you still need to restart your computer.
Related products
-

3.3ft (1m) USB to Null Modem Serial Adapter Cable, Interchangeable DB9 Screws/Nuts, COM Retention, USB-A to RS232, FTDI, Level-4 ESD Protection, Windows/macOS/ChromeOS/Linux - Rugged TPE Construction
$39.96 Add to cart -

3.3ft (1m) USB to Serial Adapter Cable, COM Retention, Interchangeable Screws/Nuts, USB-A to DB9 RS232, FTDI IC, ESD Protection, Windows/macOS/Linux
$45.09 Add to cart -

10 Pack 2 Port PCI Serial Adapter Cards
$99.99 Add to cart -

3ft (1m) USB to Serial Cable with COM Port Retention, DB9 Male RS232 to USB Converter, USB to Serial Adapter for PLC/Printer/Scanner, Prolific Chipset, Windows/Mac - TAA
$39.96 Add to cart